Checkbox
An example use-case for Checkboxes is an account creation form in a bank. In such a form, there can be several groups of checkboxes, such as the user may be asked to select
‘Communication Options’:
With ‘Phone’, ‘Email’ and ‘SMS’ as three checkboxes
‘List of attached Documents’:
With ‘Phone bill’, ‘Electricity bill’ and ‘Aadhaar’ as three checkboxes
Create a checkbox
To create a checkbox:
Click on the Checkbox button in the top-most row of the Editing Tools
For creating Checkboxes for the first time in the template,
Select New Group
Enter Group name
Enter your checkbox in ‘Value’ input box
Click Ok
To add another Checkbox
In an existing group
Follow steps of 2 but select the desired group from the drop-down you want the new ‘Checkbox’ to appear under
In a new group
Follow steps of 2 but select ‘New Group’ (Step 2.a.) and assign the new group name (Step 2.b.)

More Options
Keep selected by fault: Checking this option makes the concerned value as the default selected option for its group while filling in the template. Note - The sender/signer (if allowed) can still de-select it manually.
After you are done creating checkboxes, you can preview them by clicking the ‘Preview’ button in the bottom-left corner
.
Edit a Checkbox
To change the name (‘Value’) or the group of an already created checkbox:
Right-click on the Checkbox button you have created in the Display area OR place your cursor next to the Checkbox to change in the Display Area and click on the ‘Checkbox’ button in the top-row of the Editing Tools
After the Checkbox pop-up window opens
To change group: Select new group you want to move your ‘value’ to
To change name: Enter the new name
Click Ok
Important things to note
Each Checkbox creation process only creates one checkbox item at a time.
For example, you cannot enter ‘Bell peppers; cheese; onion’ and create three checkboxes. This will create just one checkbox called ‘Bell peppers; cheese; onion’. To create three separate checkboxes, follow the steps outlined in ‘Create a Checkbox’ above three times.
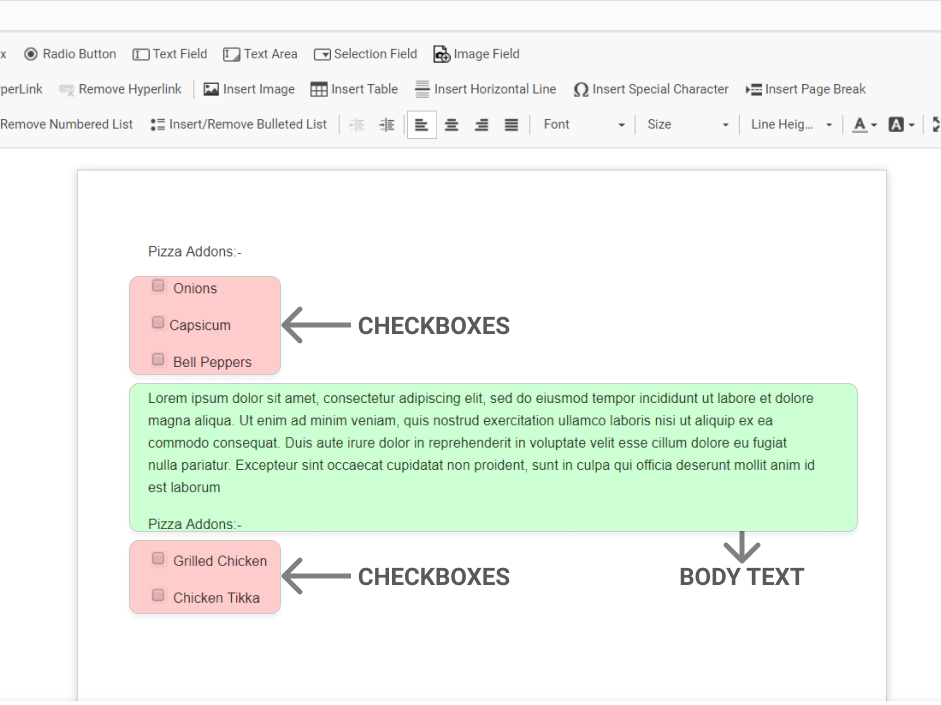
The checkbox process only creates the 🙿 box in the display area. For example, if you create a checkbox of toppings with ‘Bell peppers’, the display area will only show 🙿 box. You will manually have to go write ‘Bell peppers’ against the 🙿 box.
In case ‘New group’ is selected from the drop-down and an existing group name is entered the system will give the following error, “Group name already in use”.
Best practices with checkboxes
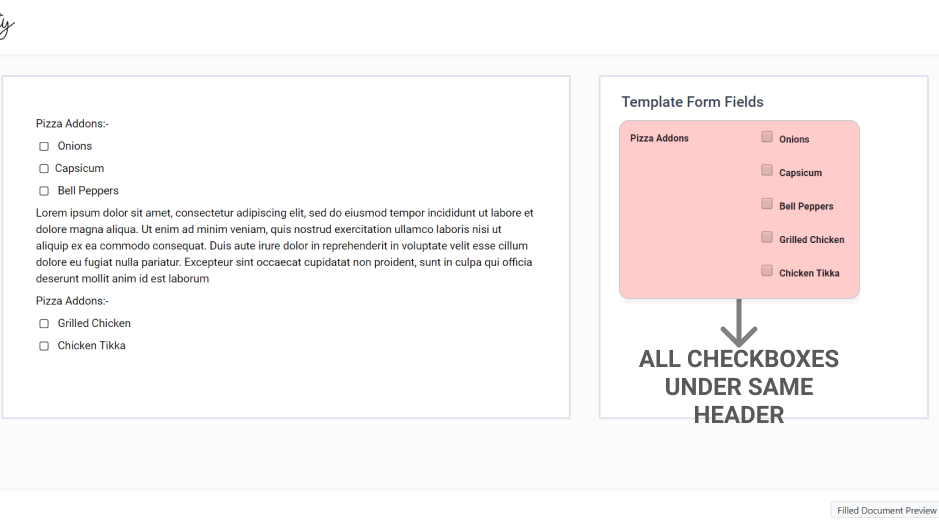
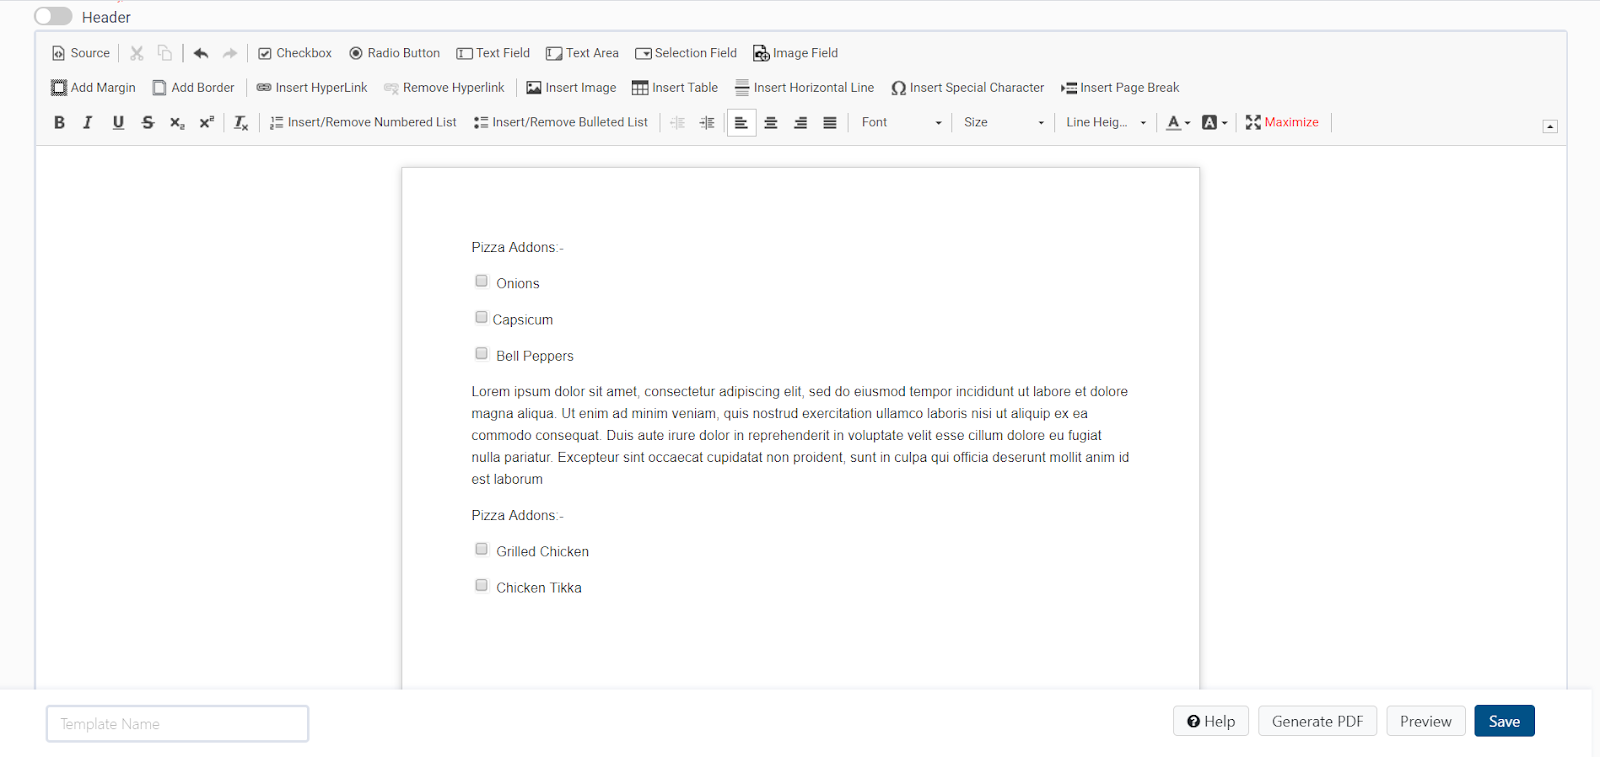
Give separate groups to checkboxes located in different areas of the document. For example, in the below screenshot, the checkboxes have been separated by some body text.
But, all checkboxes have been grouped under the same Head since they shared the same Group Name. This is NOT a suggested practice.
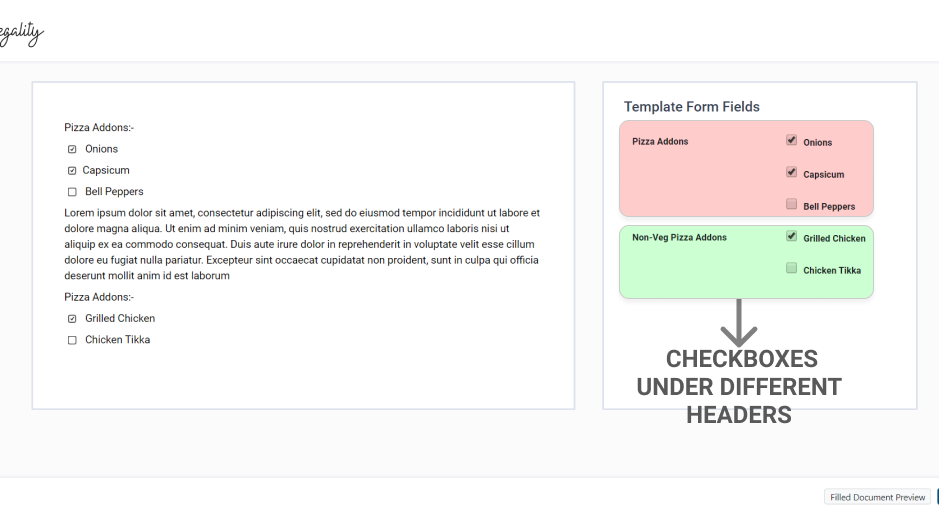
The correct way to group would be to create different (unique) group names for the second level of checkboxes, as shown in the screenshot below.
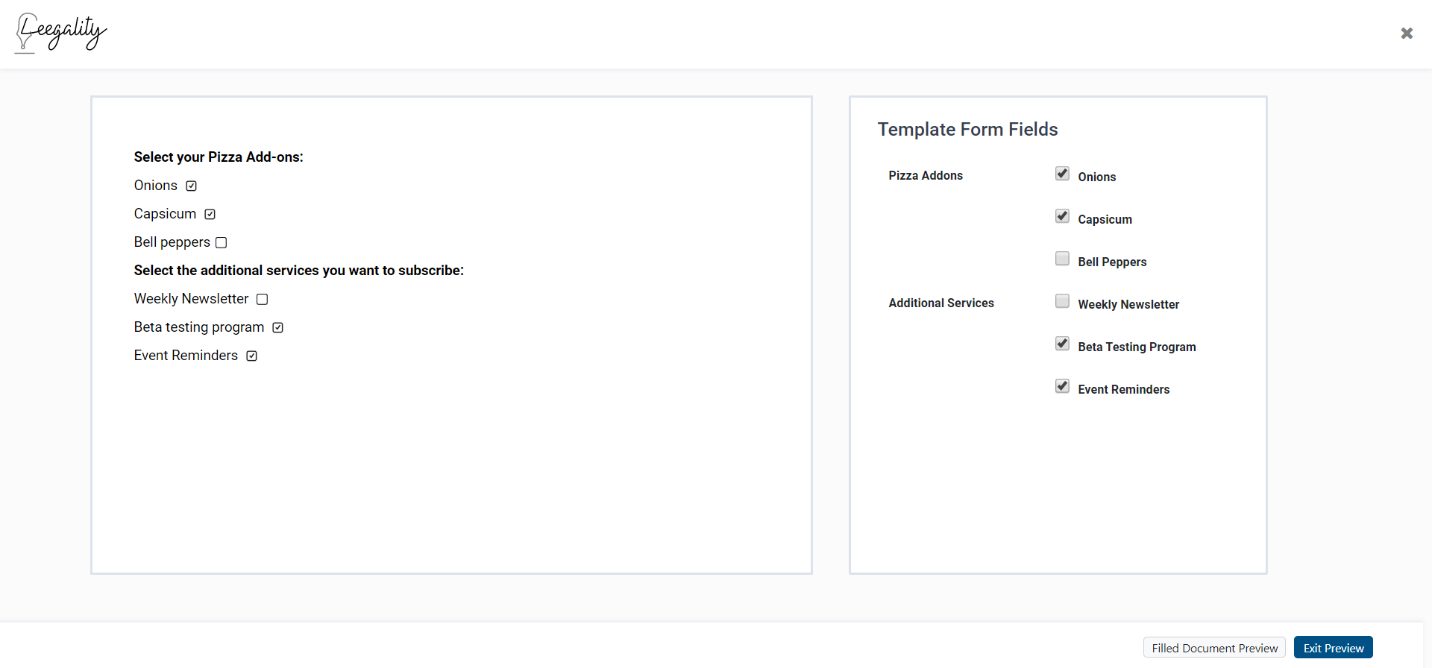
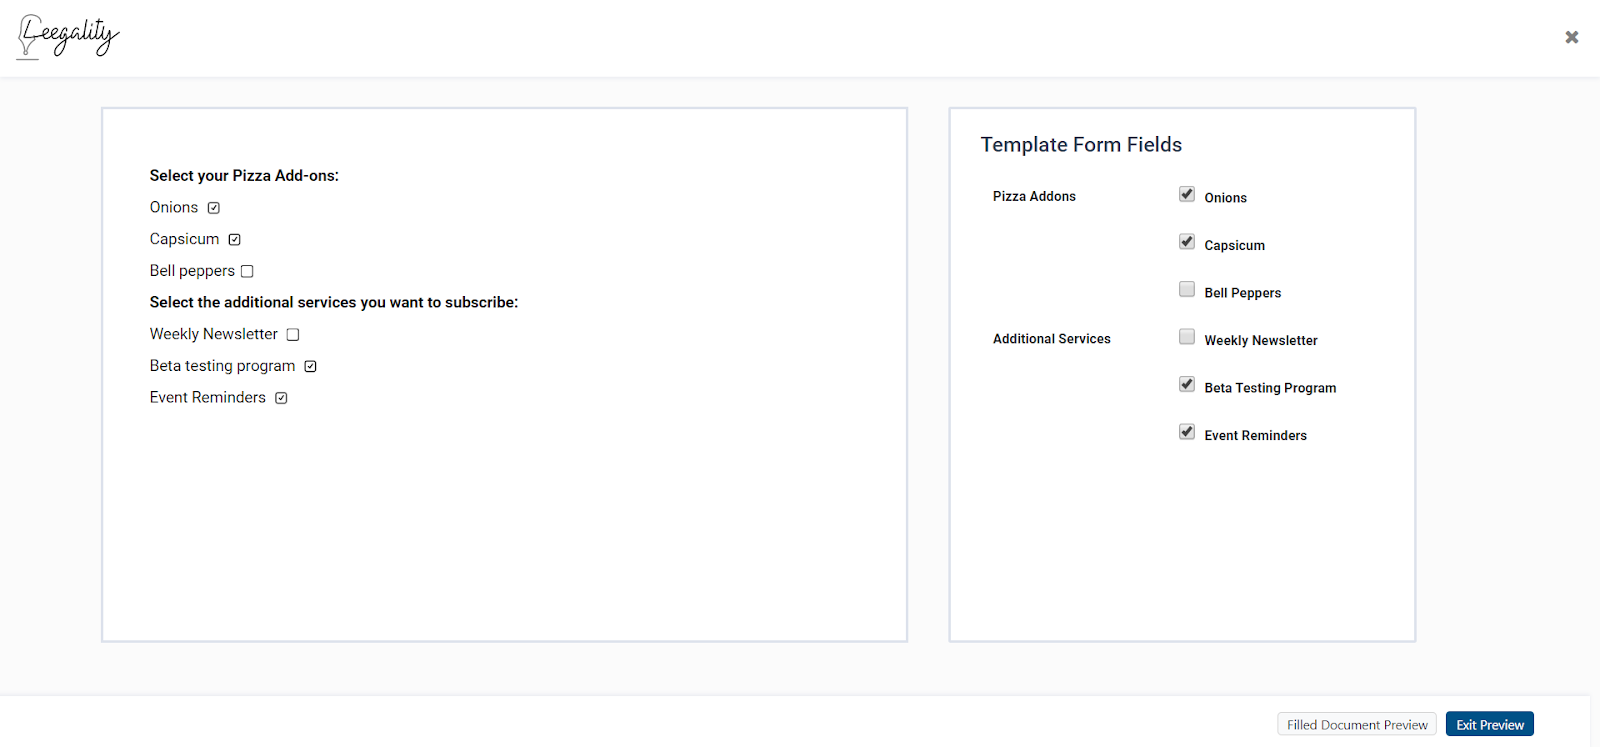
Preview and final output
Below is how the checkboxes will look in the drafting and final filling stage respectively:
Preview and final output
Related Articles
Insert Image
Insert Image allows the user to add the images to the document. Insert Image Insert Image to the document Step 1: Click on the “Insert Image” button in the 2nd row of the Editing Tools. Step 2: The image can be inserted into the document either via ...Radio button
A radio button allows the user to choose only one option from a set of options. These options do not overlap i.e. are mutually exclusive. Radio buttons should be used when selecting Gender selection (Male or Female), type of bank account to be opened ...Template Engine
USING TEMPLATES IN LEEGALITY Introduction Templates is a powerful feature that allows users to create documents that can be used for signatures repeatedly. An example use-case of templates is a bank account creation form, which gets created once, but ...PDF Template
Templates help users to create and manage documents that can be used for their signing journey. PDF templates comprises of the following: 1. Static Content - Pre-set content which includes texts, tables, lists, bullet points, borders and so on. ...Steps for Creating Signer ID using Aadhaar- Verasys
Step 1: Please click on the below link to create PAN based KYC account. Link: https://ca.vsign.in/applydsc?link=gkXzaPrYP8ZaaUJedrW-y3kxqJc7kOKFY0SOzP9Il8w= Step 2: Now click on PAN KYC button. Step 3: Fill all the appropriate details ...