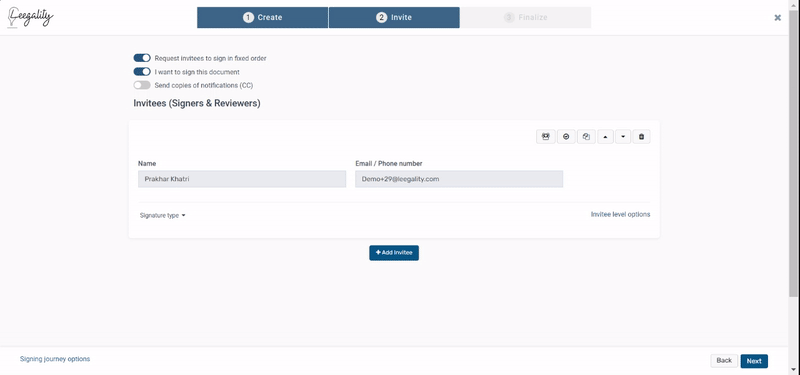
Nesl Multi stamping
Steps to configure NeSL Multi Stamping
Step 2: Enter the “number of stamp papers” to be affixed as per your requirement and click on “Save”.
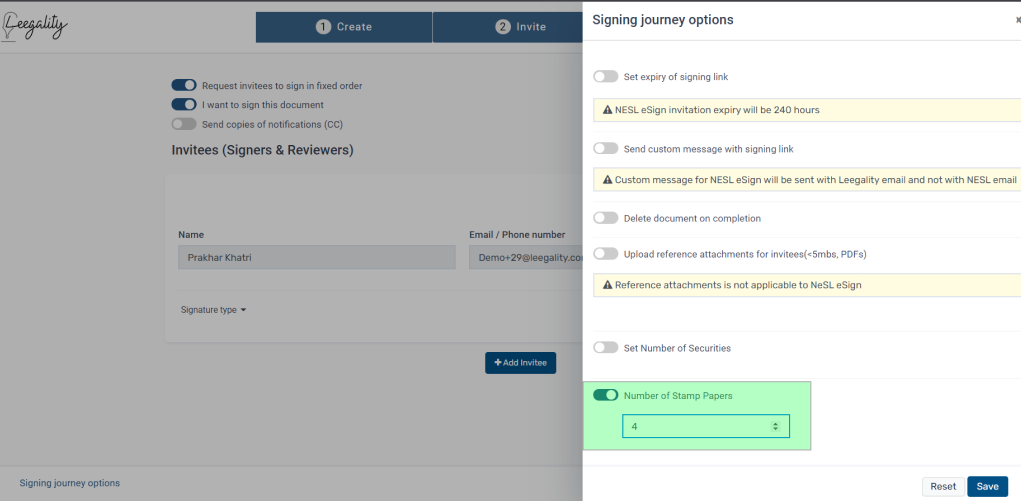

Note: Maximum of 10 stamps can be used.
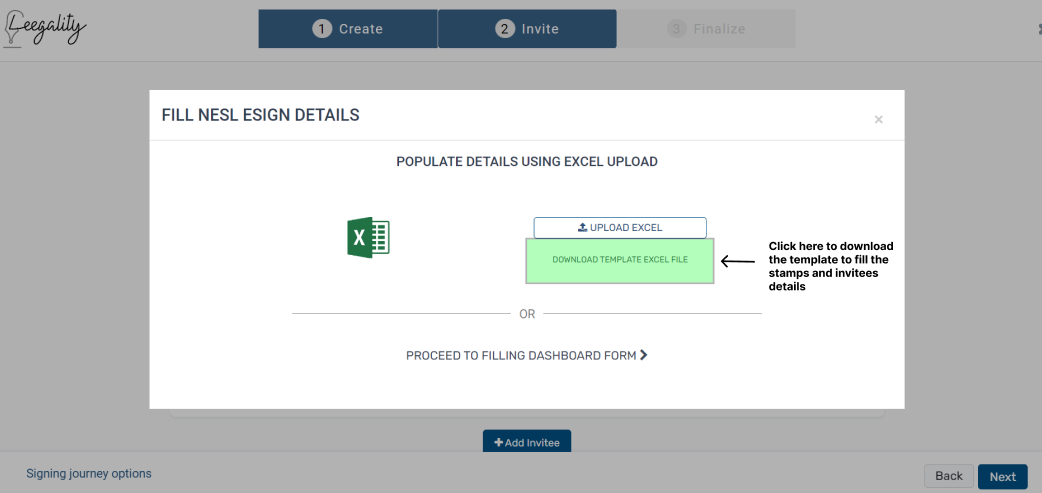
Once the number of stamps is entered in “Signing journey options”, click on Next to fill in the stamp details
Stamps and invitee Details can be filled from the “dashboard” or “Excel file”
Note: Depending on the number of stamp papers configured under “Signing journey options”, the equivalent number of stamp details have to be filled in via the dashboard or Excel file template.
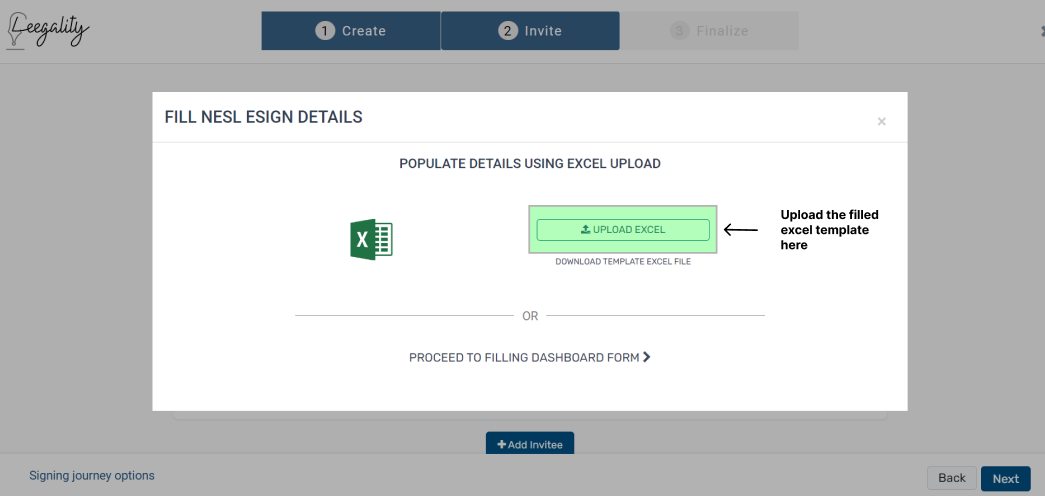
Excel File method
Step 2: Fill the excel file with all the required information and upload the filled excel template file.
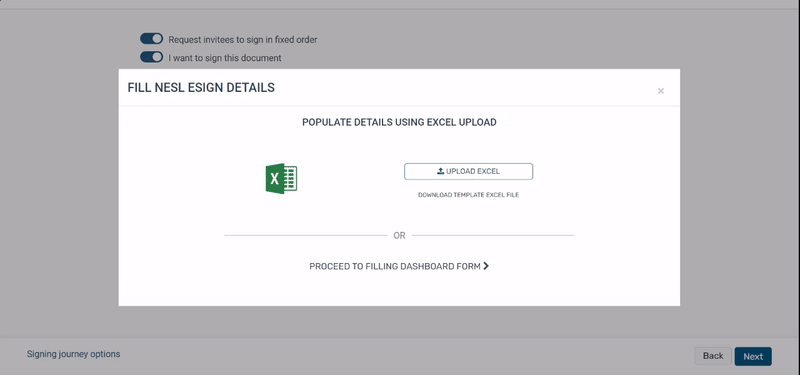
Dashboard Method
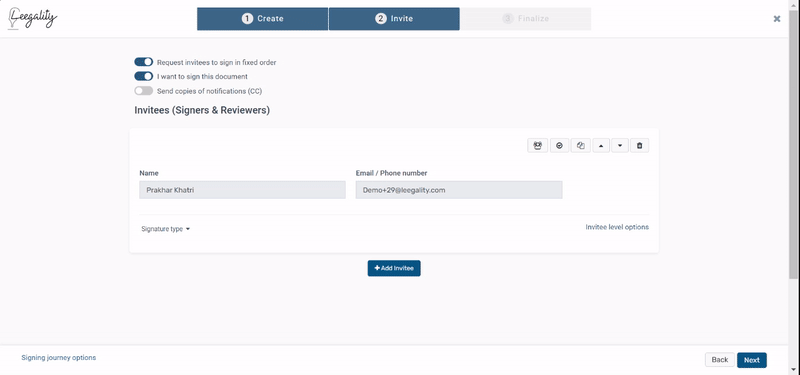
Step 2: By scrolling down to the stamp details section, you will see multiple stamp sections named "Stamp Details 1", "Stamp Details 2", etc. depending on the number of stamp papers configured.
Fill in the relevant stamp details as required and click on “Next”.

Steps to use NeSL Multi Stamping in Signing Journey
In the signing journey, after the document preview, the signer will have to view and accept each stamp paper generated by the sender.
During the signing journey through NeSL, click on the “Next” button so that Estamp status can be changed from Pending to Success.
All uploaded stamps can be viewed one after the other and accordingly the status gets changed from Pending to Success.
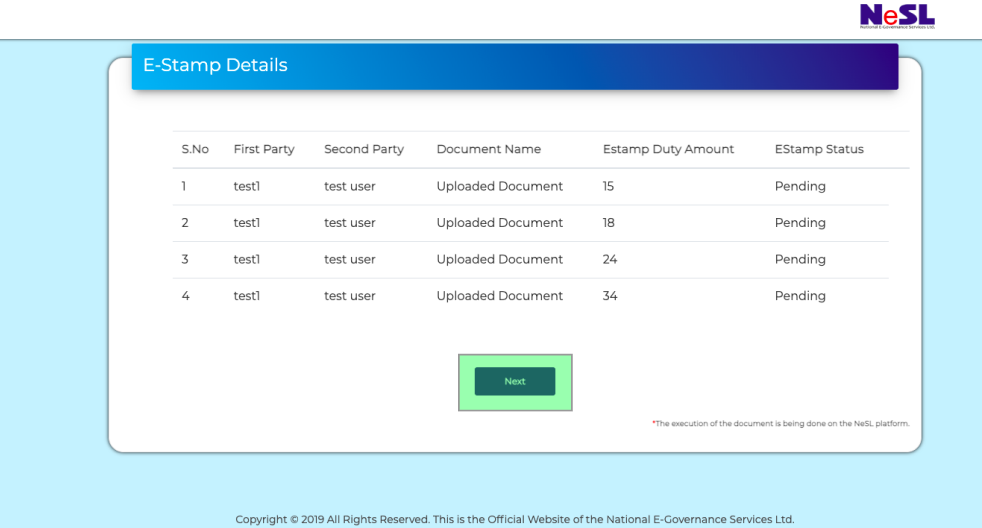

All uploaded stamps will be shown respectively
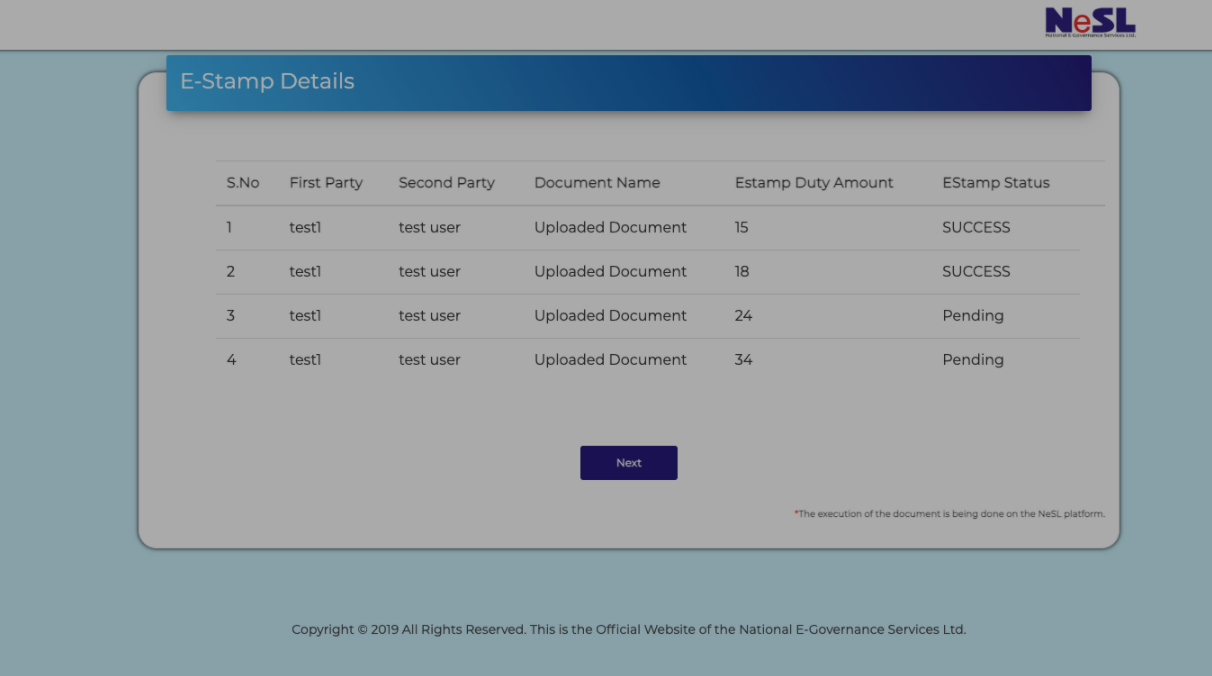
Once all stamp papers are viewed, the signer can proceed further and eSign the document.
Once the document is signed by the signer, the signed document will have all the stamps collated in the document.
Sample multiple Nesl stamp signed document can be viewed here
Related Articles
NeSL eSign
How to activate Account settings >> Department >> eSignature To activate NeSL eSign, “NeSL eSign” needs to be enabled. NeSL eSign can be made the Default signature type using the Default toggle. NeSL eSign settings can be configured by clicking on ...NeSL e-BG [ Electronic Bank Guarantee]
What is NeSL e-BG? A Bank Guarantee is an instrument issued by a bank to stand a guarantee against non-performance by a party. Typical parties involved: Applicant, Issuing Bank, and Beneficiary. The Bank issues a guarantee after due diligence, and in ...Dynamic Stamping
Dynamic stamping is a layer on top of the stamp series method followed by Leegality. As the name suggests group stamping allows you to add various stamp series of a single state into a group in order to facilitate Value-based stamp duty payment. How ...NeSL Aadhaar Validation
Note: The availability of this feature depends on your subscription plan. NeSL Aadhaar validation enables the sender to verify a NeSL invitee's details before they eSign a document. The details provided by the sender in the form (or Excel) during the ...Multi Pdf Upload
Description The multi-pdf feature allows the sender to merge multiple pdfs within Leegality instead of manually merging the document using external softwares. This feature also extends to the Leegality template engine where the pdfs can be appended ...