Completing an Invitation to eSign
Finalize
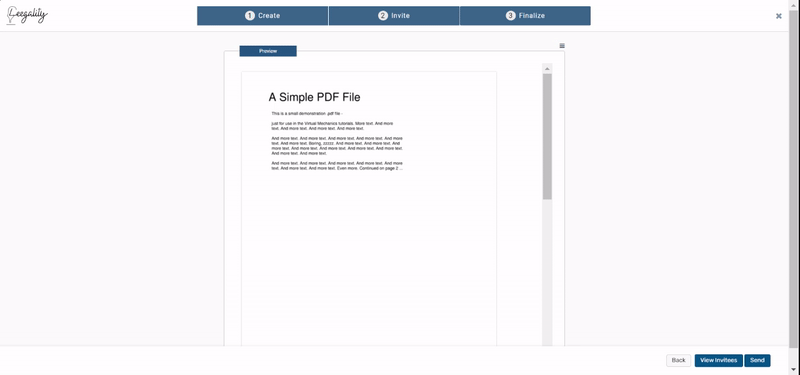
Once you have configured the invitee settings, click on the blue “Next” button. This takes you to the final step of the invitation journey- “Finalize”.
In case a stamp paper was attached it will appear as the first page of the document.
Set Signature Coordinates
This functionality allows configuring signature coordinates (placement) on a document that is being sent for signing.
Steps for setting custom coordinates
Step 1: Create a new document and configure the invitee(s).
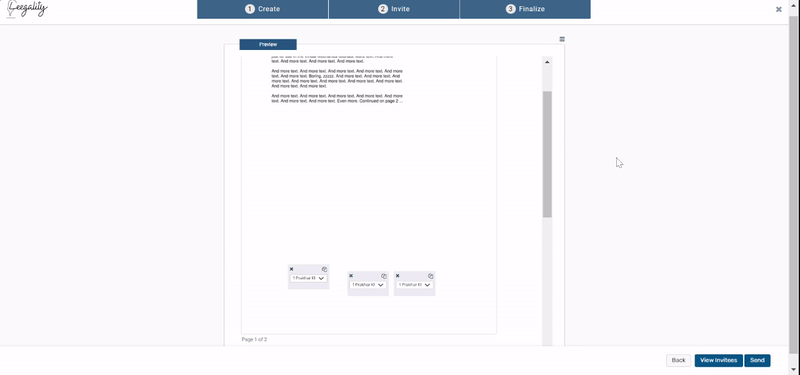
Step 2: Once reach the “finalize” page after configuring the invitee(s), set the signature coordinates by clicking on “custom coordinates” which will change the cursor iinto the Leegality logo when hovered on the document.
Step 3: Click on the required place where the signature has to be taken on the document.
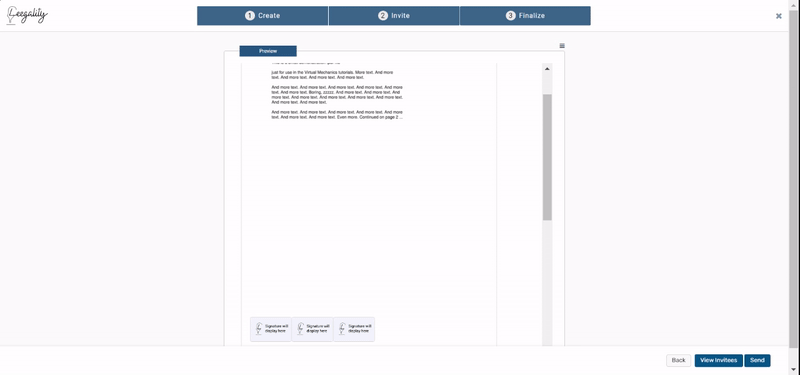
The sender has placed 3 custom coordinates by clicking on the desired location on the document
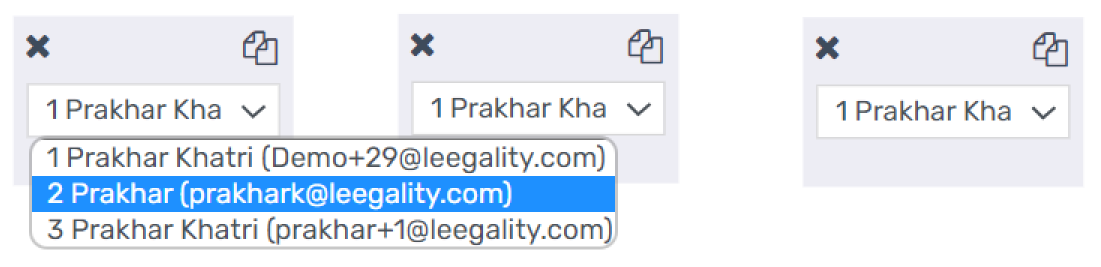
Step 4: Select which signature belongs to which signer by selecting the desired signer from the dropdown in the signature box
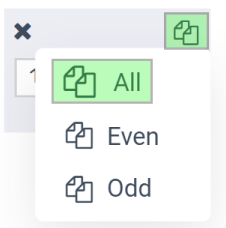
Step 5: If the signature has to be placed at the same position across all pages of the document, press “All” option as shown in the screenshot below.
Step 6: In case, custom coordinates have to be deleted that have been configured, simply click on the “Clear Coordinates” Button.
Step 7: Once signature coordinates are configured, click on the “Send” button to send the documents to the configured invitee(s).

Note: “In case any of the invitees do not have “Custom Coordinates” configured, Leegality will automatically place their signatures on the “Bottom-Left corner” (default placement) of every page.”
Send
After clicking the “Send” button your invitations to eSign will be sent
to the parties at the relevant contact details configured by you. You, as
the user will be taken to the “Sent” Screen.
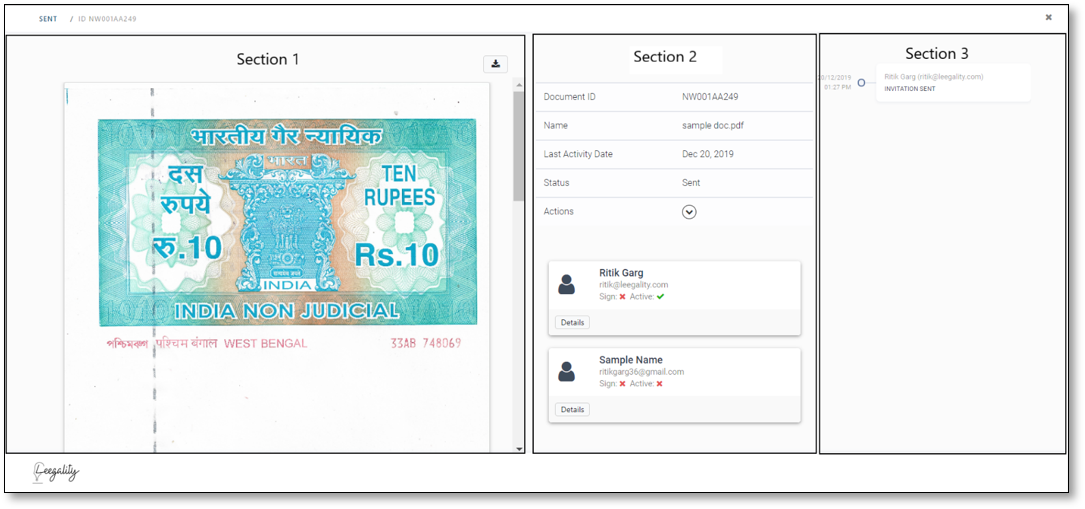
The sent screen, as shown above, is divided into 3 sections:
- The first section contains the sent document which can again be
downloaded in its raw form.
- The second section contains information pertaining to the document in
the Leegality dashboard i.e. Document ID, Document Name, Last activity
performed on the document, Status of the document.
This section also contains the invitee summary. Each box contains the configured information for each invitee and the status of the invite. - The 'actions' drop-down allows you to:-
- ‘edit’ the invitation at an
invitee and document level
- view attachments sent along with the invitation.
- complete the document artificially. This is possible when pending
invitations have
- expired
- been rejected by the invitee
- been deleted by the sender.
- delete the document, which deactivates the signing link for any pending
signatures.
- In case there is a self-sign invite it can be signed form the sent page
itself by clicking on the sign button and following the relevant
signature flow.
- Resend Notification button is to resend
a signing link notification to the configured contact parameter.
- Clicking on the detail button gives you invite specific
information and also contains the signing link to the document which can be sent to the invitee artificially.
- Activate button allows you to bypass the signing order and activates the
signing link for the party which is not in line to receive the signing order.
- The third section provides real-time updates with regard to the
invitation containing events in invitation life-cycle with time stamps.
The above ‘Sent screen’ can also be accessed by double-clicking on the
document in the ‘Sent’ folder by double-clicking on the document.
Video on the completing an eSign invitation here
Related Articles
NeSL eSign
How to activate Account settings >> Department >> eSignature To activate NeSL eSign, “NeSL eSign” needs to be enabled. NeSL eSign can be made the Default signature type using the Default toggle. NeSL eSign settings can be configured by clicking on ...NeSL eSign Signature Journey (OTP)
To eSign a document, open the invitation message from NeSL containing the eSign link. The NeSL invitation will be sent on email as well as mobile. SMS Invitation Template Email Invitation Template To begin, click on the eSign link in the ...Setting up an automated eSign
After setting up your Virtual Signature and Document Signer Certificate, hover your mouse on the down arrow and click on "enable Automated eSigning" Set up your Automated eSign by entering a Passkey and checking the consent box. Once your automated ...Aadhaar eSign Signature Journey (OTP)
A signer will need to access their e-mail (and/or phone, depending on the contact details given during the invitation creation stage) to eSign the document. Email notification SMS notification The signer needs to click on the ‘Sign’ button (for an ...Aadhaar eSign
Aadhaar eSign is a valid method of affixing an electronic signature as per Schedule II of the Information Technology Act, 2000. This feature is useful for documents where a ‘signature’ is mandatory. Aadhaar eSign userflows:- OTP Biometric Face