Local Language eSign Interface
Local Language support allows signers to complete the signing process in their native language.
Languages being provided in Local Language Support-
Hindi
Marathi
Gujarati
Bengali
Telugu
Tamil
Kannada
Malayalam
Odia
Activating the Local Languages feature

Step 2: Switch on the ‘Enable Regional Language for organisation’ toggle

Configuring Local Languages in the new document flow:
Step 1: Once the document is created, on the invitee page click on the “Enable Regional Language support” option. A side modal will appear to select Regional Language Options

Note: Regional Language support option cannot be enabled for automated sign and Nesl sign

Step 2: “Regional Language Options” has two options that can be selected according to the use case.
1. Allow Signers to Select Language:

2. Set a Default Language
By enabling this option, the sender of the document can select the default language for the invitee.
The selected language will appear during the signing journey for that invitee.
Note: Even if the sender configures a default language, the signer will be able to change the language using the language switch button in the signing journey.

Configuring Local Languages in the workflow:
Step 1: While creating the workflow, on the invitee page click on the “Enable Regional Language support” option. A side modal will appear to select Regional Language Options

Step 2: “Regional Language Options” has two options that can be selected according to the use case.
1. Allow Signers to Select Language:
Enabling this option in the workflow will allow the signer to select their local language before starting the signing journey.
2. Set a Default Language
By enabling this option, the sender of the document will be able to select the default language for the invitee.
The selected language will appear during the signing journey for that invitee.


Signing Journey
1. Allow Signers to Select Language:
If the sender has configured “Allow Signers to Select Language” while sending the document, the signer will get the option to select their local language.

2. Set a Default Language
If the sender has configured “Set a Default Language” while sending the document, the signer will not get the option to select a language instead the signing journey will start with the default language selected by the sender.
Note: The selected language can be changed during the signing journey by clicking on the regional language icon.


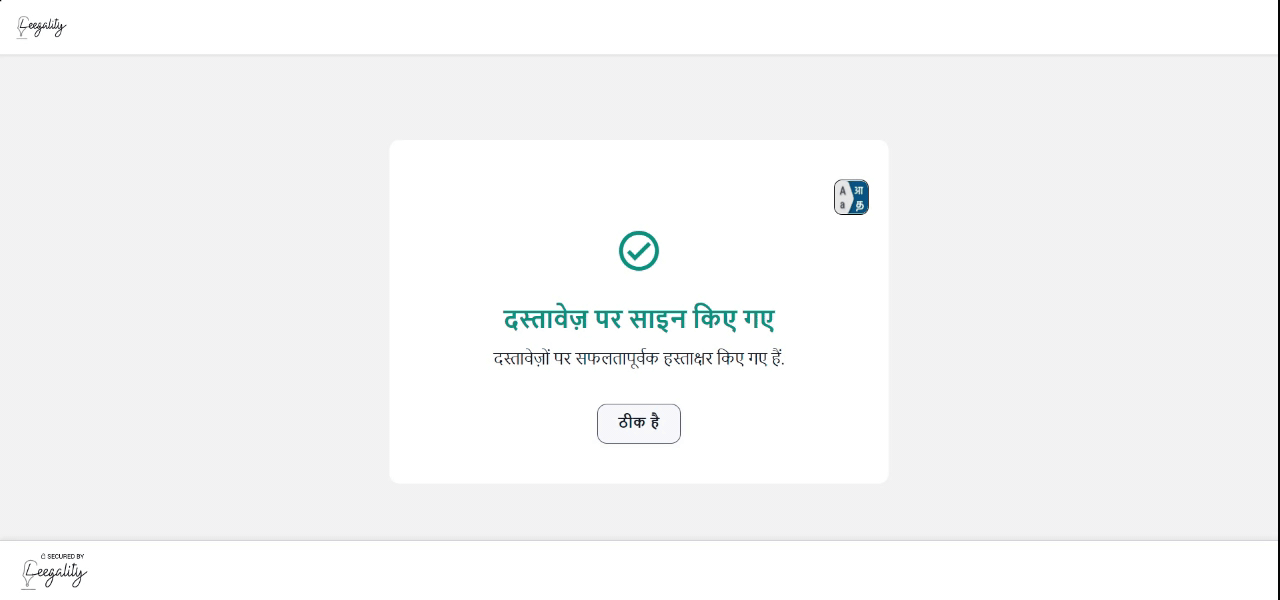
Once everyone has signed the document, the audit trail will have the consent in the selected language.

Related Articles
Aadhaar eSign
Aadhaar eSign is a valid method of affixing an electronic signature as per Schedule II of the Information Technology Act, 2000. This feature is useful for documents where a ‘signature’ is mandatory. Aadhaar eSign userflows:- OTP Biometric FaceNeSL eSign
How to activate Account settings >> Department >> eSignature To activate NeSL eSign, “NeSL eSign” needs to be enabled. NeSL eSign can be made the Default signature type using the Default toggle. NeSL eSign settings can be configured by clicking on ...Face - Aadhaar Esign
Aadhaar Face eSign Activation In Account level settings, toggle on ‘Face’ under Aadhaar eSignature as shown below Sending Journey When the document is being created or during the creation of workflow, choose Aadhaar esign and then toggle on the ...eSIGN AND SEALS
Use the eSign and Seals tab to set up and configure different types of eSigns and their appearances. This is going to be especially useful if you are a regular signer on Leegality’s growing platform; your configurations will be prepopulated when you ...Fingerprint Capture - Aadhaar Esign
Leegality’s Aadhaar Signature type allows users to sign using their fingerprint via a registered biometric device connected to a Windows PC or Android Mobile phone. Steps to activate Aadhaar biometric sign type Step 1: Click on the “Account” option ...