Creating a workflow
What is a workflow?
A workflow, quite simply, allows you to save the configurations that make up the signing journey (sign options, sign verification, signature positioning, number of signatories, templates used, stamp paper needed, authentication options, contracting features, custom consent layer, custom messaging etc.)
Thus, with workflows, the complex configuration process needs to be performed by a Leegality User ONLY ONCE - making the user experience significantly easier.
Why has this been introduced?
Due to the addition of new features picking up pace in the signing process it was becoming more and more tedious to configure these settings every time a singing journey was to be initiated. This led to mistakes and inconsistencies in the format for sending out invites.
Workflows by nature resolve this problem by allowing a one-time config of the settings to be saved for future use - significantly reducing the time taken to send out an invite.
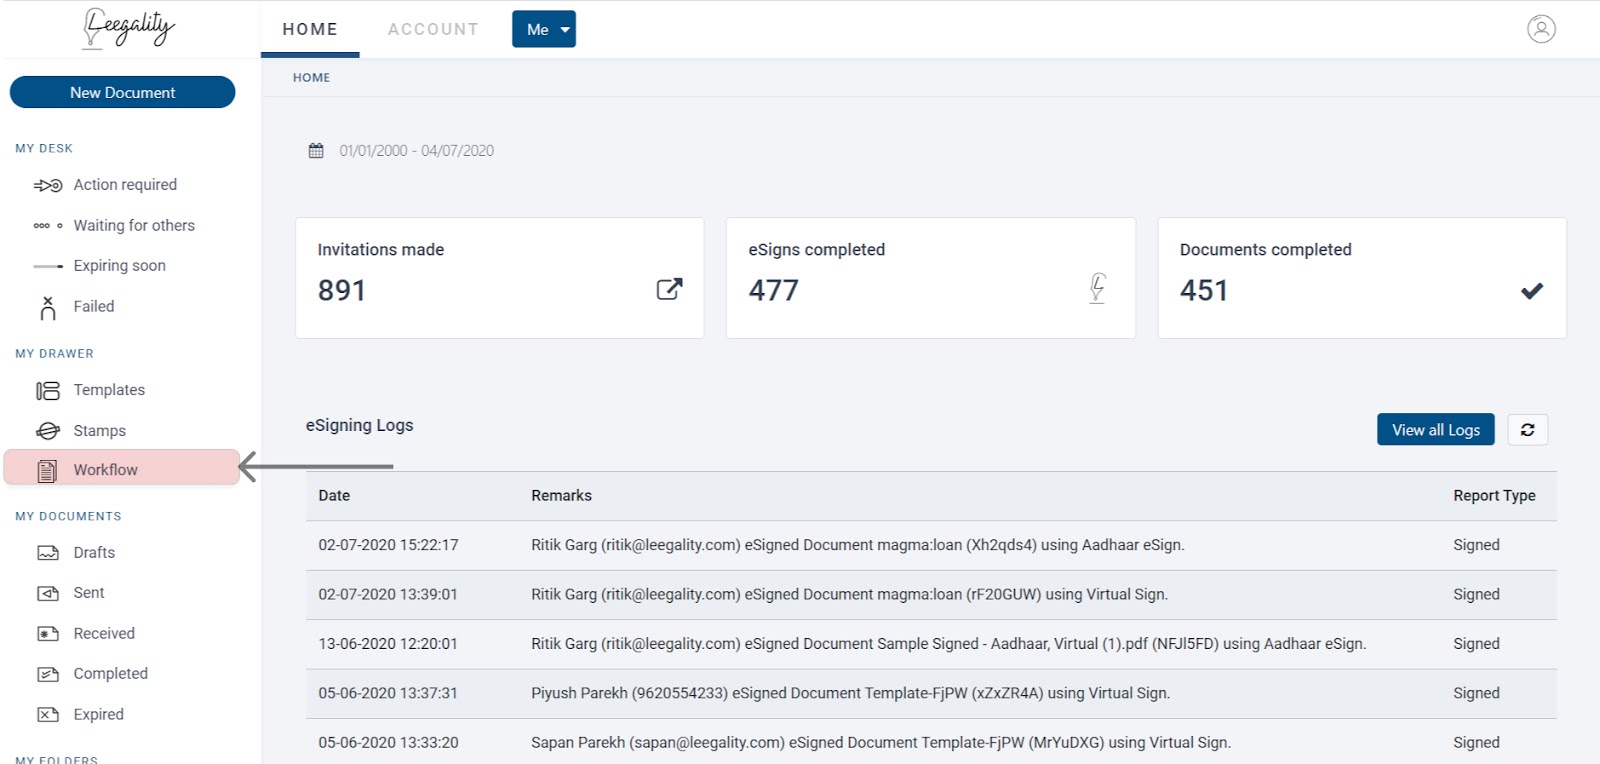
How to reach workflows:
Go to Leegality Dashboard screen and click on ‘Workflow’ in the Workstation
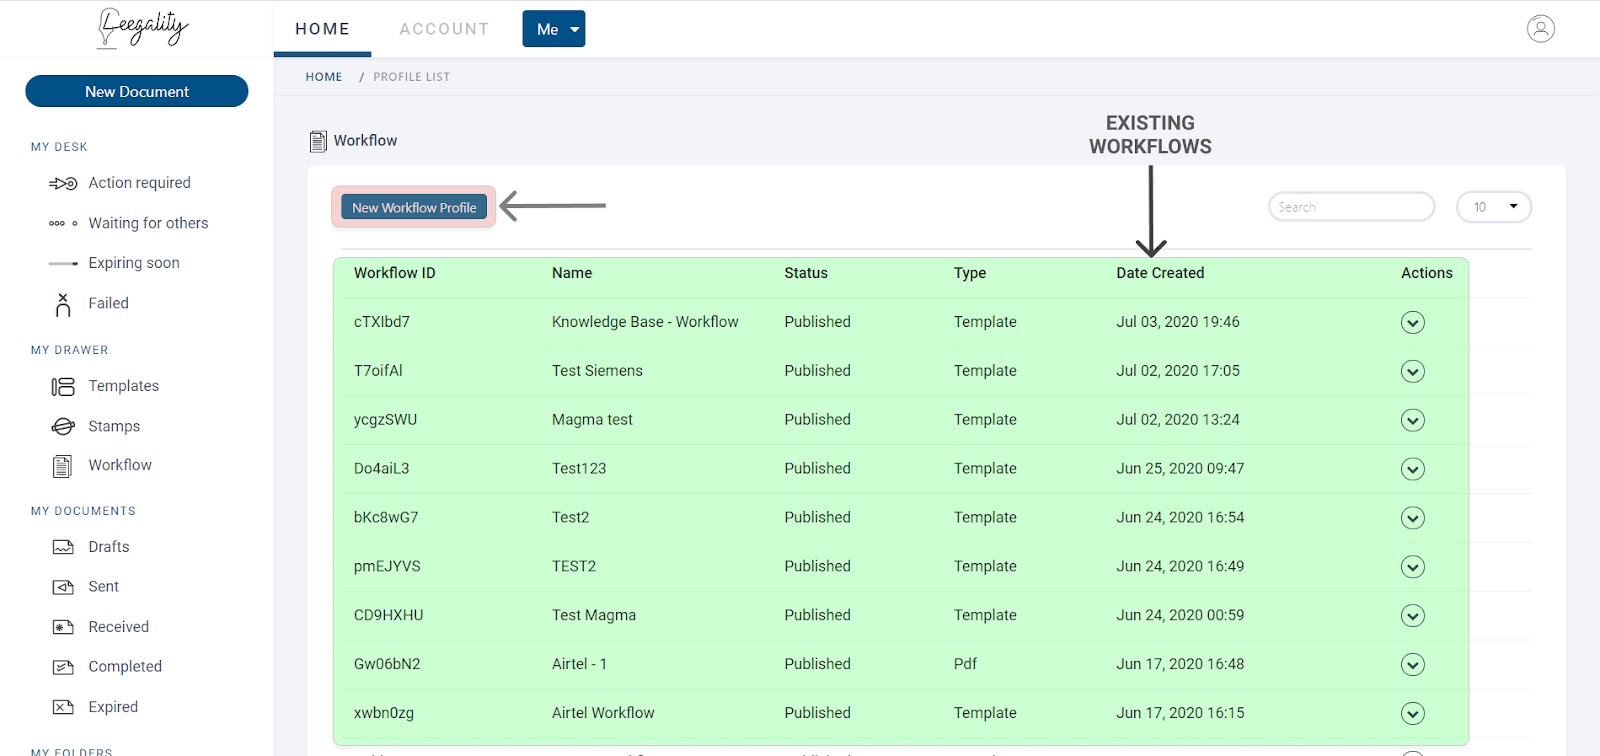
Inside the Workflow screen, click on ‘New Workflow Profile’ button
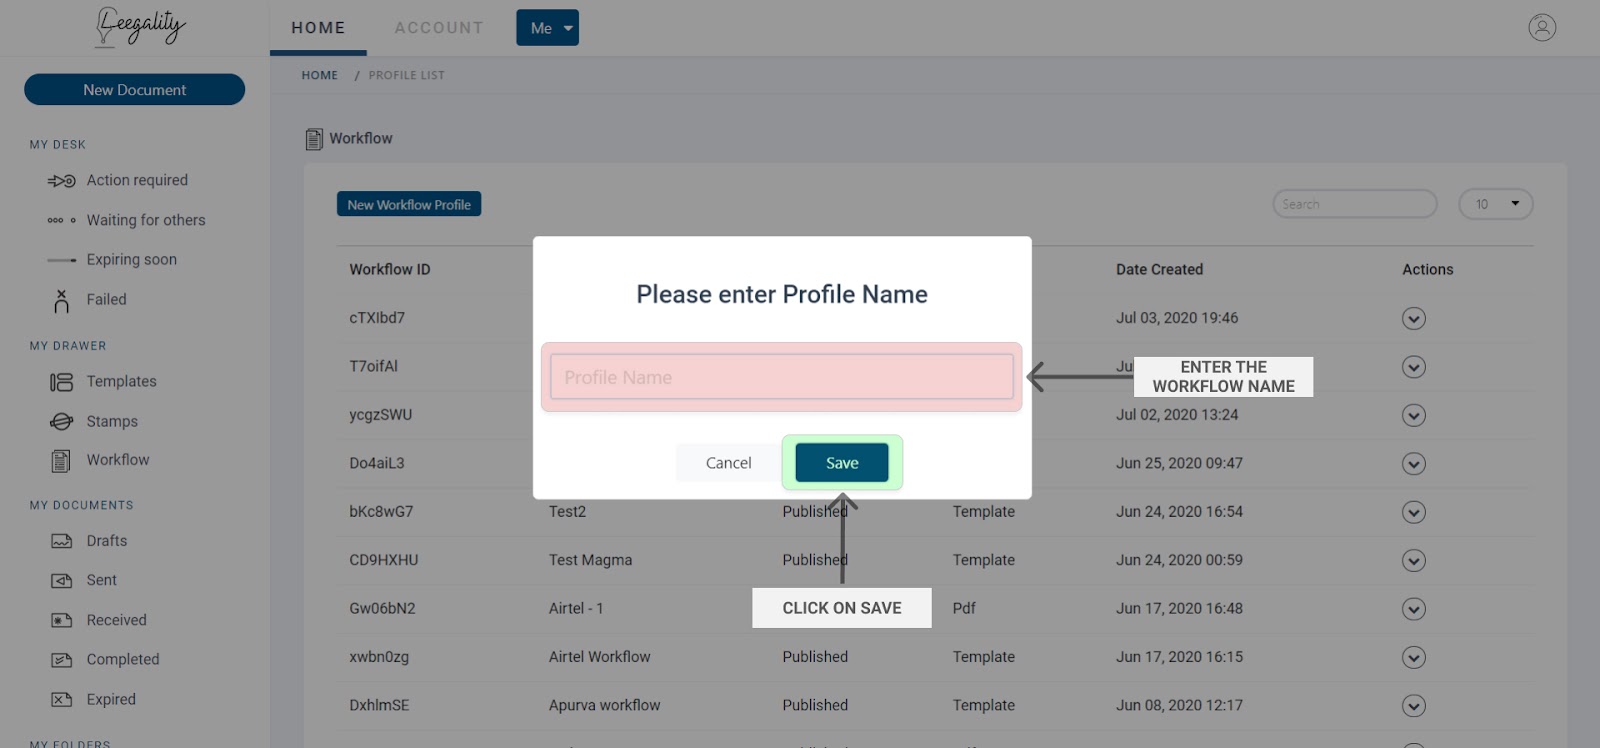
Enter a ‘Workflow profile ID’ and click on ‘Save’
You are now in the Workflow creation screen
Overview of the workflow set-up
Setting up a workflow is identical to Leegality’s legacy sending flow with the same
steps, which act as a parent set-up for all the configurations which will be applied to the documents being sent out via the workflow without any manual intervention.
Configure a workflow
Create Page
This page is where you need to select the basis for your document being sent out.
PDF - Either a dummy document has to be uploaded here to act as a base for the workflow
Please note: The concerned document pdf/template selected should be a standard document that is to be sent out every time.
ORTemplate - a template can be associated with the workflow
Choose Folder - You can specify The Folder in which you want all documents sent through this workflow to be sent after completion of execution
- This page you to select the stamp series or upload the stamp
i. Use Stamp - A stamp series can be specified for a workflow here. Every time the Workflow is executed, a stamp paper from this series will be attached to the document.
ii. Upload Stamp - Every time the workflow is executed, a stamp paper has to be uploaded and the details have to be filled in.
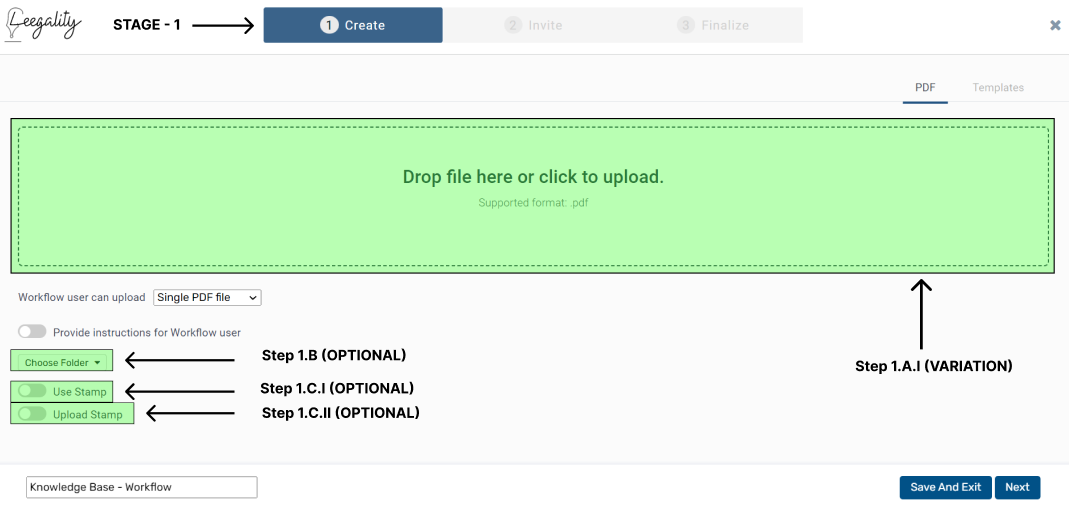
Remember this is a workflow for repeat use. So the document you select now should be a dummy/sample of the PDF you intend to send repeatedly to various customers/partners through this workflow
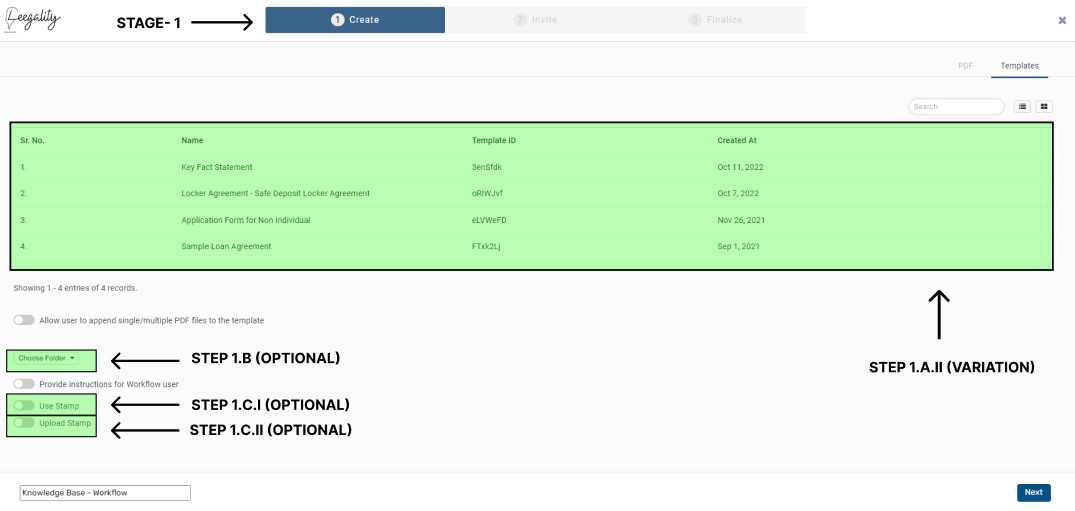
Click on ‘Next’
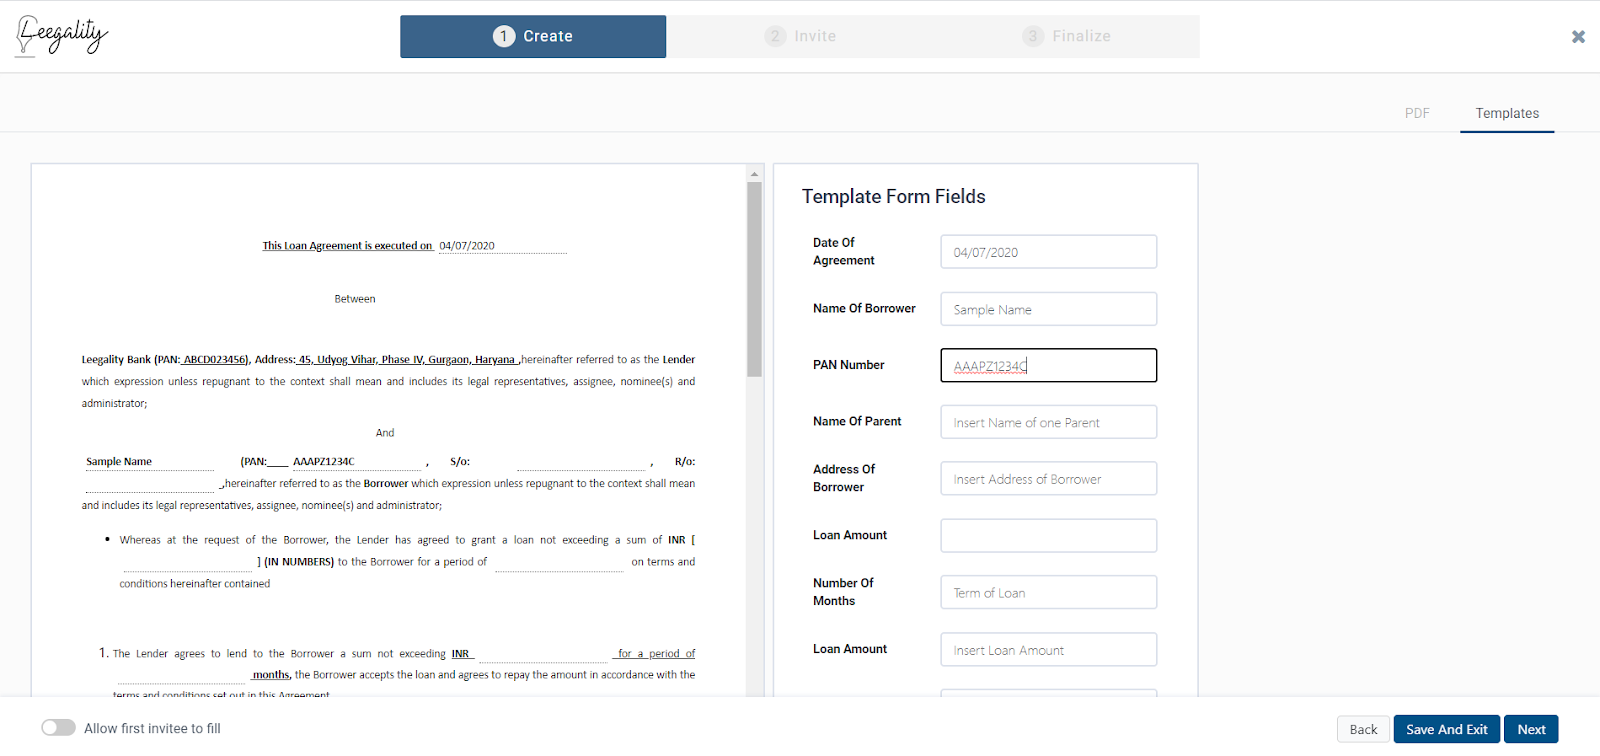
In case you have selected to create a Template Document Workflow – the next screen will take you to a preview of the Template Document along with the variable fields. You can leave these variable fields blank – this is just a Workflow Configuration and not the actual signing journey. Click next if you have confirmed the template.
Invite Page
This is where you can configure invitee settings i.e configurations for the people who are going to sign your document.Adding invitees
You will notice that Invitee Name and Contact Parameter have been grayed out – with a placeholder that looks like this in the boxes – Invitee(0)Name and Invitee(0)Email/Phone Number. This is intentional.
Remember the Workflow is a Saved set of Configurations and NOT the Sending Journey. The grayed out portions will be filled in on a case by case basis during the Workflow Sending/Execution Flow (Dashboard / Spreadsheet).
Click on the add invitee button to add any number of potential signers to the documents.

Request Signing Order
Requesting a Signing Order means that signing links will be sent to Invitees in the specified order. The order can be edited by moving the Invitee up and down with the arrow keysConfigure Invitee
Configure Invitee toggle allows you to fix a permanent invitee in the Workflow. This invitee will remain constant in every document.
E.g. In a document flow, your authorized signatory may be the same signer in every agreement. Their details can be configured here during the creation flow and they will be pre-set every time the workflow is run.
Once configure invitee has been turned on and details have been entered the toggle needs to stay on for the configuration to take effect.
Additional invitees have to be left empty which will remain as variable invitees in the sending journey (dashboard / spreadsheet).

In the above screenshot since Configure invitee has been turned on the invitee parameters have become editable in order to configure a permanent invitee.
Invitee Specific Configurations
Signature Types
Leegality offers 5 different signature types . You can choose which signature type is available for the Invitee to sign with. Note: Doc Signer and Automated Sign can only be used by your organisation’s signers and not by any third party.You can also configure specific configurations for a signature by clicking on the Gear Icon
Further signature type specific configs can also be configured here.
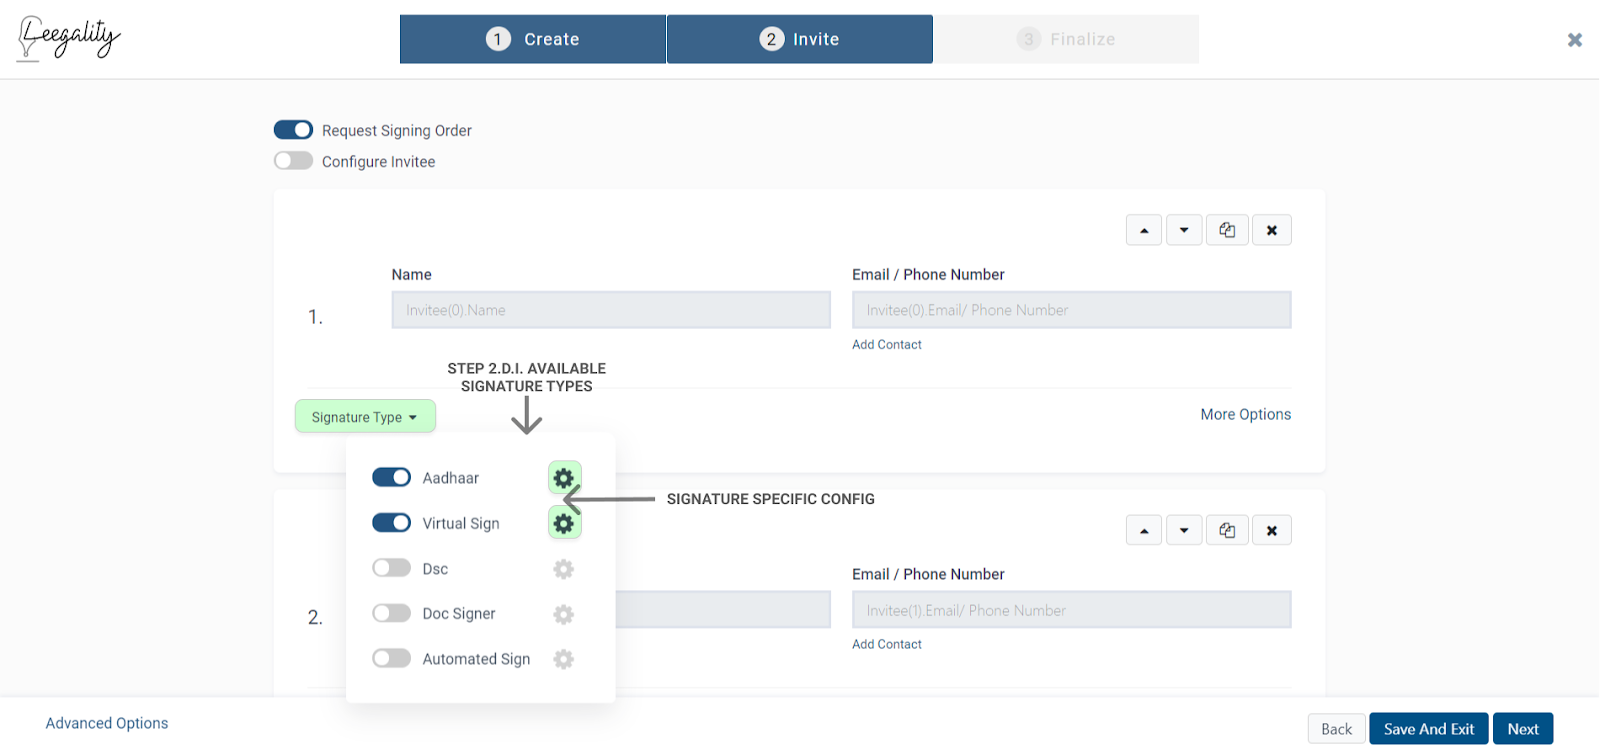
In this case, Aadhaar eSign and Virtual Sign have been toggled on for the first signatory of the document. This means that the first signatory will always be given these two options to sign the document
- More Options contains Leegality’s suite of Invitee Specific Customization options. Here you can set these configurations for each signatory to avoid repeat configuration for each signing journey.
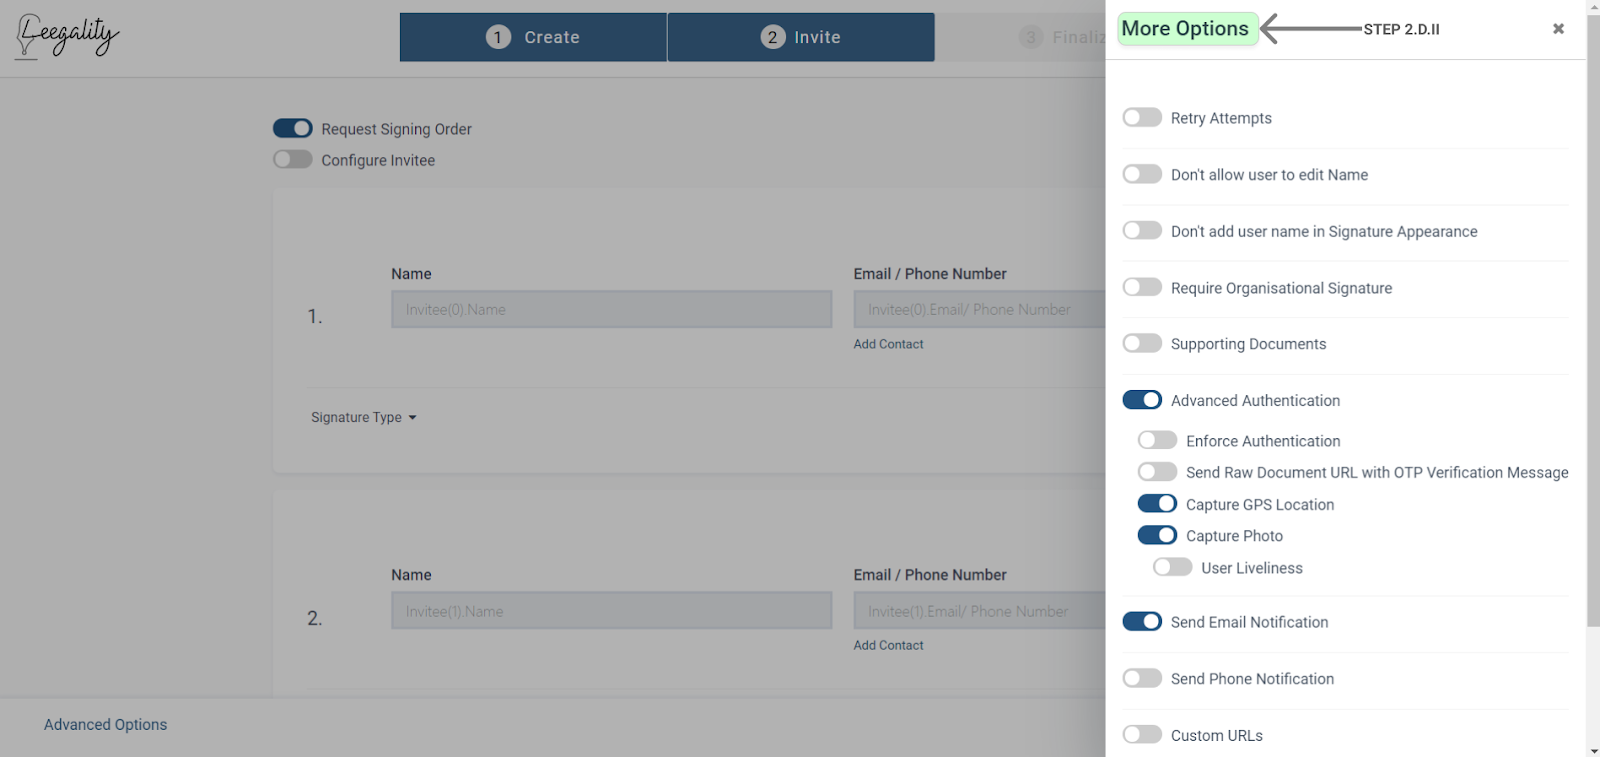
In this screenshot the Advanced Authentication > GPS Location and Capture Photo have been activated for the first signatory. This implies that the GPS Location and Photo of the First Signatory at the time of signing will always be captured and reflected in the audit trail for all documents sent through this Workflow
Advanced Options – a.k.a Journey Wide Configurations
Advanced Options caters to journey wide settings which are applicable to ALL invitees to a signing journey
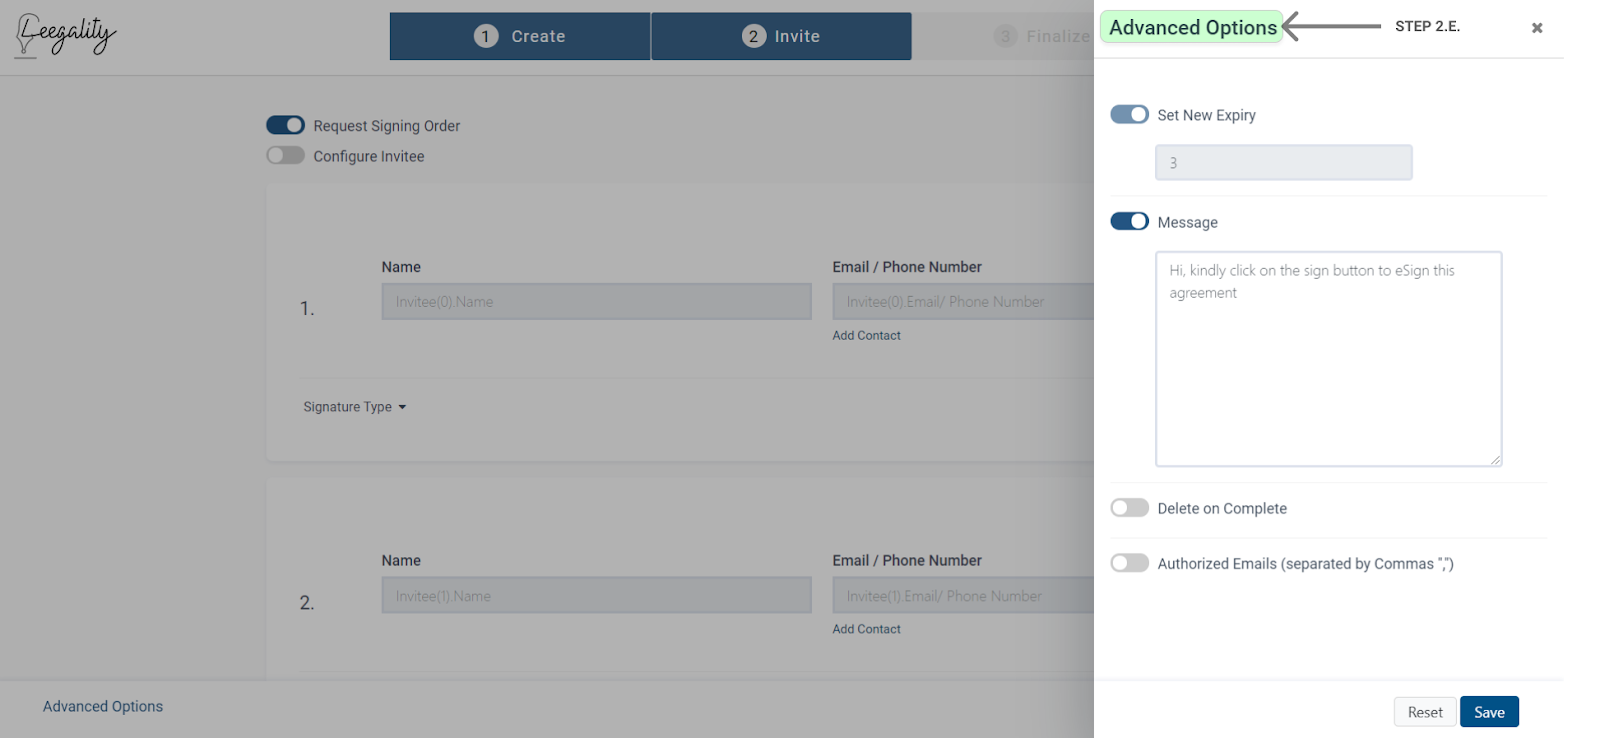
In the above screenshot, two journey-wide configurations have been set (i.) the expiry has been set at 3 days which means that every invite sent via this workflow will expire after days (ii.) A custom message has been added to the invite which will display in the email/phone notification sent out for every invite sent via this workflow
Once you have completed all desired configurations click on ‘Next’
Finalize Page
The final step of your Workflow Journey is fixing Signature Coordinates.
By default, the signatures are configured to appear on the bottom left of every page of your document. You can set custom coordinates for your signatures by clicking on the additional options button on the top right and clicking on the custom coordinates button in the dropdown.
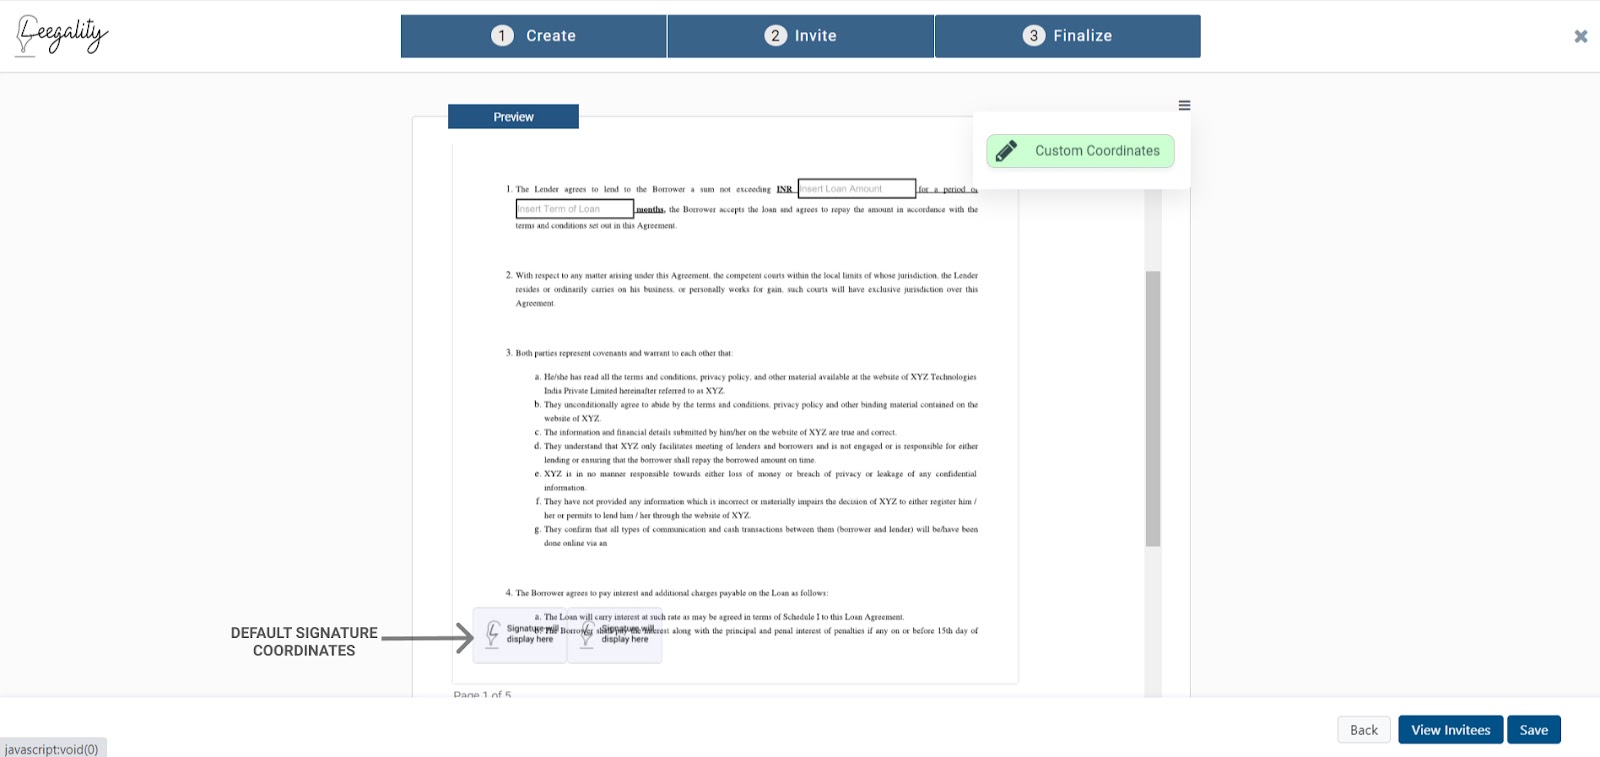
Click anywhere on the document to drop a placeholder for the signature. Each placeholder box will also contain a drop-down menu for you to specify the party to which that placeholder pertains.
By clicking on the drop-down menu , you can choose to replicate the position of the placeholder on the same position on each page by clicking on ‘All, or on “odd” or “even” page

Note: Place holders can be deleted by clicking on the cross button either for all pages or a single
page. This is only when the placeholders have been copied using the above dropdown
Any of the copied placeholders can be moved without affecting others
The placeholder size can be increased or decreased as per requirement by simply dragging from its edges

Once you have placed the signatures placeholders for all the invitees click on ‘Save’.
Your workflow has now been published and is ready for use.
Related Articles
Running a workflow - Spreadsheet
The spreadsheet workflow is a way to send out invitations in bulk using a spreadsheet upload without having to repeat the dashboard process for N number of documents. Note: spreadsheet upload is only applicable for Template configured Workflows ...Running a workflow - Dashboard
Go to Leegality Dashboard screen and click on ‘Workflow’ in the left menu. Click on "Run Workflow" option which will redirect to the list of workflow available in the workflow screen and click on "Run" to execute the document through the required ...Custom mapping of workflow spreadsheet template
What is custom mapping? Leegality allows you to send documents for signing using a Leegality generated spreadsheet template in which variable document information and signer parameters can be filled. However, your organization may be using a software ...Creating a document
New Document Upload 1. To send the document for signing/reviewing click on the “New Document” option. 2. Clicking on “new document” will lead to the document creation page The Name and Internal Reference Number (IRN) fields have a maximum character ...Signature Certificate Verifier
The Signature Certificate Verifier feature allows the sender (Leegality Customer) to configure certain details of the intended signer and compares the details filled in by the sender and the details received in the Digital Signature Certificate after ...