Leegality Payment Collect
Introduction
Leegality Payment Collect is a feature that will allow Leegality clients to collect payments within the signing journey from their signers. This happens through a payment gateway (currently only Razorpay is supported) which needs to be linked with the client’s bank account.
Prerequisite:
1. The client needs to have a KYC completed Razorpay account. For account creation, go to https://dashboard.razorpay.com/ and create an account
2. The client also needs to link their bank account with the Payment Gateway account(Razorpay) to receive payments

Please note: Currently we’re only offering Razorpay as the default payment gateway but we’d be happy to help you integrate another gateway in case you’re already using a different gateway
Activating Leegality Payment Collect
Before you can use the Leegality Payment Collect feature you will need to activate it in the Dashboard through an Admin account. Follow these steps:-
Step 1: On the Dashboard, navigate to Account >> Department >> Payment Collection

Step 2: Click on the dropdown of ‘Choose Payment Gateway’ and select a payment gateway (Leegality is integrated with Razorpay’s Payment Gateway)
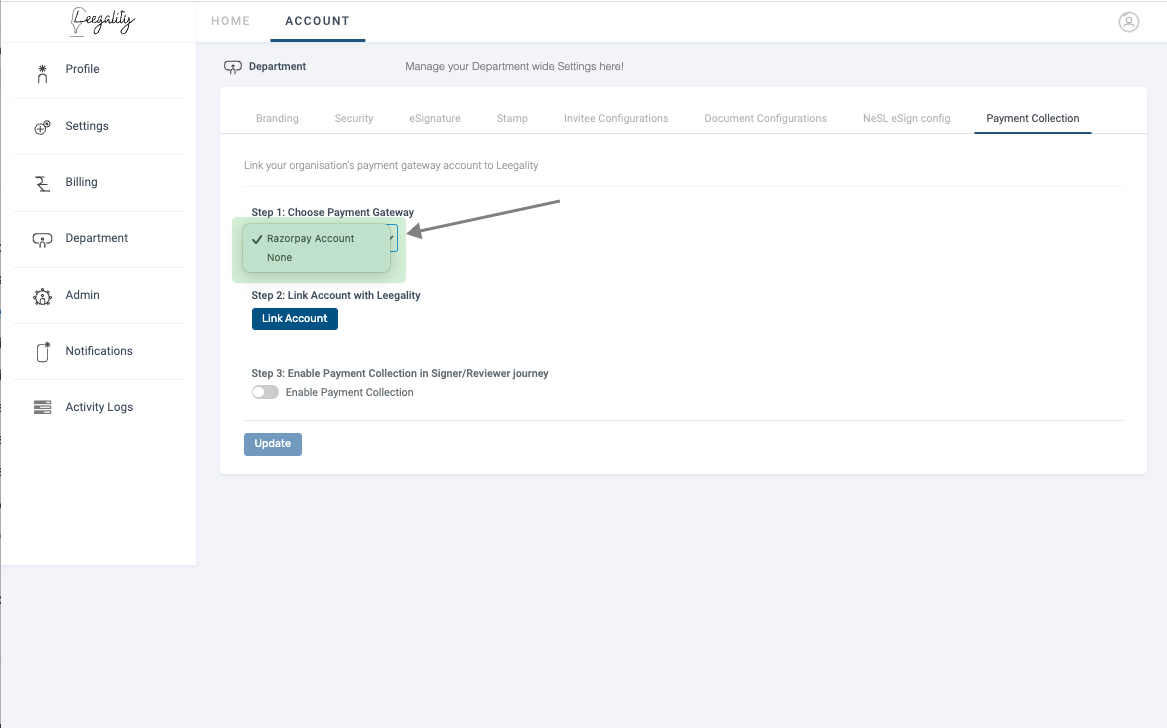
Step 3: Click on the ‘Link Account’ button.

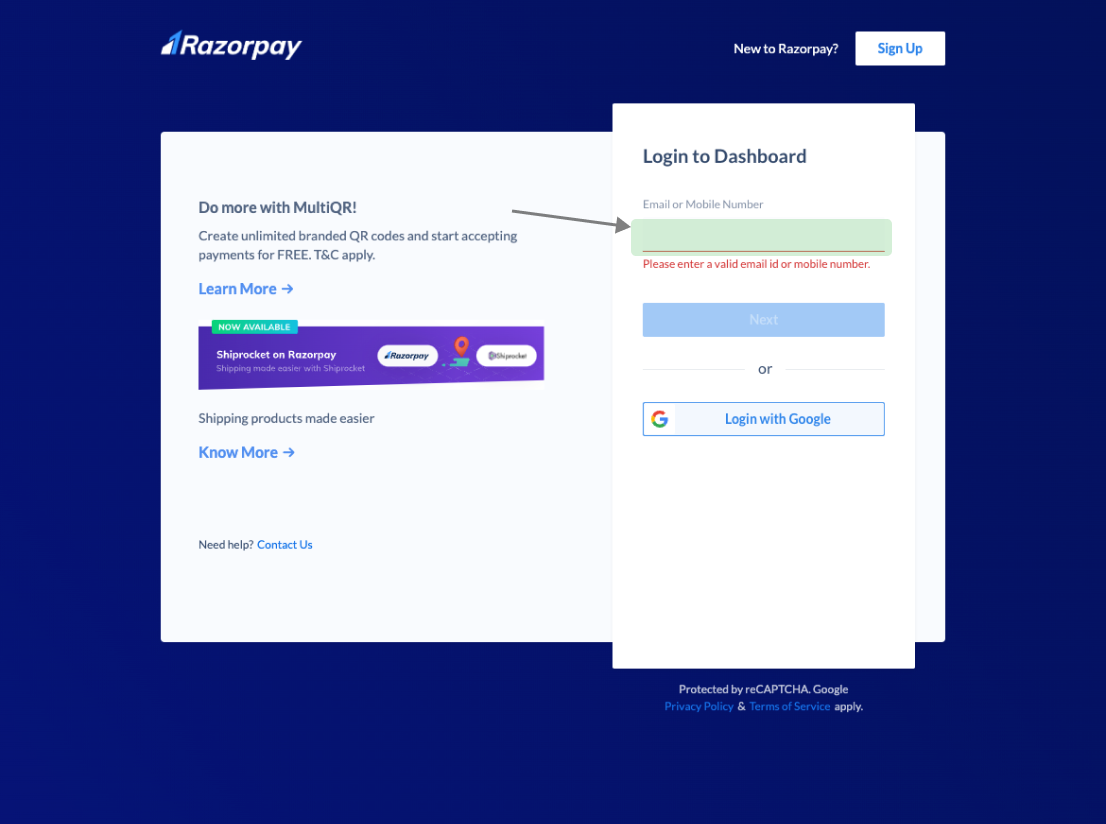
Step 4: You will then be redirected to the Razorpay dashboard. You can login and proceed to link your Razorpay account to Leegality’s dashboard.
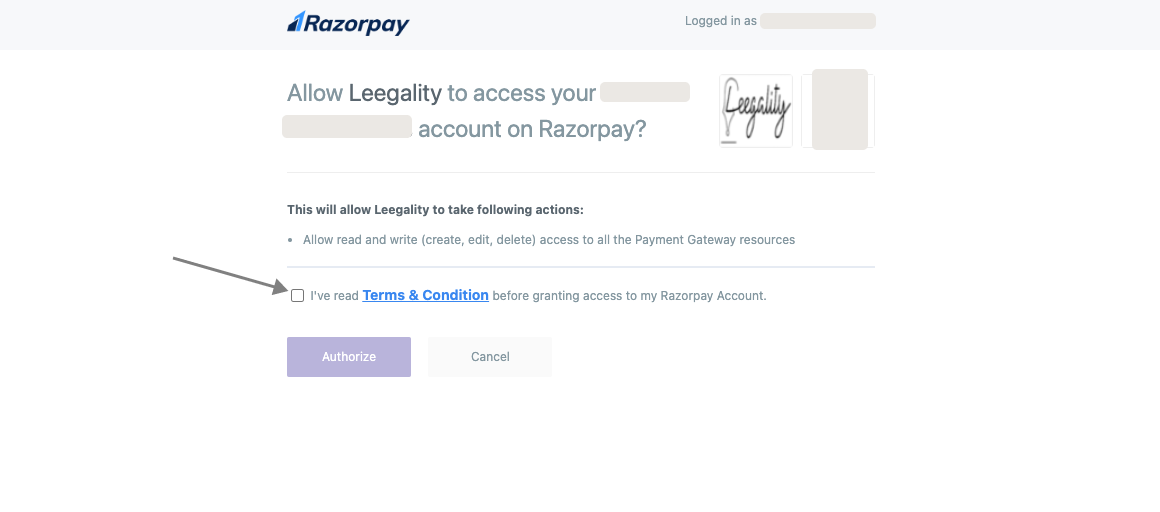
Step 5: Tick the ‘Terms and Conditions’ checkbox and click on ‘Authorize’ to complete Payment Gateway Linkage.
Step 6: After completing this process, you would receive an email stating that you have agreed to provide Leegality access to your Razorpay account. The email will be sent to the email id linked with the Razorpay account.
Step 7: Toggle on ‘Enable Payment Collection in Signer/ Reviewer journey’. Then click on Update to save the change.

You can now use the ‘Leegality Payment Collect’’ feature while sending signing invitations.
Configuring Leegality Payment Collect- New Document Flow
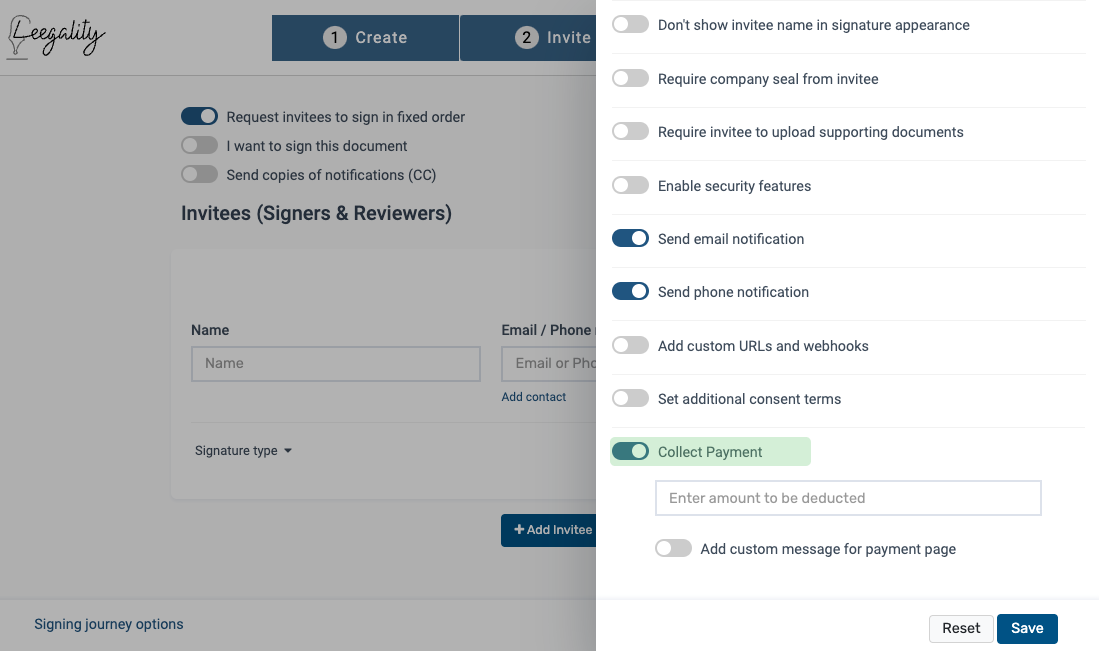
Step 1: On the invite page, click on ‘Invitee level options’ of the invitee you want to collect payment from.
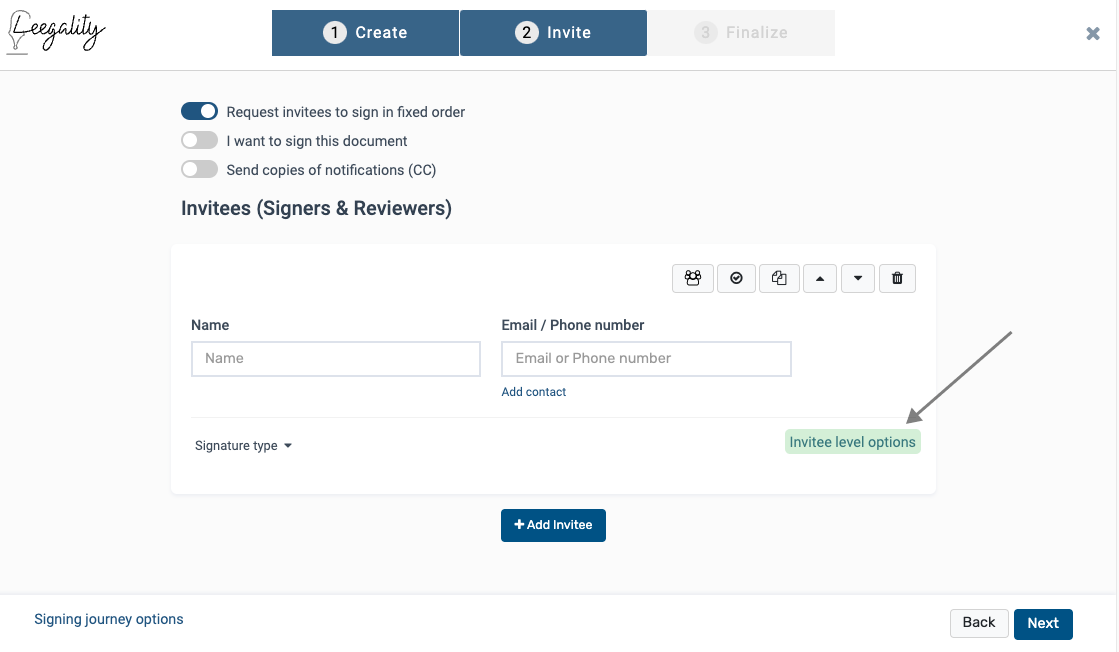
Step 2: Toggle on ‘Collect Payment’. You can enter the amount you want to be collected from the invitee in the dialogue box below the Collect Payment toggle. You can also add a custom message which will be shown to the invitee before they initiate payment.

Note: The Amount Range:
Minimum- Rs. 10
Maximum- Rs. 1,00,000
Step 3: Click on the Save button after entering all the details.
Configuring Collect Payment- Workflow
Step 1: On the invite page, click on ‘Invitee level options’ of the invitee you want to collect payment from.
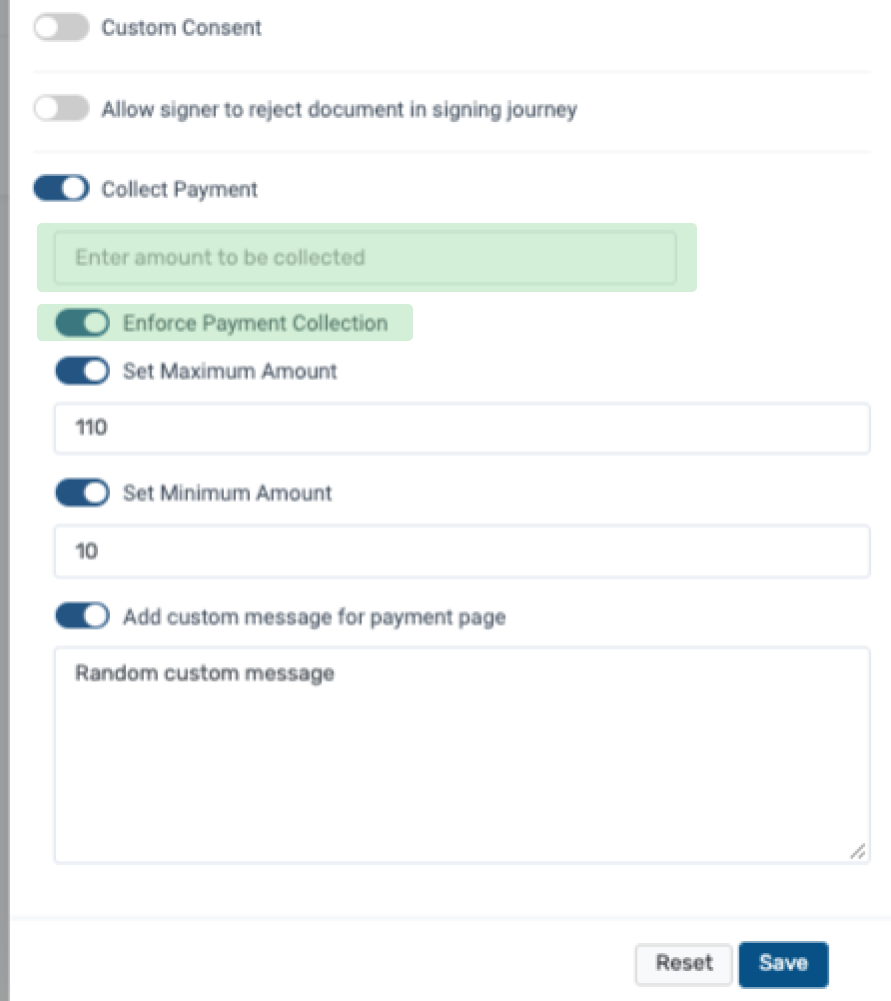
Step 2: Toggle on ‘Collect Payment’.
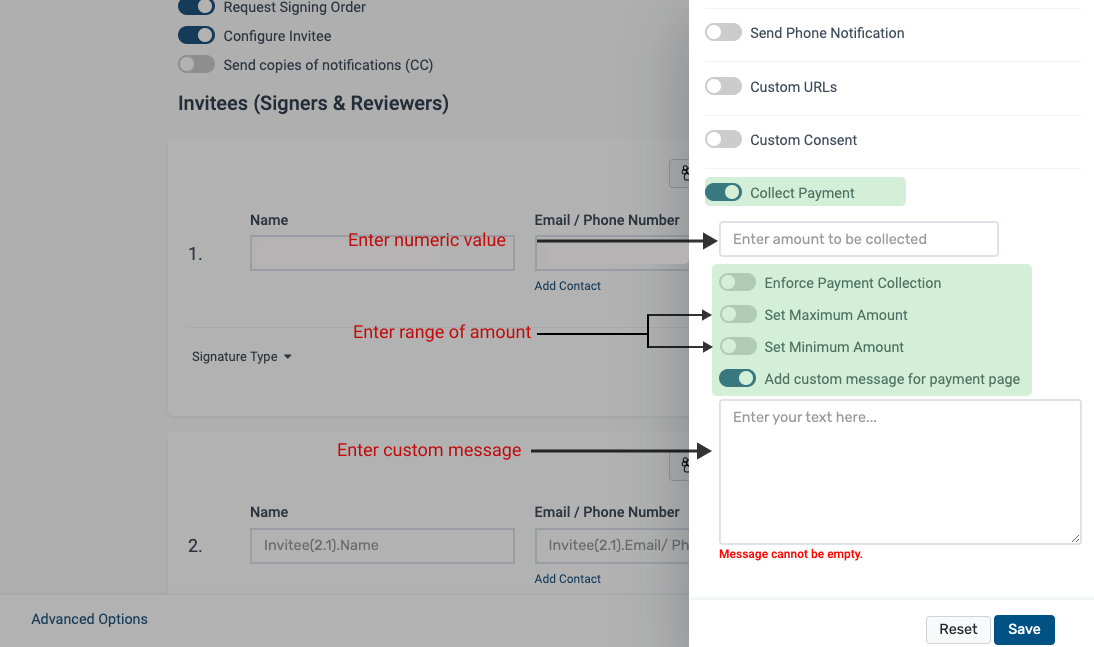
1. ‘Enter amount to be collected’ Input: If this field is left blank then the user running the workflow can set an amount to be collected. If a value is set in the input box, the value will be used as is.
2. Enforce Payment Collection- Turn on to make payment compulsory for eSigning/ Reviewing. If left unchecked, the user running the workflow has an option to not configure any payment to be collected.
3. Set Maximum Amount- Maximum amount that can be collected while running the workflow.
4. Set Minimum Amount- Minimum amount that can be collected while running the workflow.
5. Add custom message for payment page- Custom message which is shown to the invitee before they initiate payment.
Step 3: Click on the Save button after entering all the details.
Sending a Document via Workflow
If you are not familiar about running workflows generally, use this Guide to learn more about running a Workflow via the Leegality dashboard - Running a Workflow
Running a Workflow
1. First let’s also cover a scenario where the workflow runner has to enter an amount while running the workflow.
2. If Enforce Payment Collection is turned on while configuring a workflow, the user will have to enter an amount to be collected.
3. If maximum and minimum amount isn’t entered, then by default the minimum value is Rs. 10 and the maximum value is Rs. 1,00,000.
Sending a document(s) using Excel Upload
If you are not familiar with using Leegality’s excel upload functionality, use this Guide to learn more about Sending a document(s) using Excel Upload - Running a Workflow - Via Excel Upload
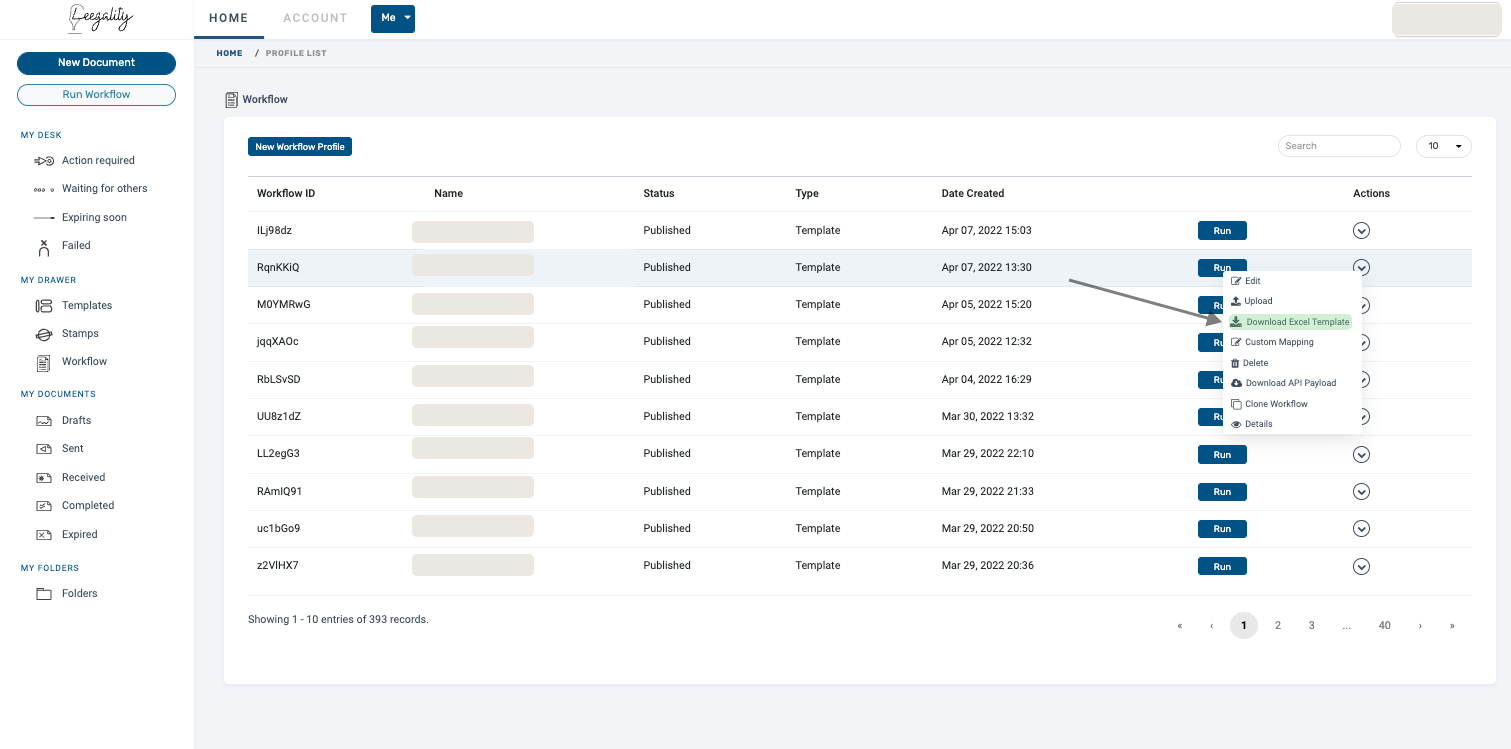
Step 1: After configuring a workflow, an excel template for the same can be downloaded from the dashboard
Step 2: In case an amount to be collected is preconfigured in a workflow for a particular invitee, any new amount entered in the excel file will be ignored by Leegality and the value set at the time of configuring the workflow will be used. In this case, the value under the header ‘Invitee(0).amount’ can be left blank.
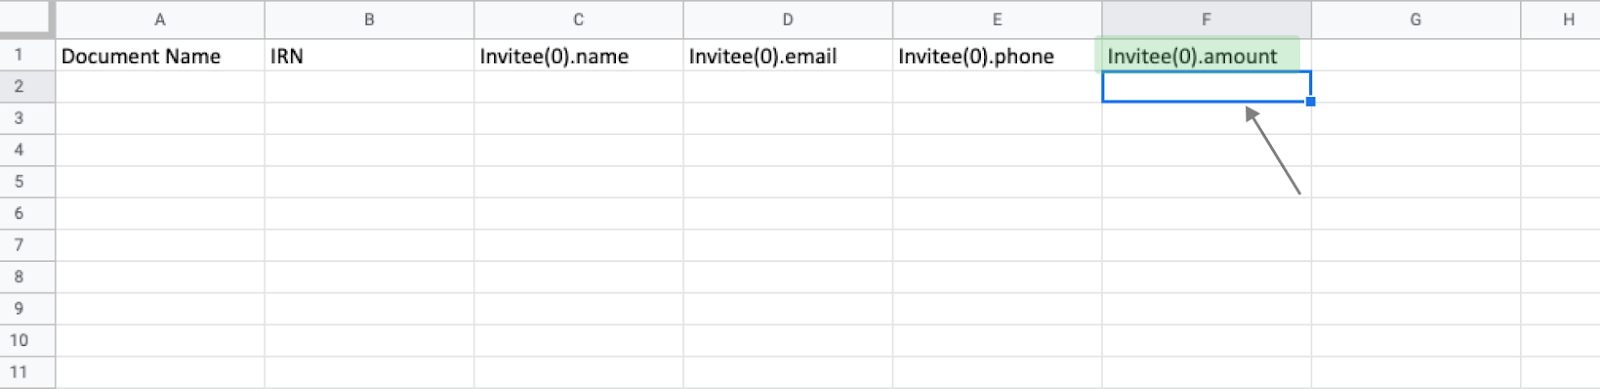
Step 3: If Enforce Payment Collection is turned on while configuring a workflow and the amount to be collected isn’t preconfigured, the user will have to enter a value for the column
Invitee.amount (for that particular invitee).
Step 4: Excel Upload won’t work in the following situations- if the amount to be paid entered in the excel spreadsheet is more than the maximum amount configured or less than the minimum amount configured for that invitee in the workflow.
Custom Mapping
Use this Guide to learn more about Custom Mapping in the Leegality Dashboard - Custom mapping of workflow spreadsheet template
Signing Journey
Step 1: You as an invitee will receive a signing link to the document.
Step 2: You can preview the document they will be eSigning/ reviewing.
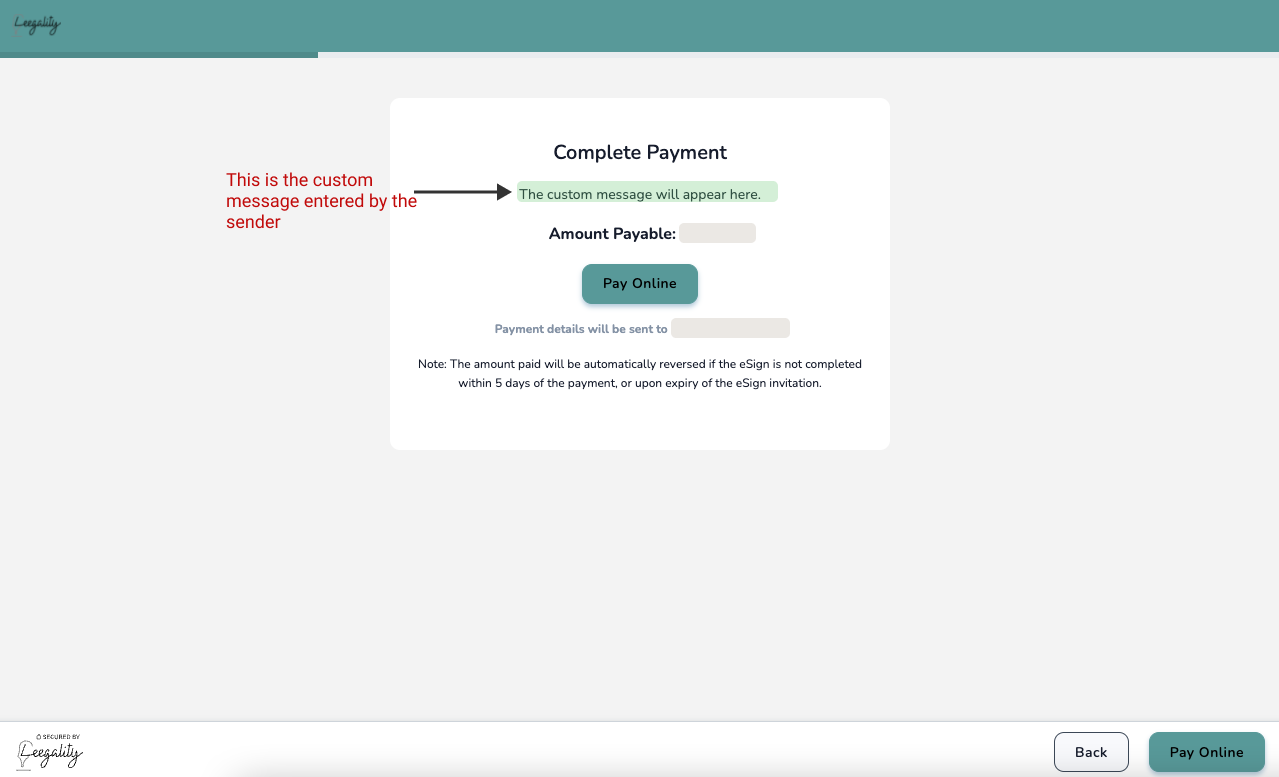
Step 3: Before eSigning/ reviewing, you will have to complete payment (amount as set by the sender).
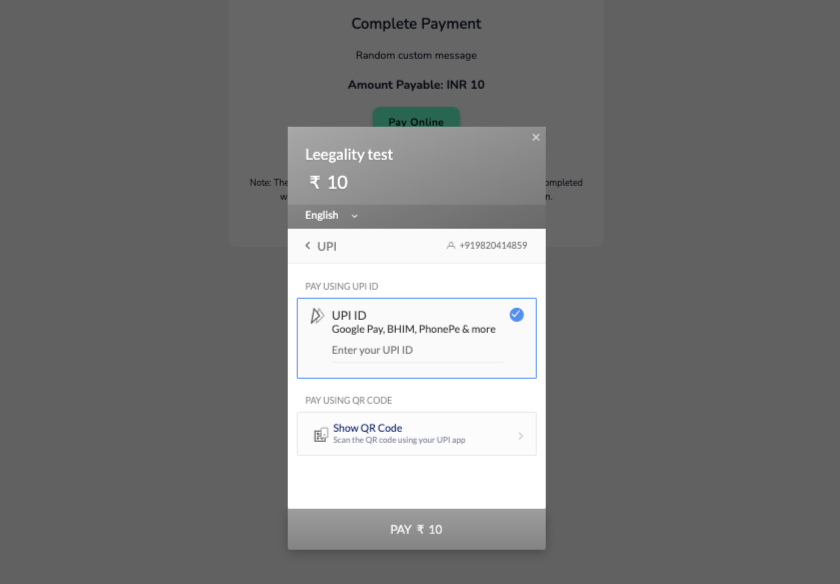
Step 4 : Click on the ‘Pay Online’ button as shown below-
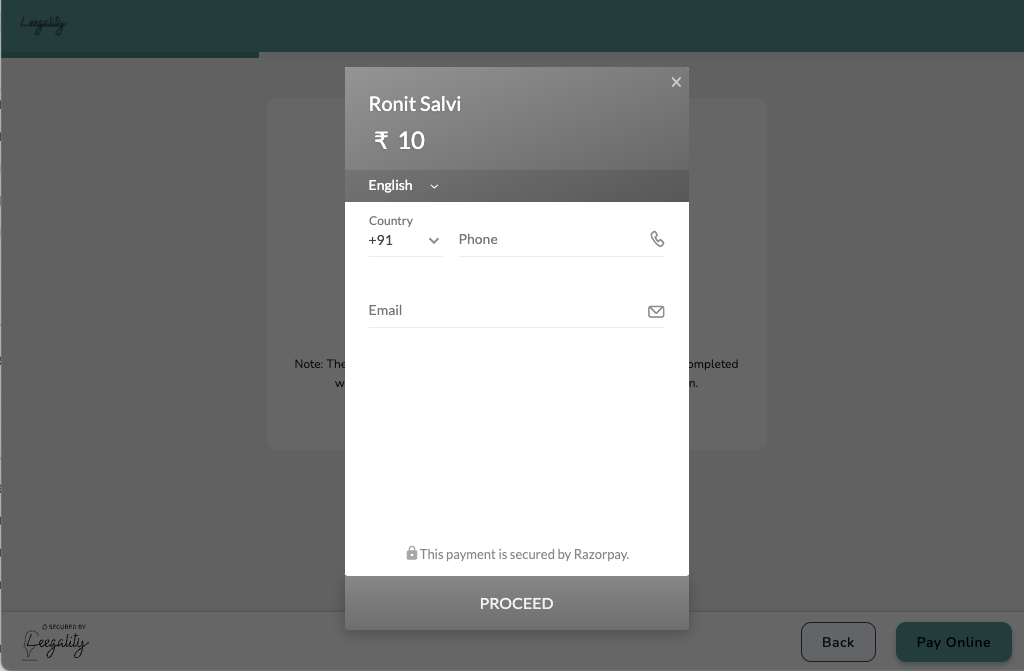
Step 5: Enter mobile number and email address and click on ‘Proceed’.
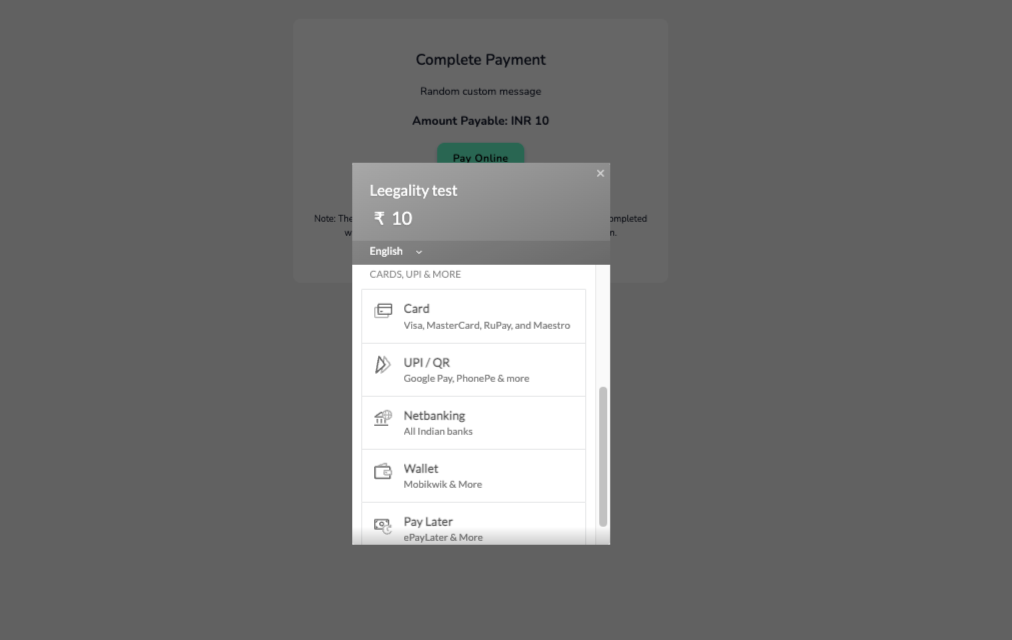
Step 6: Select the mode of payment and proceed to pay.
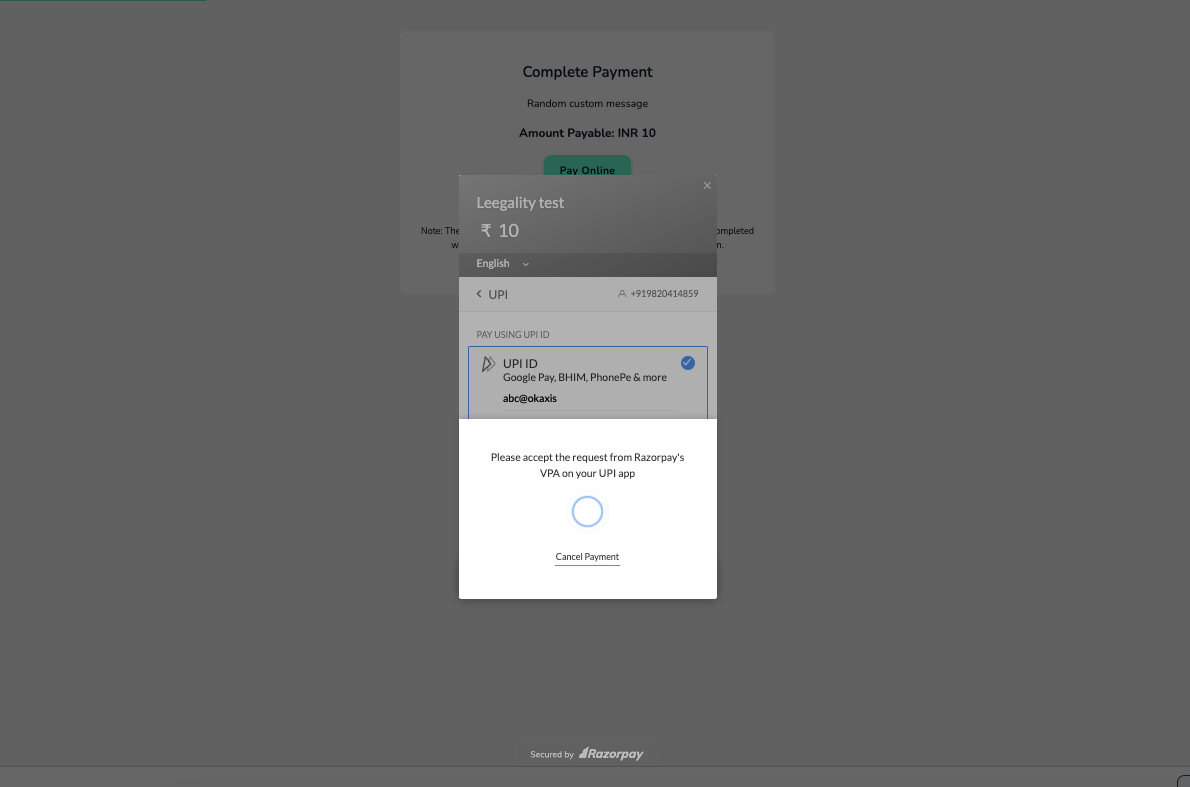
Step 7: After a successful payment, you can proceed to eSigning/ reviewing the document. Details of the payment will be sent to the payer and the sender. The payment gateway and bank may also send separate notifications.

Step 8: Complete the signing journey within 5 days of payment, else payment will be reversed. Payment reversal is notified via email-

Step 9: Payment reversal takes time and funds typically will hit the bank account of the payer in 7 to 12 business days.
Step 10: After a reversal, if the signing journey is attempted again - then the signer will have to pay again (since the previous amount was reversed)
Note: Payment Methods and Transaction Limits : https://razorpay.com/docs/payments/payment-methods/transaction-limits/

You can reach out to your Razorpay account managers to increase these limits.
Payment Status of Invitees
Step 1: The sender can check the status of payment on ‘Details’ page
Step 2: Click on the ‘View Payment Logs’ icon
Step 3: The modal shows the date of payment by the signer/ reviewer, the payment ID, amount paid and status of payment
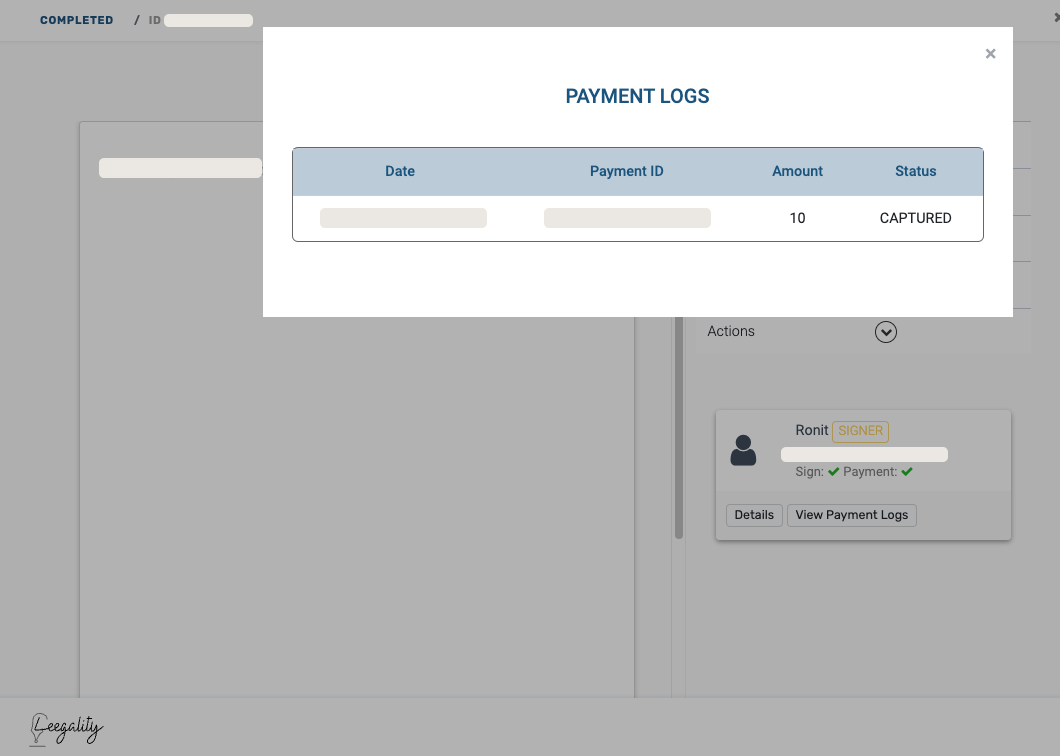
Status Meaning-
Authorized: Payment has been completed by the signer, but the sign/review itself is not completed. Funds have been deducted from the payer’s bank account but have not yet been earmarked for deposit in the recipient’s bank account.
Capture: Payment as well as eSigning/ reviewing has been completed. The amount is earmarked for depositing into the recipient's bank account. Note that funds take some time to reach the recipient’s bank account.
To know how settlement works, visit https://razorpay.com/settlement/
Payment Logs
Payment Authorised: This log is created when the payment is made by the invitee but the document is not signed by the invitee.
Note: Payment will be reversed if the document is not signed.
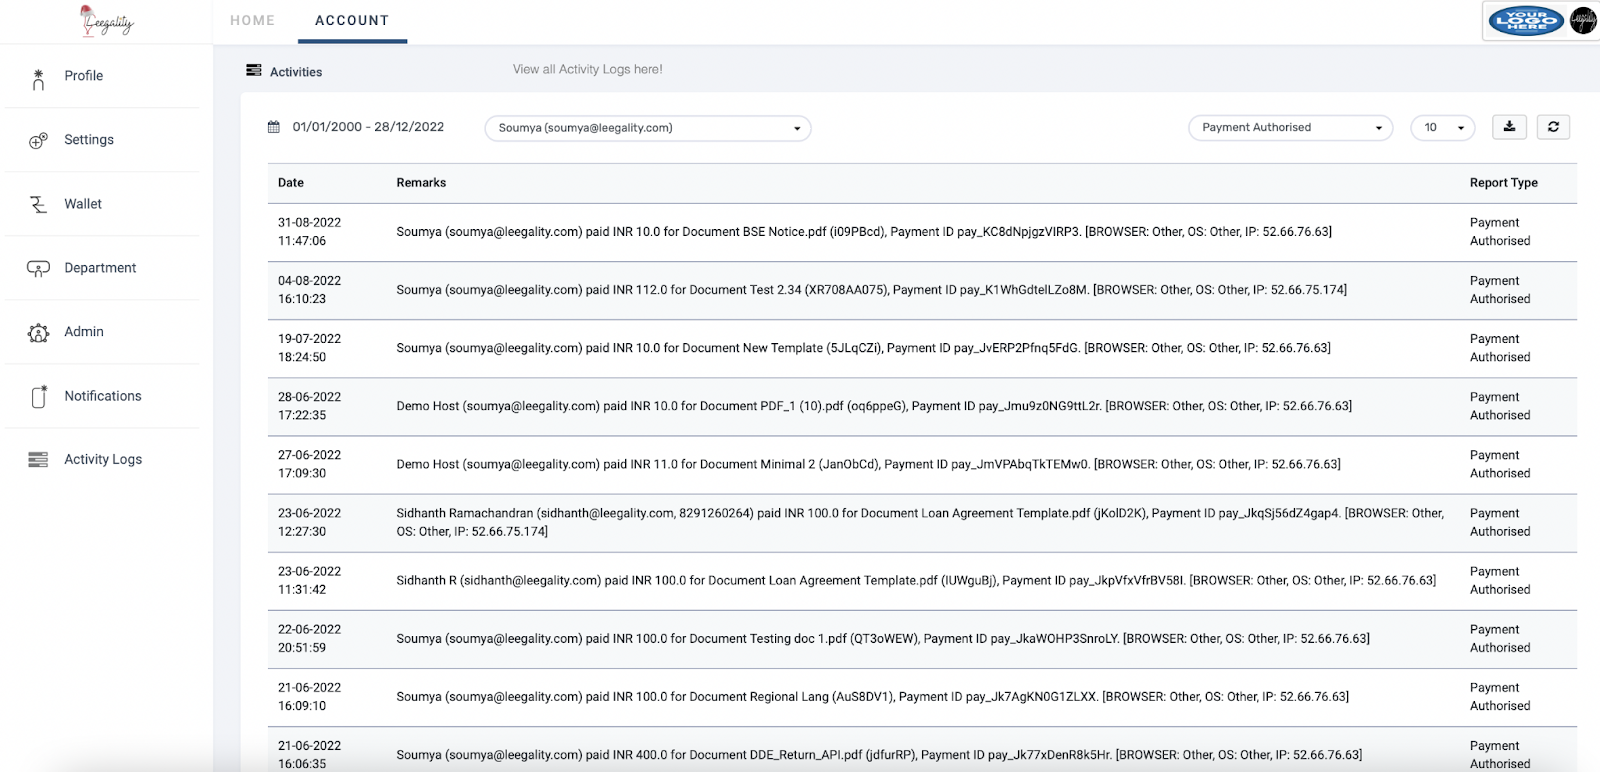
Payment Captured: This log is created when the payment is made by the invitee and also document is signed by the invitee.
Payment Refunded: This log is created when the payment is refunded to the invitee.

Refund scenarios
Paid amount is refunded if the signing/ reviewing journey is not completed within 5 days of the payment, including by way of expiry of the documentation.
Related Articles
Leegality Getting Started Guide
This guide aims to familiarize you with Leegality’s document infrastructure platform and the capabilities available to you as a user. Leegality is a unified e-Signature, Digital Stamping, and Document Workflow platform tailor-made for the unique ...Leegality Home
Before you proceed with this Knowledge Base, an important point to note – several of the processes and steps here can be fully automated and integrated within your own application through our APIs (docs.leegality.com). Therefore, if you are ...Activity Logs
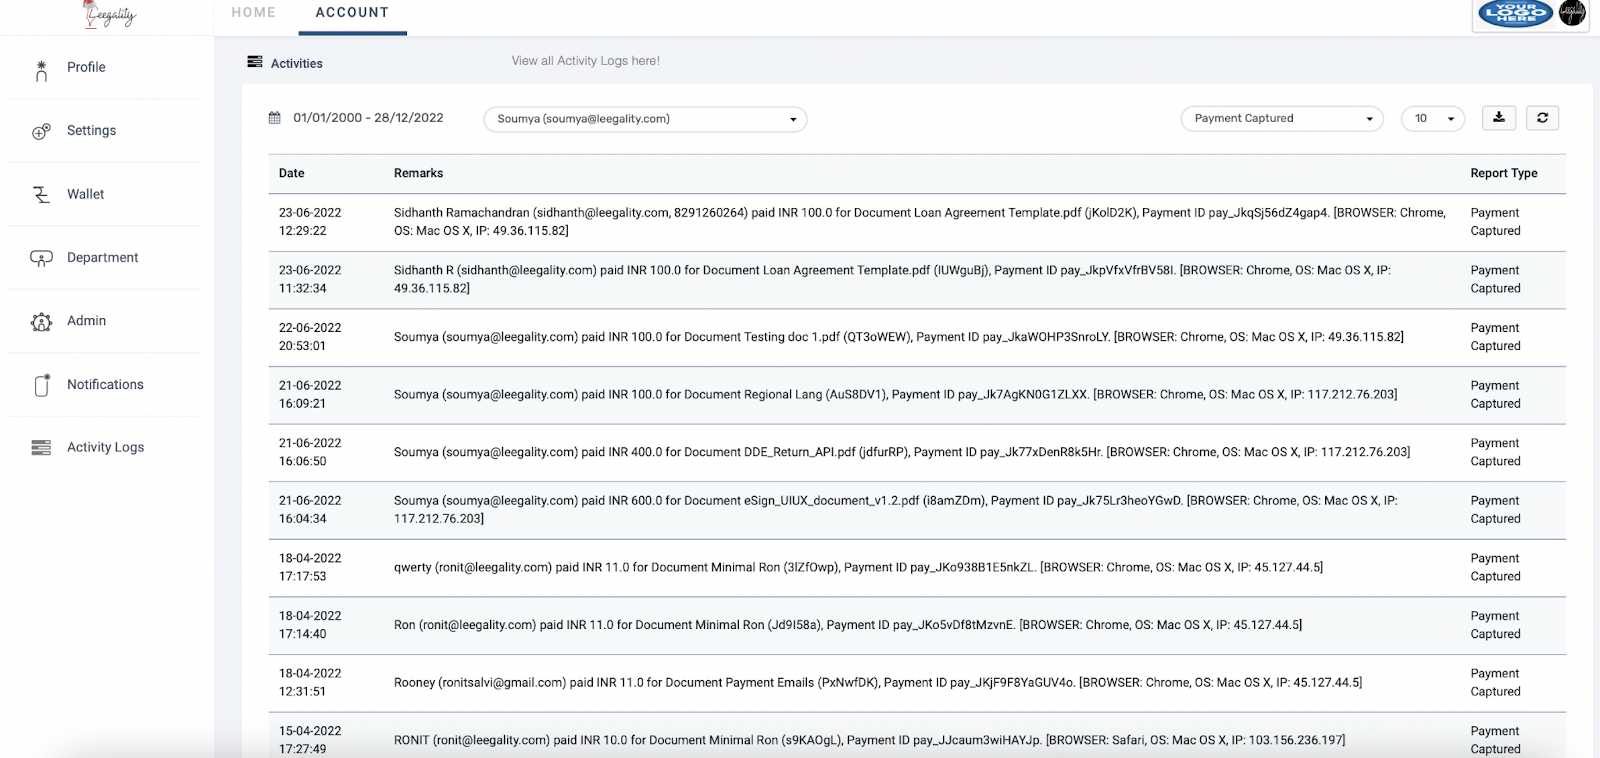
The “Activity Logs” are comprehensive logs recording all account activity on Leegality. The logs can be filtered as per your requirement with the appropriate date range provided at the top of the page. Steps to reach Activity Logs Click on the ...Extending the Use-by date of stamp papers in the Leegality dashboard
Stamp papers procured via Leegality have a default use-by date of 6 months from the date of purchase, after which the stamp papers are removed from the circulation of usable papers and move into the expired section. Note: This is not a regulatory ...Dynamic Stamping
Dynamic stamping is a layer on top of the stamp series method followed by Leegality. As the name suggests group stamping allows you to add various stamp series of a single state into a group in order to facilitate Value-based stamp duty payment. How ...