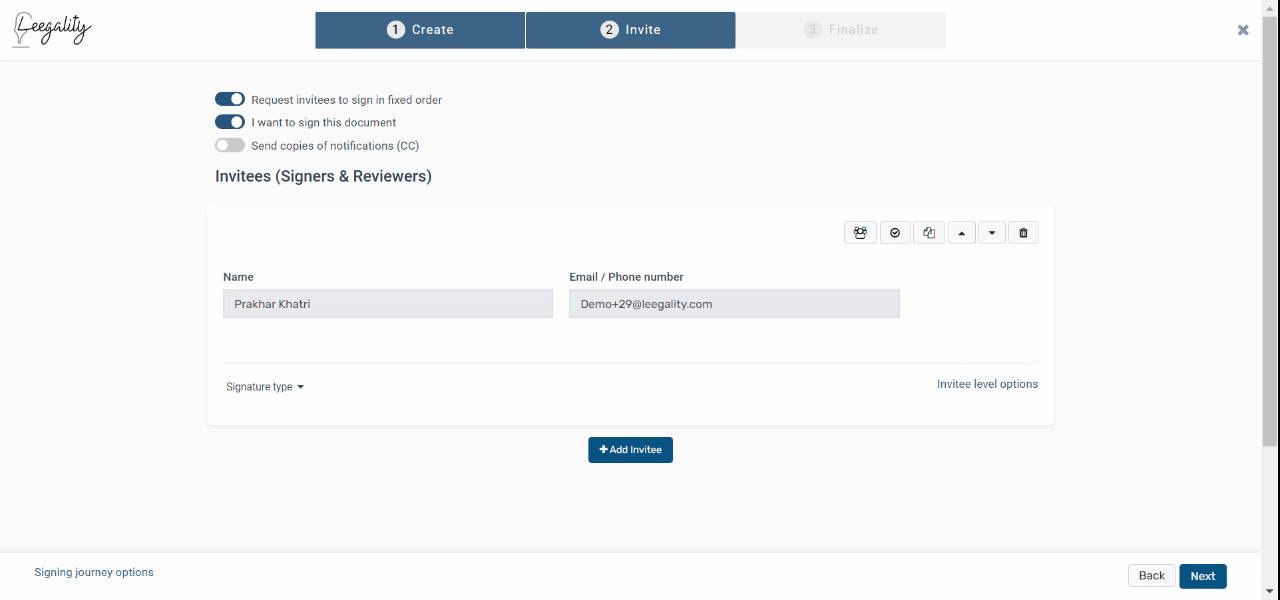
Signing Journey Options
“Signing journey options” are to further modify the signing journey for all the invitees.
By using “Signing journey options”, the sender of the document can:
Set expiry of signing link

Note: An invitation to eSign is valid for 10 days by default.
The minimum expiration time is 45 minutes which can be set by entering '-1'.
“0” Days expiry means the invite will expire at 11:59:59 hours of the sent date.
Greater than 0 any number entered represents the number of days the invite will be valid.
Note: Expiry days can not be set greater than 365.
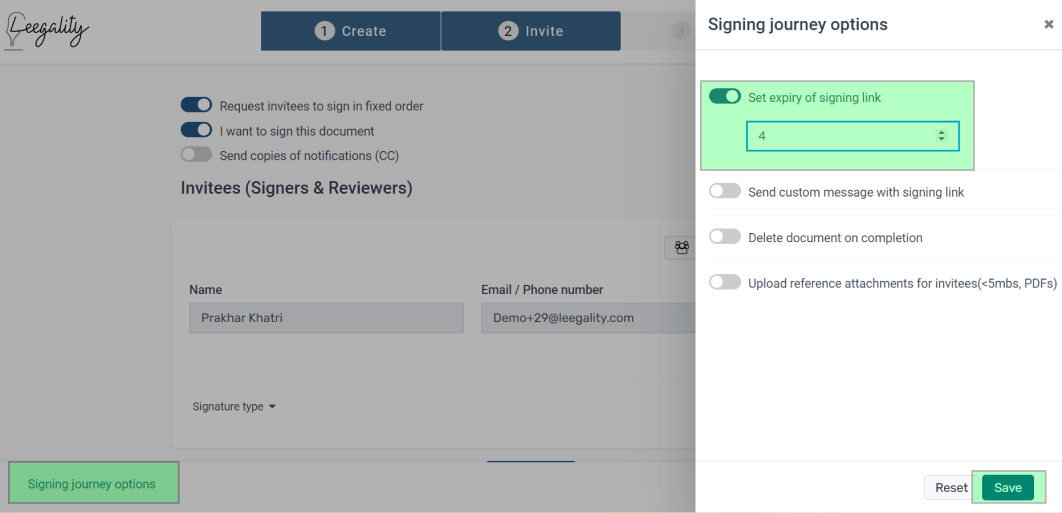
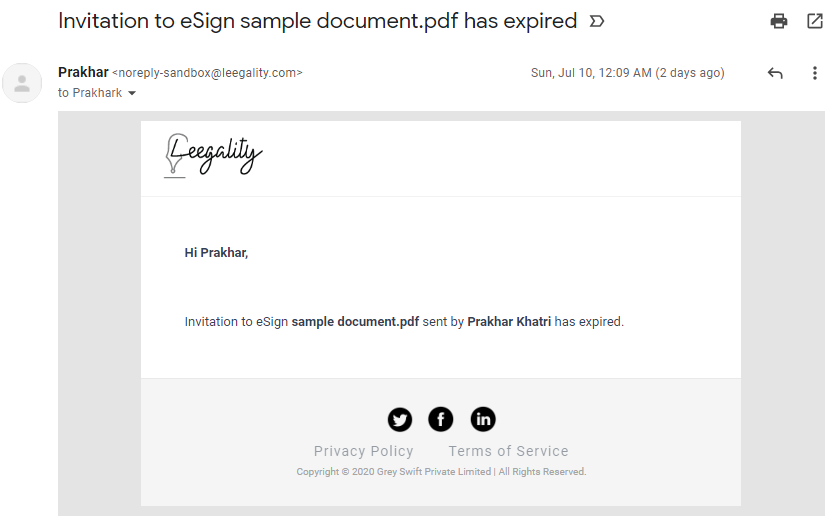
Once the document is expired, the email/SMS notification will be sent to the signer.

Send custom message with signing link
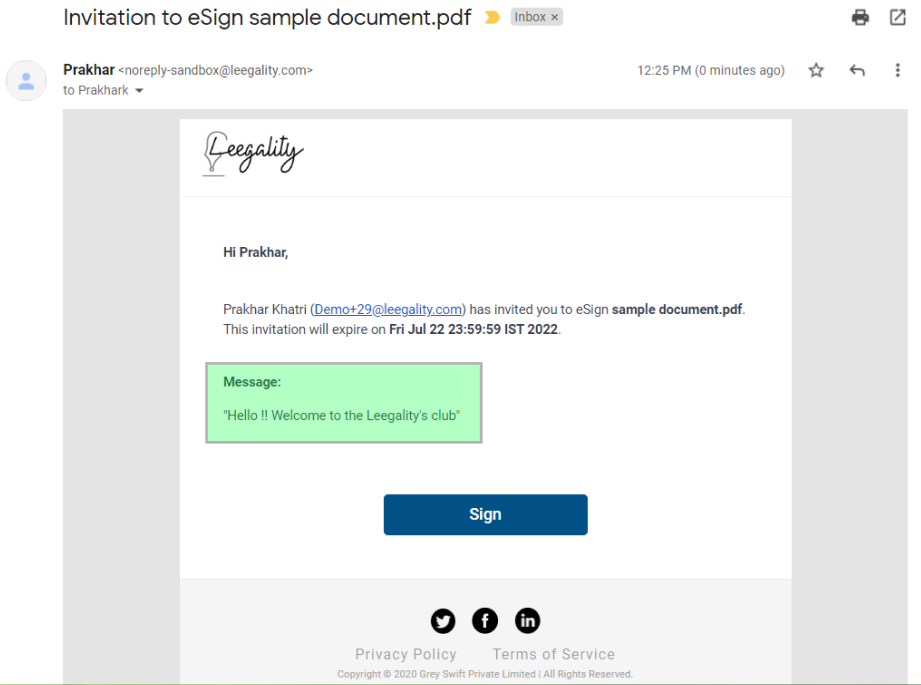
Email invitation triggered to the signer with a custom message
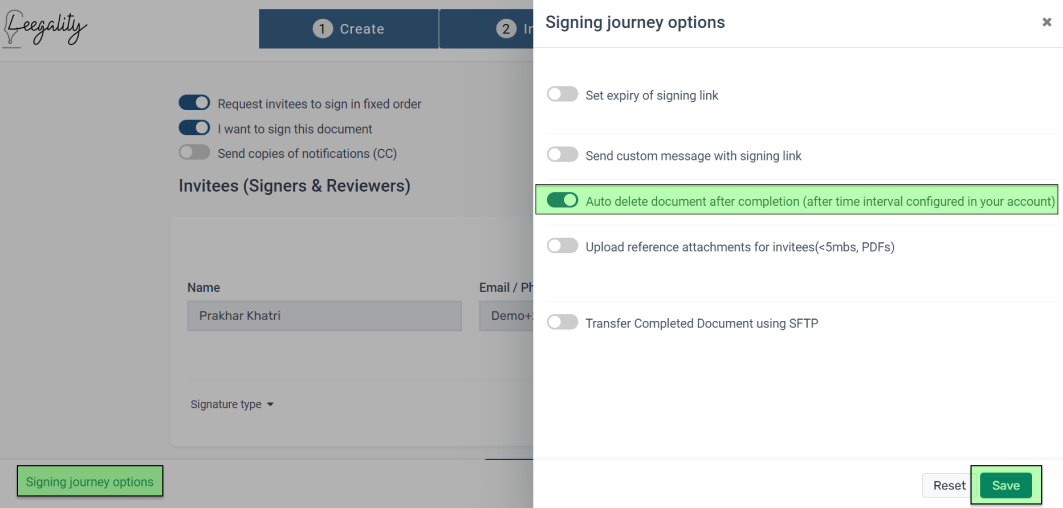
Delete document on completion
Toggling the option “ Delete document on completion” will result in your copy of the document being deleted from Leegality’s servers after the duration configured in this setting.
Note: This option can be enabled from the document settings.
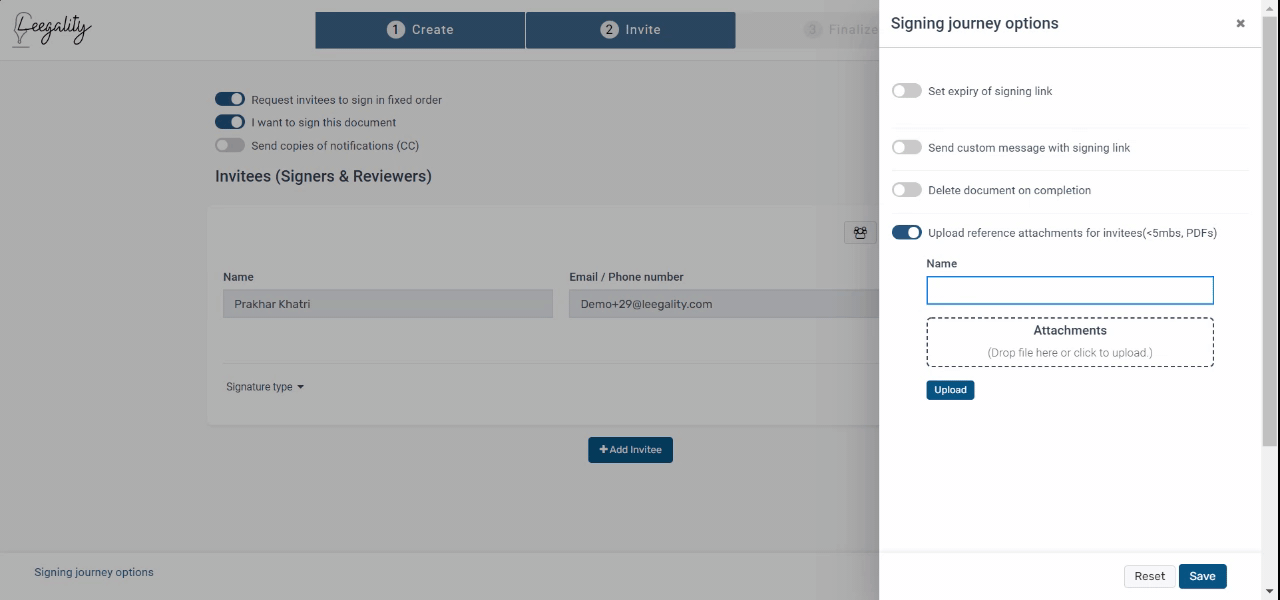
Upload reference attachments for invitees(<5mbs, PDFs)
“Upload reference attachments for invitees(<5mbs, PDFs)” allows you to add attachments to documents being sent to the invitee which can be accessed by them in the signing journey.
- On the Invitee Configuration page, select Signing Journey Options on the bottom right.
- Then toggle on Upload reference attachments for invitees.
- Upload the Reference attachment and give it a suitable name.
- After the reference document is selected click Upload button to attach the reference document.
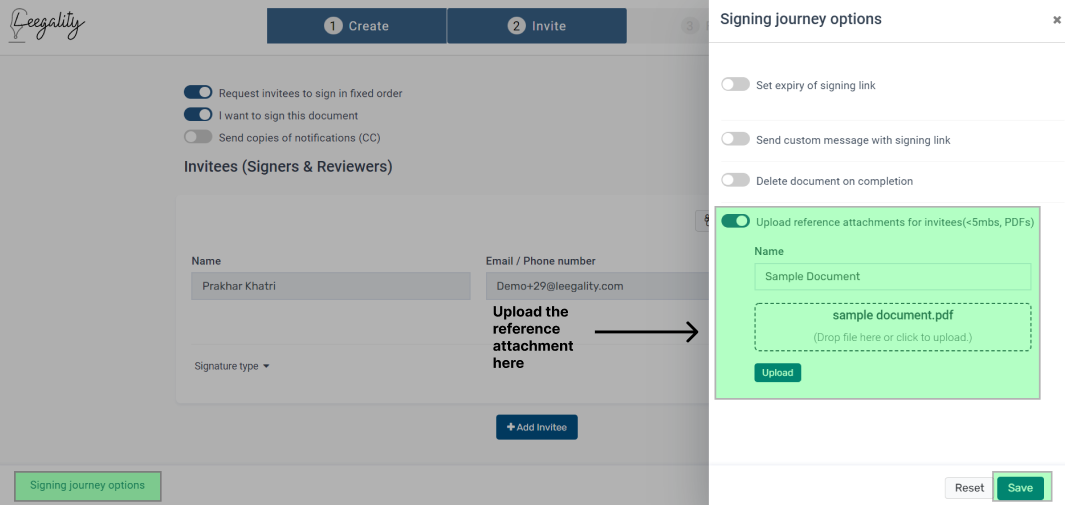
Note: Reference documents should be less than 5MB.
Add Reference Attachments after sending a document invitation
- Go the the details page of the invitation.
- From the Action dropdown, select Reference Attachment option.
How Invitees can access Reference Attachments in Signing Journey
- Click on the attachment icon (📎) on the right. Here, you will access all reference attachments.
- Click Preview to see the attachment and you can also Download it.

Transfer Completed Document using SFTP
Toggling on “ Transfer Completed Document using SFTP” helps in providing secure file access, file transfer, and file management of signed documents and audit trails.
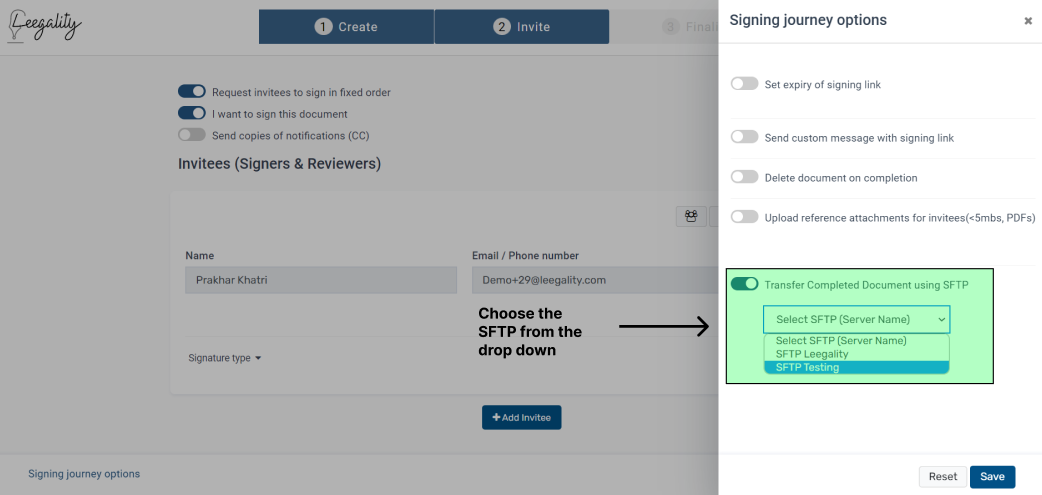
To read more about the functionality of Secure File Transfer Protocol - SFTP, click here.
Related Articles
Preview Options
Once the content is created in the display area, to see how the document will be displayed to the signer, the template engine provides 3 types of preview options: Generate PDF Once you have configured your template, there are a few configurations ...Invitee level options
“Invitee level options” provide various options to further modify the signing journey for the particular invitee. By using “Invitee level options”, the sender of the document can set the retry attempts for Aadhaar signing, prioritize Aadhaar ...Virtual Signature Journey
You will need to access your e-mail (and/or phone, depending on the contact details given during the invitation creation stage) to eSign the document. Email notification SMS notification Click on the ‘Sign’ button (for an email) or the signing link ...Two-factor Authentication (2FA) during signing
Description Two-factor Authentication (2FA) during signing is a security feature that ensures the authenticity of the signer of a document. 2FA mandatorily requires a sender to specify both the email address and the phone number of the signer. The ...Signing Options
Each ‘Signature Type’ has its own options that can be accessed by clicking the ‘gear’ icon. Aadhaar Aadhaar authentication can be configured to take place via an: OTP Verification Biometric Verification Iris Verification The Aadhaar certificate ...