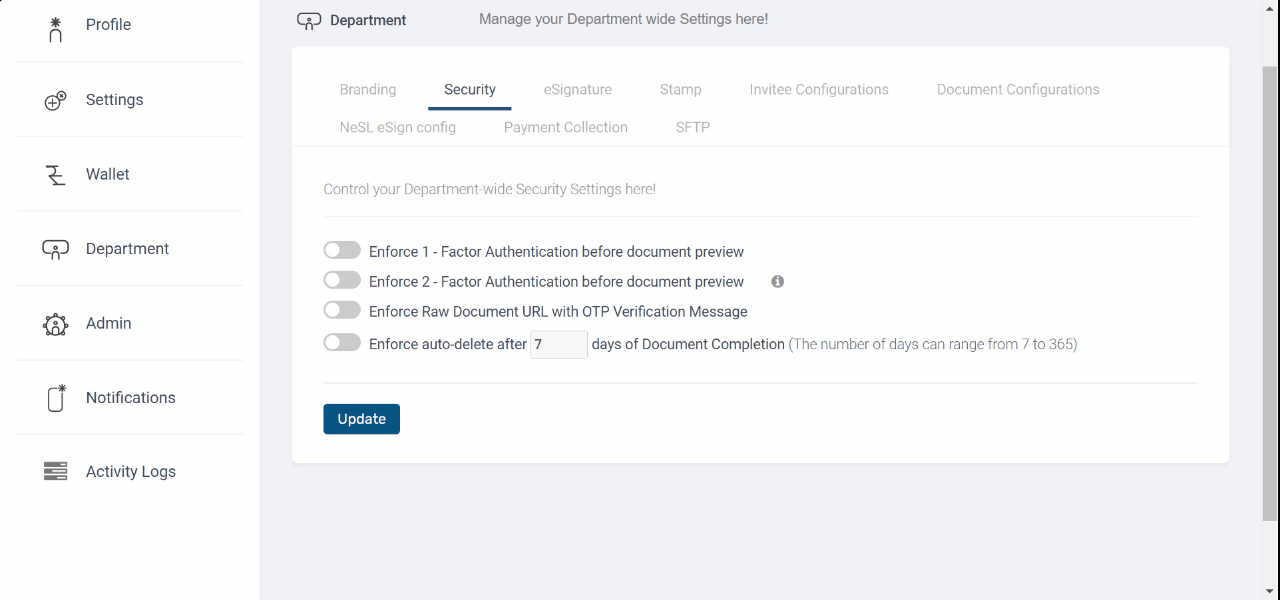
Security
The security tab allows you to configure certain safeguards for your signing invitations/documents.
In case a security setting is turned on it will be enforced upon all the documents created via new document flow and Workflow creation.
If the security setting is turned off, then the security features are configurable while sending a document via new document flow and Workflow creation.

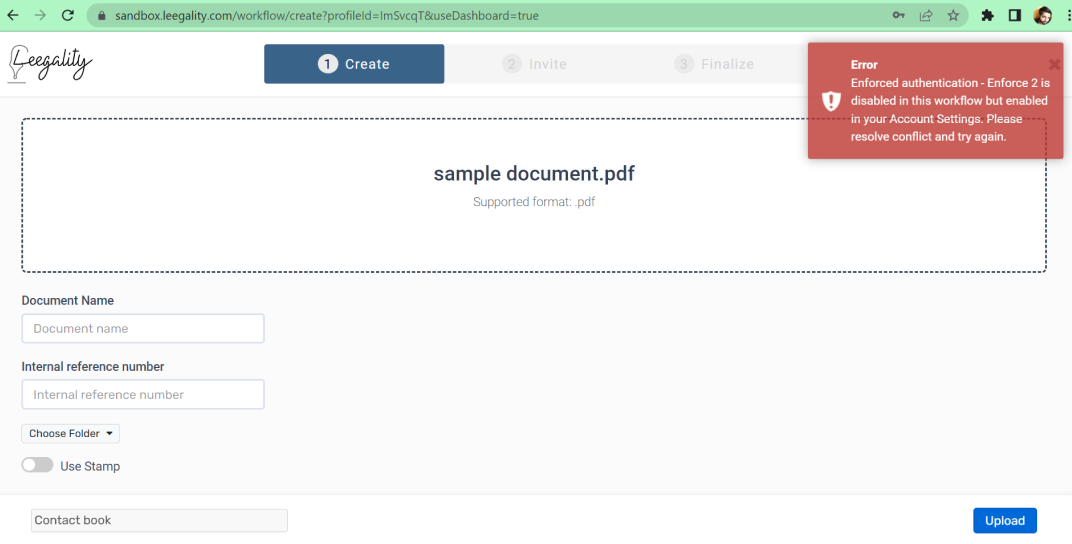
Note: While running the workflow, the error comes while running the workflow if the workflow settings conflict with the account security setting.
Steps to reach the Security tab
There are four security settings that can be activated:
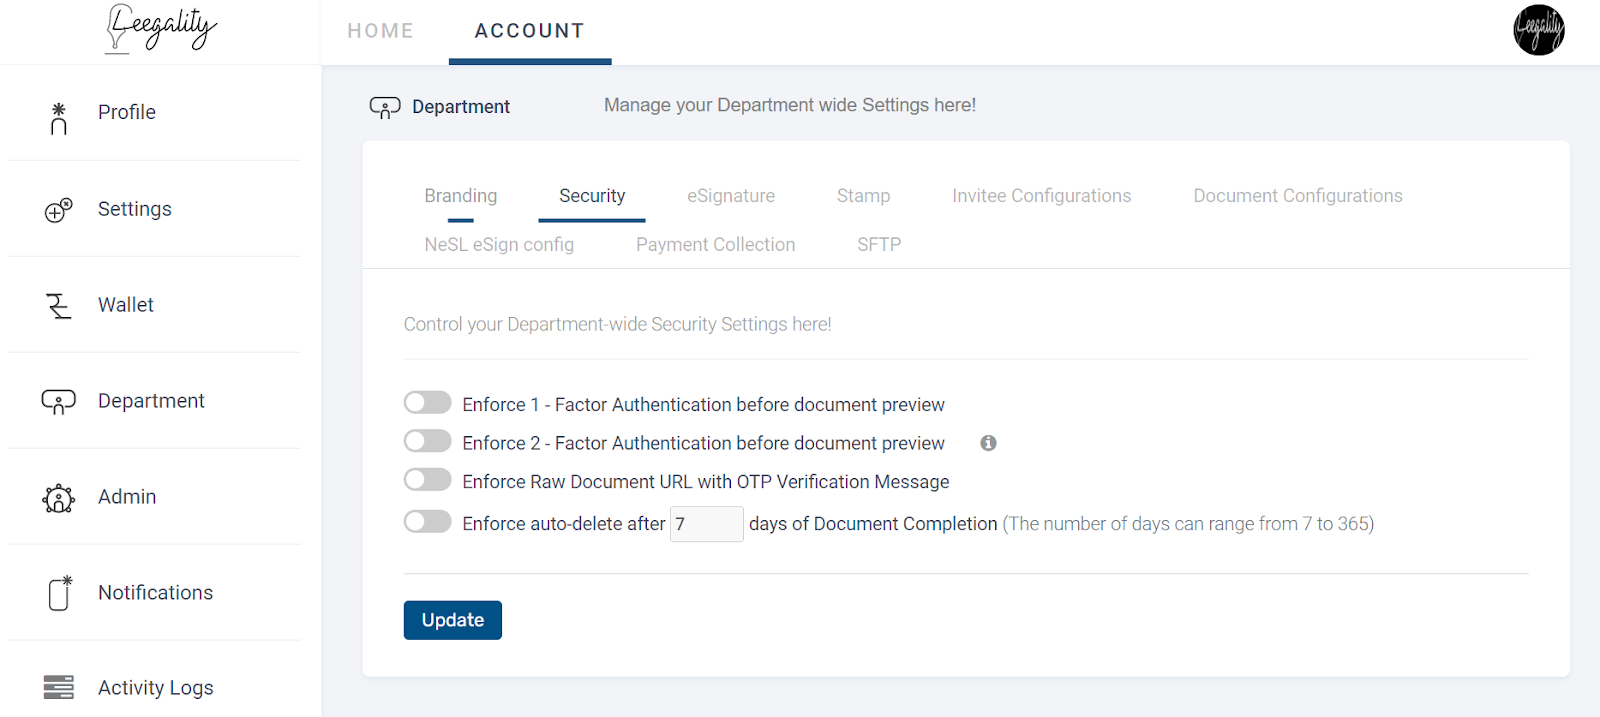
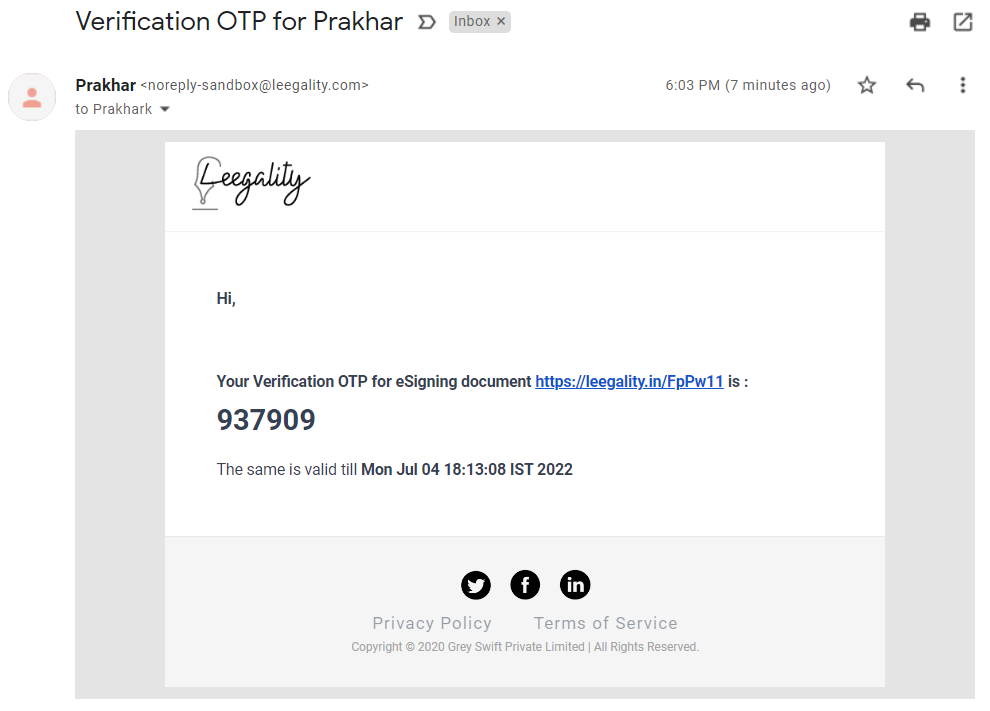
Enforce 1 - Factor Authentication before document preview:
Enabling this security feature ensures that an invitee signing a document goes through an OTP authentication through their Email ID or Phone Number (either can be configured while sending the document) before being able to view the document. This adds a layer of security to safeguard your documents in case of mistaken forwarding of signing invitation to the wrong parties.
Enforce 2 - Factor Authentication before document preview:
Enabling this security feature ensures that the invitee signing a document goes through an OTP authentication through their Email ID and Phone Number ( both have to be configured during sending the document) before being able to view the document. This adds a layer of security to safeguard your documents in case of mistaken forwarding of signing invitation to the wrong parties.
Enforce Raw Document URL with OTP Verification Message:
Enforce auto-delete of Completed Document :
Toggling on this configuration will enable auto-deletion of all documents in the completed folders for the duration configured in this setting.
Note: The number of days can range from 7 to 365 for auto-deleting the completed documents from the completed folder.
 Note for both Sender and Invitee: File size greater than 7 MB will not be shared as an attachment over email. Please access the link and download the signed agreement copy and audit trail. Post 7 days the documents will be deleted from our servers and will not be accessible to anyone.
Steps to Setup Auto-Deletion Reminder Notification
Step 1: Click on the “Account” option on the homepage, then go into the "Notification" tab and then click on the "User".
Step 2: Toggle “Auto-Deletion Reminder Notification” will be on once “Enforce auto-delete of Completed Document” is activated.
To know the steps to add the contact to Auto-Deletion Reminder Notification, click here.

Email notification
Additional resource
You can also watch a video explaining the group invitee process in detail here - Video explaining Leegality's Security settings.
Related Articles
Enable security features
The option “Enable security features” provides additional authentications to make the signer identification more robust. Require '1 - factor authentication' before document preview Enabling this security feature ensures that an invitee signing a ...NESL error codes
Parameter Missing Parameter Missing ER00P1 Response Url is Missing ER00P2 ClientId is Missing ER00P3 Authorization is Missing ER00P4 Api key is Missing ER00P5 MetaData is Missing ER00P6 Mandatory request parameter Missing ER00P7 ResponseUrl should ...Secure File Transfer Protocol - SFTP
SFTP, or Secure File Transfer Protocol, is a file transfer mechanism that uses secure shell encryption to provide a high level of security for sending and receiving file transfers. It builds on the File Transfer Protocol (FTP) and includes Secure ...Two-factor Authentication (2FA) during signing
Description Two-factor Authentication (2FA) during signing is a security feature that ensures the authenticity of the signer of a document. 2FA mandatorily requires a sender to specify both the email address and the phone number of the signer. The ...Steps for Downloading Aadhaar XML
Step 1: Visit the webpage:https://myaadhaar.uidai.gov.in/offline-ekyc Step 2: On the webpage, click on “Login”. Step 3: Enter “Aadhaar Number” and the “CAPTCHA (Security Code)” visible on the screen and click on “Send OTP”. Step 4: Enter the OTP ...