Installation Steps: Morpho RD Services
Leegality’s Aadhaar sign supports fingerprint-based e-signing using the Morpho 1300 E3 biometric device.
In order to use the biometric device in the signing journey, you will need to connect the device to your computer/mobile and download the necessary drivers/helper app. This document sets out the prerequisite steps for using the Morpho 1300 E3 biometric device in eSign journeys.
To download the Mopho RD service for windows devices click here.
Install the Morpho RD Services for Windows
Step 1: Download the Mopho RD service for windows devices by clicking here. Connect the biometric device to your computer.
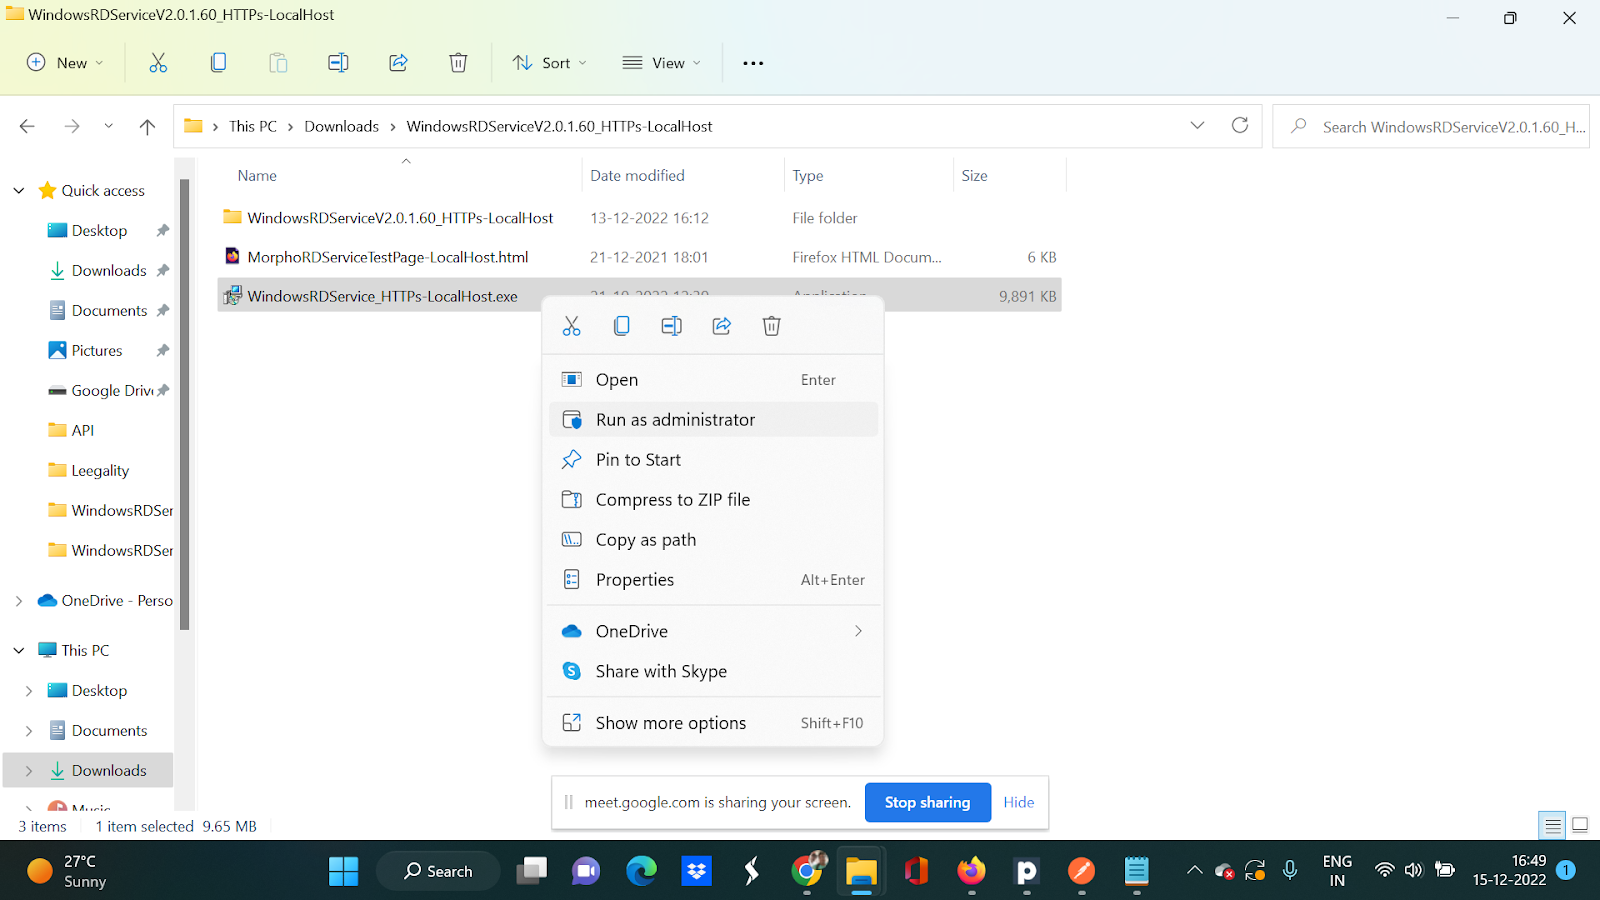
Step 2: Run the downloaded file as an administrator.
Step 3: Click on "Next" to proceed to Installation
Step 4: Click on Install to install the Client Service.
Step 5: After clicking on Install, the system will start installing the Morpho RD Service.
Step 6: On finishing the installation of the driver, the Morpho RD service window will pop up. Select “No, I will restart the compute later” and “Finish”.

Settings to be changed in Chrome Browser
Step 1: Once the RD service is installed open the URL in the chrome browser: chrome://flags/ in the new tab.
Step 2: Enable “Allow invalid certificates for resources loaded from localhost.”

Step 3: Post enabling, relaunch the chrome browser.
Settings to be changed in Mozilla Firefox
Step 1: Download the java run time by clicking here.
Step 2: Download Mozilla Firefox 32-bit by clicking here.
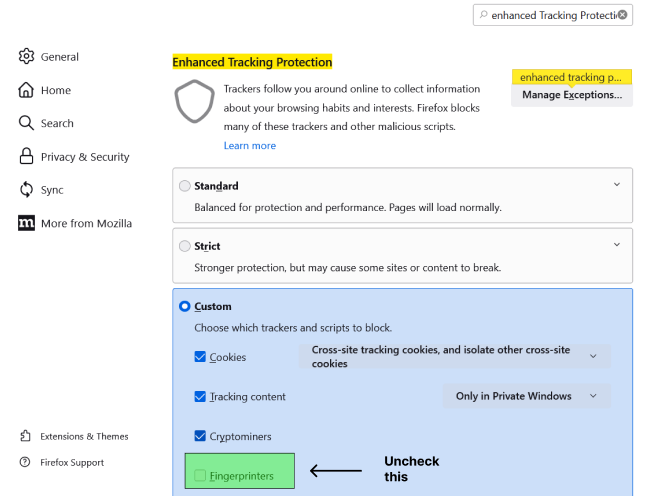
Step 3: Go to the Mozilla setting, under privacy and security settings search “Enhanced Tracking Protection”.
Select custom and remove “Fingerprinters” and restart the browser.
Related Articles
Installation Steps: Mantra MFS 100 Device
Leegality’s secure virtual sign supports fingerprint-based e-signing using the Mantra MFS 100 biometric device. In order to use the biometric device in the signing journey, you will need to connect the device to your computer/mobile and download ...Fingerprint Capture - Aadhaar Esign
Leegality’s Aadhaar Signature type allows users to sign using their fingerprint via a registered biometric device connected to a Windows PC or Android Mobile phone. Steps to activate Aadhaar biometric sign type Step 1: Click on the “Account” option ...Steps for Downloading Aadhaar XML
Step 1: Visit the webpage:https://myaadhaar.uidai.gov.in/offline-ekyc Step 2: On the webpage, click on “Login”. Step 3: Enter “Aadhaar Number” and the “CAPTCHA (Security Code)” visible on the screen and click on “Send OTP”. Step 4: Enter the OTP ...Aadhar Transaction Biometric Errors
This article guides troubleshooting common errors encountered during Aadhar biometric transactions by providing clear explanations of error codes, possible causes, and actionable solutions. Error Code Error Description Error Details Recommended Steps ...Steps for Creating Signer ID using PAN
Visit https://esign.e-mudhra.com/UI/createNewUser.jsp Enter your Full Name, Mobile Number, Email ID, and a 6 digit PIN. Note the PIN in a secure manner, as it will be required at a later stage for using the SignerID. After entering the above details, ...