Enable security features
The option “Enable security features” provides additional authentications to make the signer identification more robust.
Require '1 - factor authentication' before document preview
Enabling this security feature ensures that an invitee signing a document goes through an OTP authentication through their Email ID or Phone Number (either can be configured while sending the document) before being able to view the document. This adds a layer of security to safeguard your documents in case of mistaken forwarding of signing invitations to the wrong parties.
Require '2 - factor authentication' before document preview
Enabling this security feature ensures that the invitee signing a document goes through an OTP authentication through their Email ID and Phone Number ( both have to be configured while sending the document) before being able to view the document. This adds a layer of security to safeguard your documents in case of mistaken forwarding of signing invitations to the wrong parties.
There are 2 scenario’s in case of a 2-factor authentication:
Link accessed via email/phone number - In case the signing link is accessed via:
Invitee Email - Leegality will count that as an authentication in itself and the user will only have to carry out the OTP authentication for the mobile number
Invitee Phone Number - Leegality will count that as an authentication in itself and the user will only have to carry out the OTP authentication for the email .
Link accessed via other any other source - In this case 2 OTP authentications will be carried out. 1 for each Email and Phone Number.
Send document download link with all OTP email and messages
Enabling this security feature, a link to the raw pdf document will be sent in all the OTP verification email’s/messages.
Capture GPS location
If the security feature “Capture GPS location” is enabled, the signers will need to allow access to their location coordinates before being permitted to sign the document. The GPS coordinates captured will be reflected in the audit trail.
Activating Capture GPS location
Once the document is created or during the creation of workflow, on the invitee configuration page click on “invitee level options”, under more options toggle on “Enable security features” and then toggle on “Capture GPS location”

Signing Journey of Capture GPS location
During the signing journey, the GPS location will be captured, and click on “proceed”, the captured location will appear in the audit trail.


Note: Signer has to give the location access to the browser for capturing GPS location while signing the document.

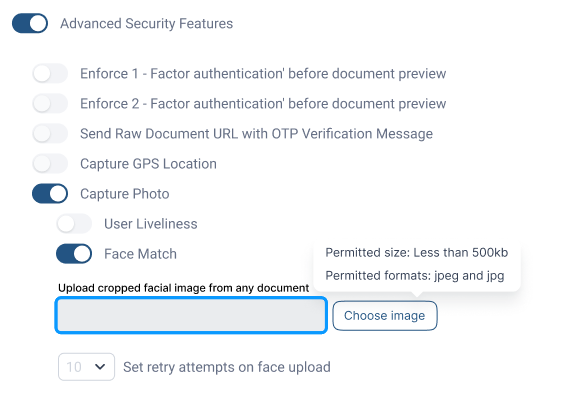
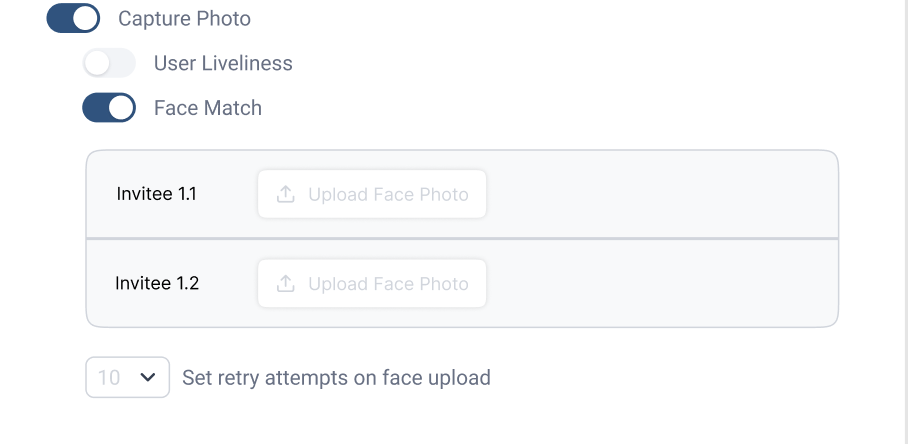
Capture photo
If the security feature "Capture photo" is enabled, the signer will need to grant access to their camera for live photo capture. The signer will not be allowed to sign the document until the live photo capture is completed.
Activating Capture photo
Once the document is created or during the creation of workflow, on the invitee configuration page click on “invitee level options”, under more options toggle on “Enable security features” and then toggle on “Capture photo”.

Signing Journey of Capture photo
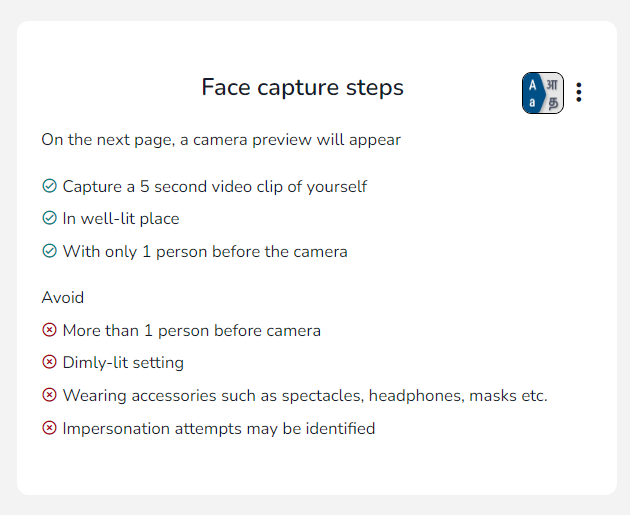
Step 1: During the signing journey, the below instructions will appear on the screen which have to be followed.
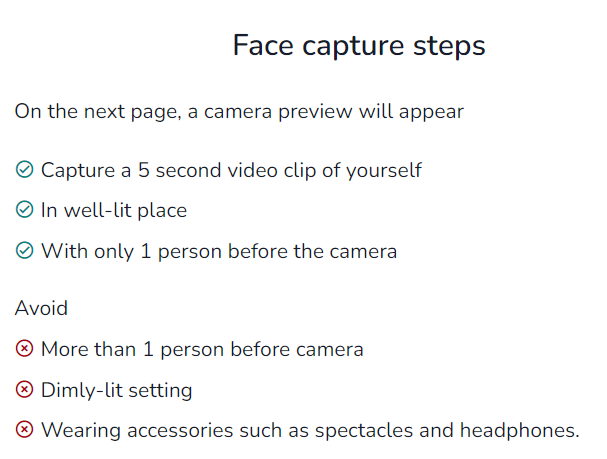

Instructions
On the next page, a camera preview will appear
Capture a 5 second video clip of yourself
In well-lit place
With only 1 person before the camera
Avoid
More than 1 person before camera
Dimly-lit setting
Wearing accessories such as spectacles and headphones.
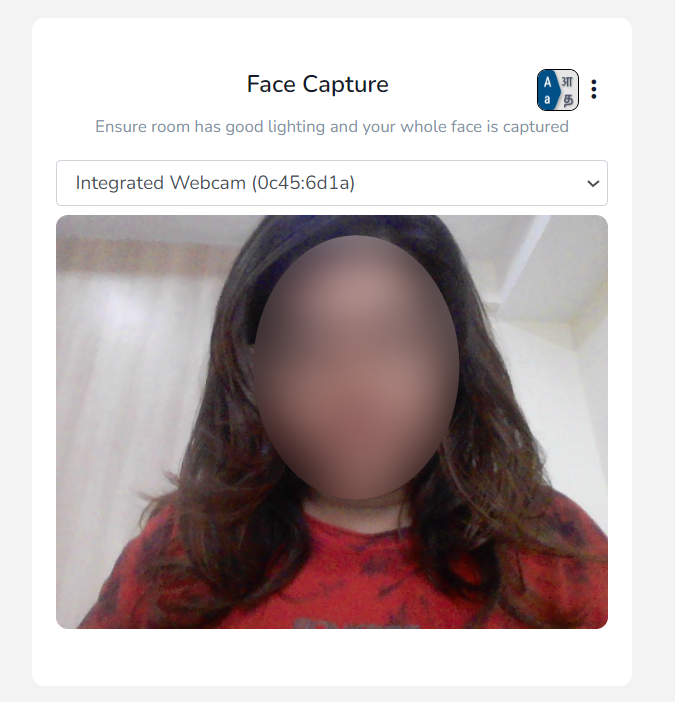
Step 2: After having the prerequisites as mentioned on the instruction page click on “Proceed”.
Step 3: The signer will need to allow access to their camera for capturing the photo.

Face capture with user liveliness check
This feature prompts the signer to do a face capture along with an OTP verification (the OTP will appear on the screen) in order to proceed with the signing process.
Activating Face capture with user liveliness
Step 1: Once the document is created or during the creation of workflow, on the invitee configuration page click on “invitee level options”, under more options toggle on “Enable security features”.

Step 2: Toggle on “Capture photo” and “User liveliness” once “Enable security features” is enabled.

In the Signing Journey
Step 1: During the signing journey, the below instructions will appear on the screen which has to be followed.
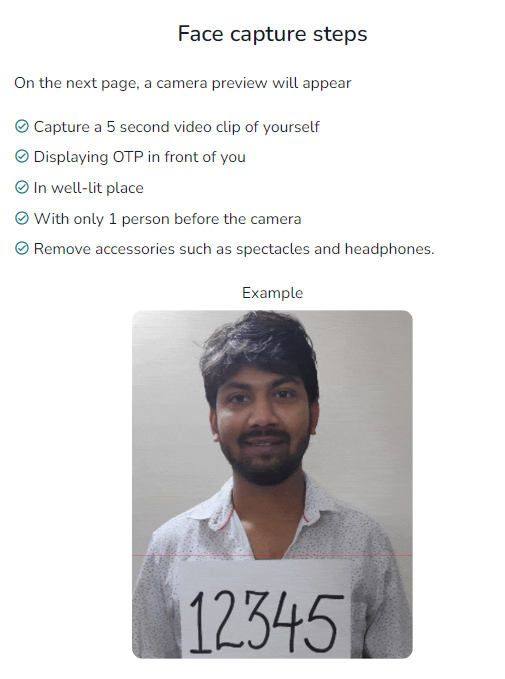
Capture a 5-second video clip of yourself
Displaying OTP in front of you
In well-lit place
With only 1 person before the camera
Remove accessories such as spectacles and headphones.
Step 2: After having the prerequisites as mentioned on the instruction page click on “Proceed”.
Step 3: The signer will need to allow access to their camera for capturing the short live video and show the OTP that is appearing on the screen.
Two ways to show OTP during liveliness:
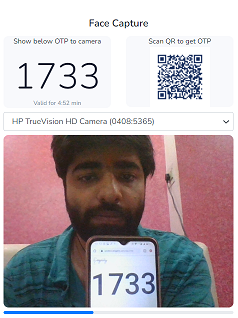

Note: The signer will not be allowed to sign the document until the system verifies the OTP appearing on the screen that is written on paper or shown on the phone.
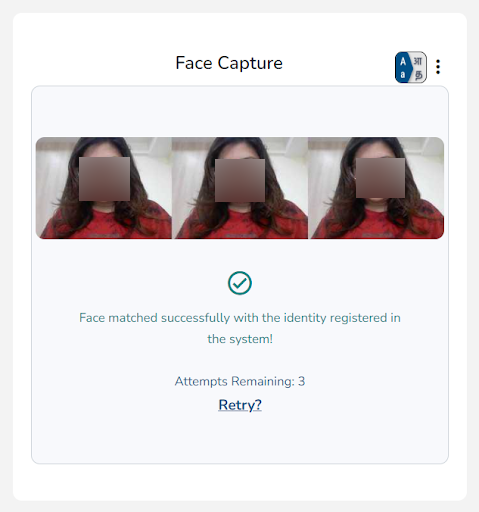
Capture Photo with Face Match
Activating Face Match
- You can set a threshold percentage for successful facial matching results. By default, this threshold will be set at 85%.
- Following are the two acceptance condition offerings:
- Reject if failed - The signing journey will be halted, and an error screen will be displayed if the Face Match process fails.
- Accept but respond with results - Allows the signer to continue with the signing journey despite a failed Face Match, but the failure result will be displayed to the client on the Details page of the dashboard.
Sending Journey
Step 2: When Face Match is enabled, the sender will have to upload an image for reference. This image will be of the signer but might contain identity documents like PAN Card, Aadhaar Card, Onboarding forms, etc. Senders should ideally mask/crop the document around the face and upload only facial data. Also, set the number of retry attempts for face capture by the signer.
Group Invitee
Running Workflow
Signing Journey
Step 1: During the signing journey, the below instructions will appear on the screen
Step 2: The signer needs to allow access to their camera and their photo will be captured
Related Articles
Security
The security tab allows you to configure certain safeguards for your signing invitations/documents. In case a security setting is turned on it will be enforced upon all the documents created via new document flow and Workflow creation. If the ...Two-factor Authentication (2FA) during signing
Description Two-factor Authentication (2FA) during signing is a security feature that ensures the authenticity of the signer of a document. 2FA mandatorily requires a sender to specify both the email address and the phone number of the signer. The ...Invitee level options
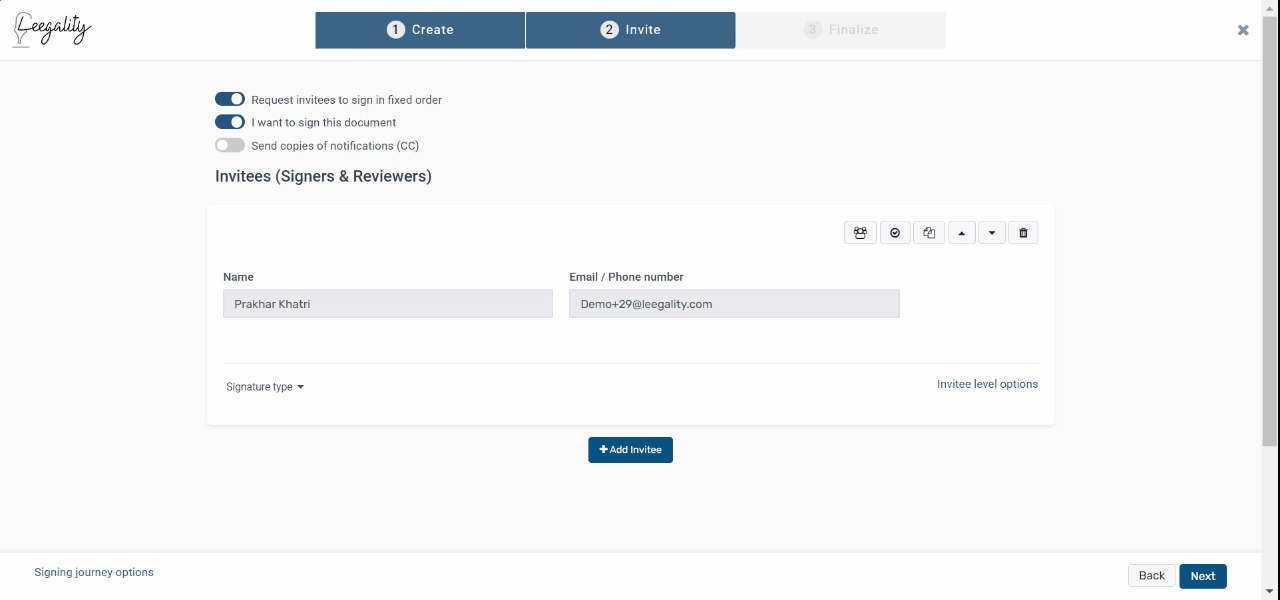
“Invitee level options” provide various options to further modify the signing journey for the particular invitee. By using “Invitee level options”, the sender of the document can set the retry attempts for Aadhaar signing, prioritize Aadhaar ...Smart User Liveliness
Smart User Liveliness ensures that the signatory is actively present during the eSigning process using AI-based facial recognition. It detects and rejects spoofing attempts such as photos and recorded videos. By analysing facial cues and other ...Reviewer Role
Description The reviewer role is a non-signing invitee type where the invitee either approves or rejects a document sent to them. The purpose of this invitee type is to allow the sender to ensure that there is a review of the document before the same ...