Cloud DSC
Cloud DSC is a way to apply IT Act-compliant digital signatures, without having to possess a physical token that is necessary for traditional DSC token-based signing. Users can simply complete a 100% online, one-time verification process, following which they can access their DSC from any computing device using signer ID, PIN and OTP.
The one-time account creation and verification process takes 30 minutes on average and can be completed using a PAN card (Reference Article) or an Aadhaar XML | Reference Article) .
The verification process is completed through a third party called an eSign Service Provider which is a registered certifying authority (Verasys) with the CCA (Controller of certifying authorities) which is an entity directly regulated by the Controller of Certifying Authorities.
Steps to activate Cloud DSC
Step 1: Click on the “Account” option then go into the ‘Department’ tab and then click on the ‘eSignature’.

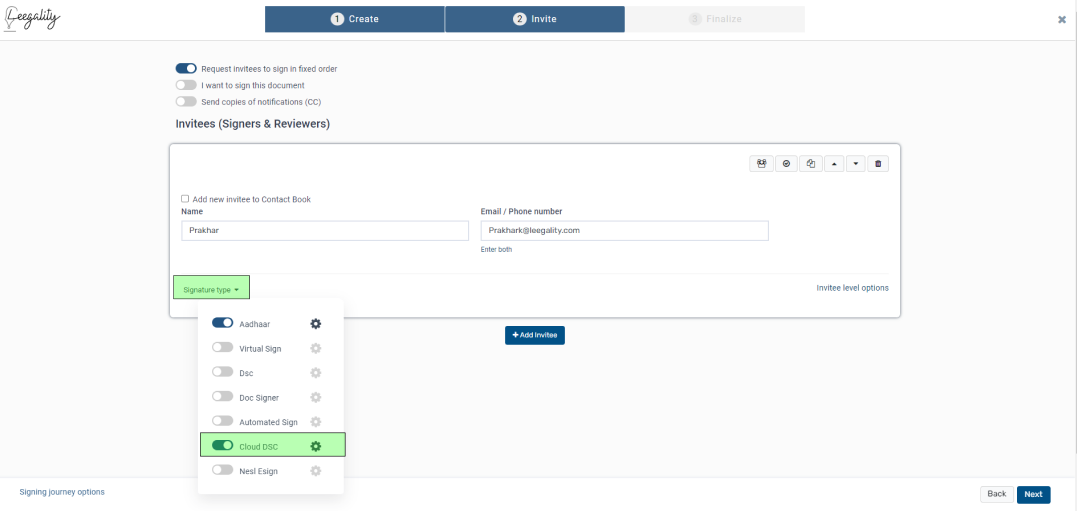
Step 2: Activate the Cloud DSC toggle

Note: Cloud DSC can be selected as the default eSign type by activating the Default toggle.
Step 3: Configure Cloud DSC verification settings.

Steps to configure Signer ID for your account
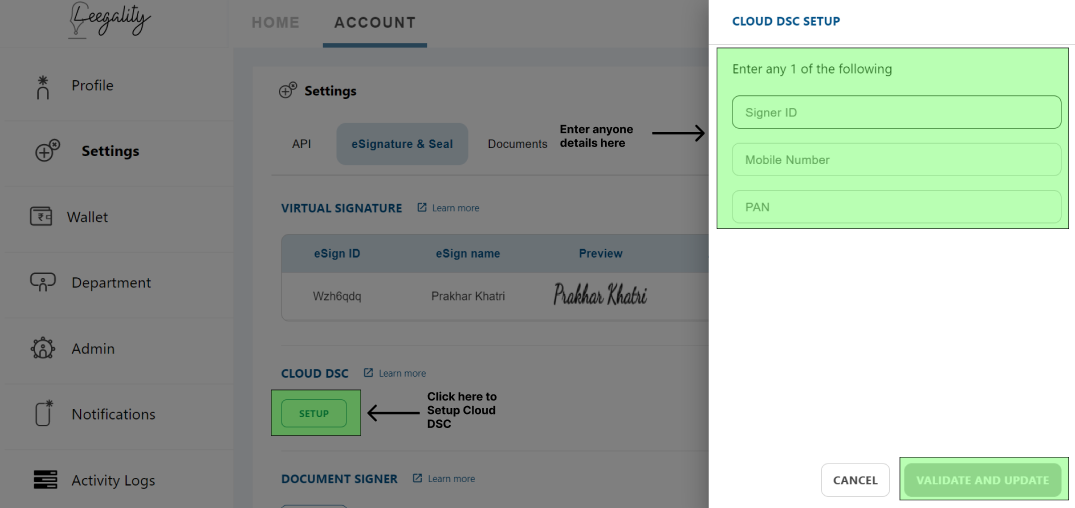
Step 1: Click on the “Account” option, go into the ‘Setting’ tab, and click on the ‘eSignature & Seal’.
Step 2: Click on “Setup” for Cloud DSC, a side window will appear for entering the SignerID.
Configuring a Cloud DSC Signature - New document Flow/Workflow
Step 2: In the “Cloud DSC Options” side menu, you can:-
1. Fix the SignerID of the invitee
This toggle allows the sender to fix the signer id for the invitee and they won't be able to enter a different signerID in the signing journey.
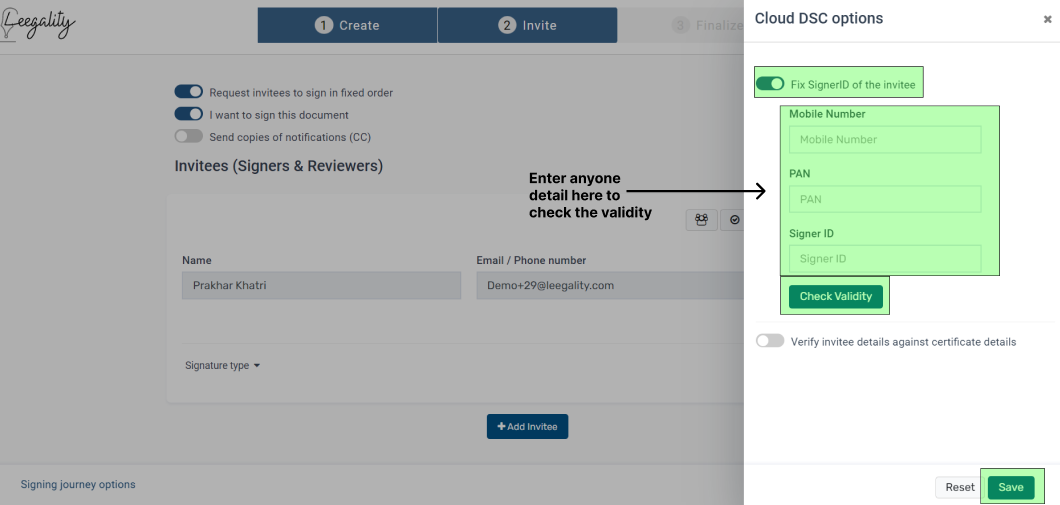
To fix the signerID of the invitee, enter the signer ID or enter the invitee's mobile number or PAN and click on “Check Validity” to get the Signer ID that is linked.
2. In case this toggle is turned off - the invitee will be asked to either:-
Create a new signer ID, and after that enter the signerID in the signing journey
Enter their existing signer ID
Use the signerID saved in the invitee’s account (if any)
3. Verify invitee details against certificate details
You can verify the digital signature used to sign the document against the input values specified by you. For Cloud DSC, you can verify the following parameters:
Verify Name: verifies the digital signature against the name of the Invitee;
Smart Name Verification: verifies the digital signature against the name of the Invitee with reference to an appropriate percentage threshold as set by you.
Invitee Pin Code: verifies the digital signature against the Pin Code of the Invitee
Invitee State: verifies the digital signature against the State of the Invitee
Invitee last 4 Aadhaar digits: verifies the digital signature against the last 4 digits of the Aadhaar of the Invitee (note that this works only if the signerID used by the invitee was created using Aadhaar XML)
Read more about Certificate verification here: Aadhaar certificate verification.

Sending a document via Workflow
Running a Workflow
Use this Guide to learn more about running a Workflow via the Leegality dashboard - Running a Workflow
In case “Configure Signer ID” is turned off the user can proceed to send the document.
In case” Configure Signer ID” is turned on:-
In the case of “Enable” - The user can either configure it or allow the invitee to enter/create and enter the signer ID in the signing journey
In the case of “Mandatory” - The user will have to configure a Signer ID mandatorily
In the case of “Fixed” - The user can proceed with sending the document.
In case Verify details with the Certificate Details has been turned on - The user will have to configure the required parameters for verification against the Cloud DSC.
Sending a document(s) using Excel upload
Use this Guide to learn more about Sending a document(s) using Excel Upload - Running a Workflow - Via Excel Upload
In case “Configure Signer ID” is turned off, no additional columns will be provided in the Leegality excel template
Enable - The user does not have to mandatorily fill in the extra columns:
If filled - Only Pan or mobile number fields are required to be filled and the signer ID will be fetched on the basis of this
If left empty - The invitee will be allowed to enter/create & enter a signer ID in the signing journey
Mandatory - The user will have to mandatorily input the ⅔ of the cloud DSC columns in order for the successful creation of the invite.
Fixed signer ID - The 3 additional columns will have to be left empty since the information has already been fixed in the workflow and any information filled here will be overwritten.
Custom Mapping
Use this Guide to learn more about Custom Mapping in the Leegality Dashboard - Custom mapping of workflow spreadsheet template
The 3 additional column headers can be mapped as normal in the Custom mapping module.
Signing Journey

In case the Signer ID has not been provided by the Sender
The signer is prompted to select one of the following:
Create new Signer ID - Here the user will proceed to an instructions page on how to create a Signer ID on Verasys:
Creating a signer ID using PAN - Reference Article
Creating a signer ID using Aadhaar - Reference Article
Once the user has successfully created their signer ID - they will come back to the signing journey and click on proceed and enter their newly created signer ID
Note 1: Successful creation of signerID means the approval of the account by the eSign Service Provider (Verasys) after video verification. On successful approval, the user will receive an email from Verasys, with login details for their Verasys SignerID account. If the user tries to use a signerID for which video verification is not complete, they will receive one of the following errors, depending on the stage of account creation:
“Please enter valid SignerID”
“Subscriber steps pending”
“CA Verification pending”
Note 2: The signer is advised not to close the signing journey tab for a seamless journey, and easy access to the Help resources on the page. However, even if the signer closes the signing journey page, they can re-open on the signing URL to complete the signing, once their SignerID is ready.2. Use an existing Signer ID - The user will be prompted to either
Enter the signer ID
OrFetch the signer ID using their PAN and Mobile Number (this option will work only if a PAN is linked to the SignerID. In cases where an account is created using Aadhaar XML, linking the PAN to that account is Optional. Users desiring to link their PAN to their Verasys account can do so here.
Note: In order to use a SignerID it must be a fully verified and active account. If you try to use a signerID for which video verification is not complete, you will receive one of the following errors, depending on the stage of account creation:
“Please enter valid SignerID”
“Subscriber steps pending”
“CA Verification pending”

In case a signer ID has been provided by the Sender
After the preview page, the signer will be led to the “Confirm Signer ID” and Name page

3. The signer will check the consent box and click on “Sign document”
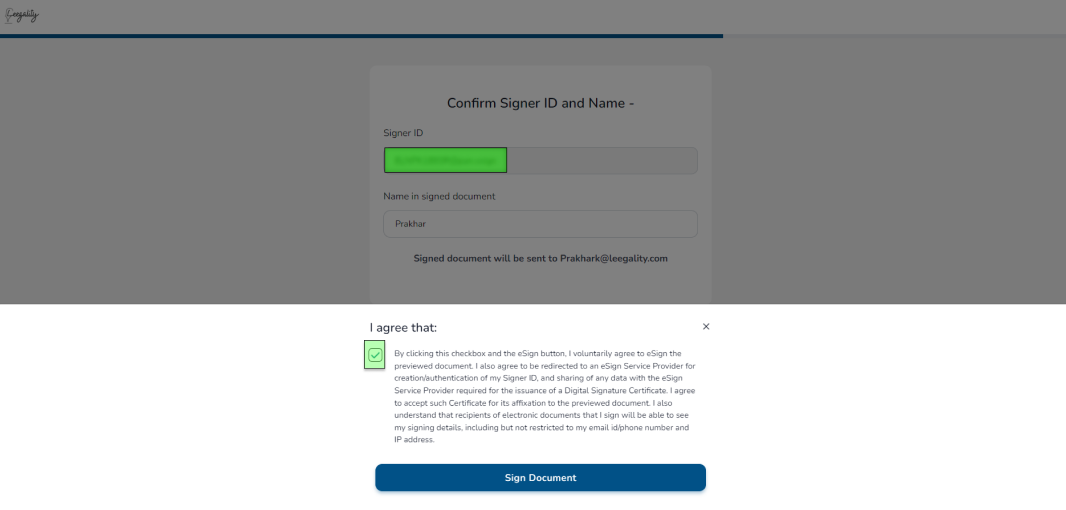
Check the consent box and click on “Generate OTP”.
OTP will be received on the registered mobile number.
Enter OTP & PIN, ( click here to reset your pin)
Click on “Sign Document” to sign the document.


Related Articles
Bulk Cloud DSC
The Bulk Cloud DSC feature helps signers to sign up to 5 documents using Leegality’s Cloud DSC at the same time. Steps for signing multiple documents using Cloud DSC: Step 1: Prerequisites to use Leegality’s Bulk Cloud DSC Sign feature can be ...DSC Token
A USB token-based DSC (containing the Digital Signature Certificate), can be used by you/counter party for eSigning. You can also use this to sign your documents in Bulk. DSC Esign Frequent Issues
Error during installation This error message appears while installing the Leegality DSC Utility - to prevent this error, install the application by running the setup as an administrator. Signing Journey Errors 1.) Leegality DSC Utility is not ...DSC Token - Signing Journey
Prerequisites for signing via Leegality using a DSC Token:- Leegality DSC Utility should be downloaded and running as administrator: Download link: ...Procedure for Bulk Sign using a DSC Token
Download Leegality’s DSC client utility from https://gitlab.leegality.com/leegality-public/dsc-utility. This is a prerequisite to use Leegality’s Bulk Sign feature. Open received folder Click on the Bulk sign button. Note: Only received documents ...