Leegality Getting Started Guide
This guide aims to familiarize you with Leegality’s document infrastructure platform and the capabilities available to you as a user.
Leegality is a unified e-Signature, Digital Stamping, and Document Workflow platform tailor-made for the unique needs of Indian businesses. It's the fastest and easiest way for you to close out important paperwork with your end customers, agents, business partners, investors, and your authorized signatories - in a fully digital, secure, and compliant way. No paper, No paperwork!
Sign-up/Login and add a billing profile in Leegality
You can use the link- https://app1.leegality.com/login?signup=true to log in/sign-up for Leegality.
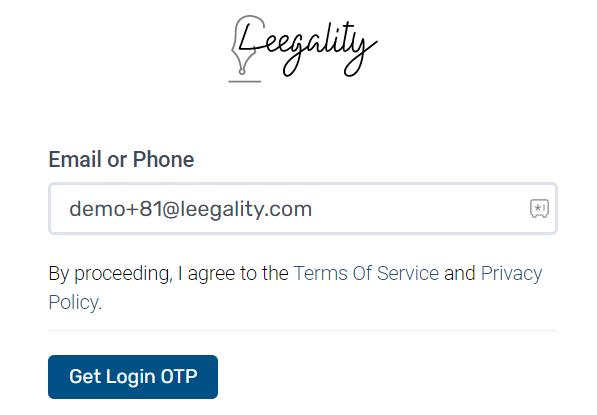
Step 1: Enter your email ID/phone number and click on “Get Login OTP”.
Step 2: Enter the OTP that is received in the email/SMS, then enter the name and click on “Sign Up”.
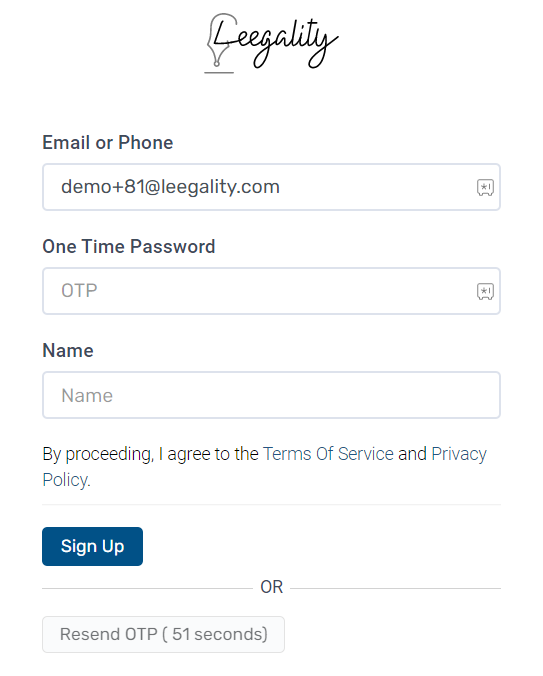


Note: New password can not have 3 or more consecutive characters.
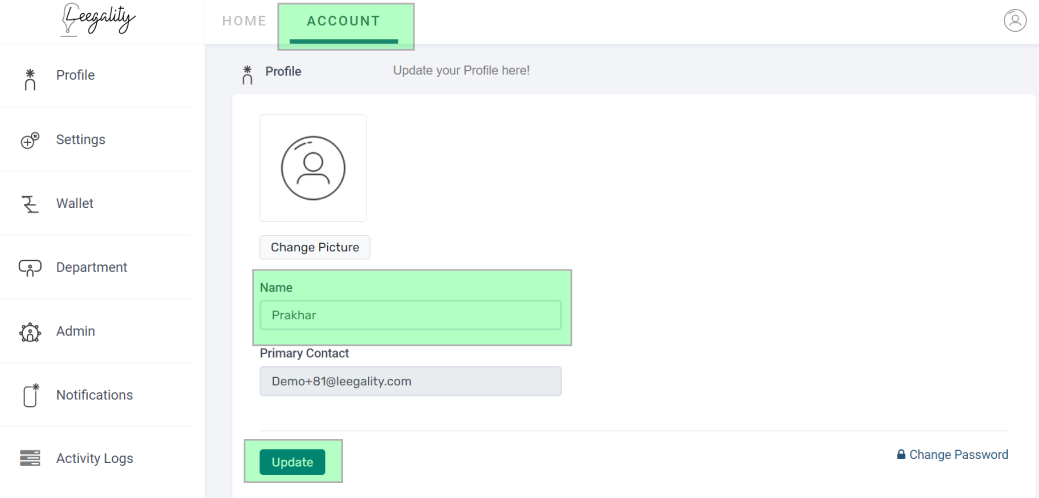
Go to the “Account” option, and set the account name as required.

Leegality Home Page
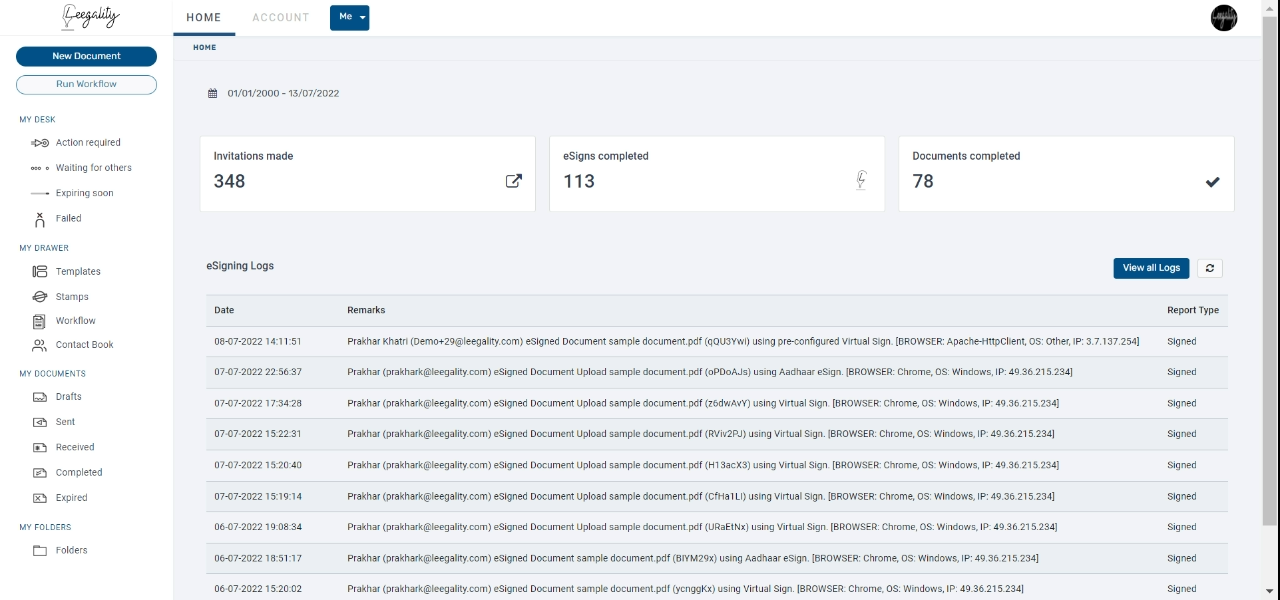
Navigation
Action buttons
New Document Button: This option will help to send the document for signing/reviewing.
Run Workflow button: This option will lead you to an existing workflow. The workflow is a preconfigured document flow used for sending documents in bulk, for API integrations, and defining the process of sending & signing all documents for that use case.
Account Summary
My Desk
Action Required: This tab contains documents that require your attention. This includes all received documents which need to be signed by you, and all documents pending as drafts.
Waiting for Others: This tab contains documents sent out by you but not signed by the invitees.
Expiring Soon: This tab contains documents that are expiring within 5 days.
Failed: This tab contains documents for which esign has failed. eSign failure can occur on account of four reasons:
Where the invitation to sign has expired without the document having been signed by all parties
Where the document cannot be eSigned due to downtime in the Certifying Authority (NSDL/Verasys/E-mudhra) or UIDAI servers.
Verification failure in documents where verification has been activated (link), before accepting the party’s signature.
When it's a group invite and the minimum required threshold has been completed, the other unsigned signatories would be shown here.
My Drawer
Templates: The templates tab consists of the list of templates in your account and allows you to view &edit existing templates, and create new ones here based on your use case. These templates can be used in the sending journey of a new document and the creation of a workflow
Stamps: The stamp tabs let you view the stamp inventory, create a new stamp, and create & manage stamp groups.
Workflow: The workflow tablets you an existing workflow or creates a new workflow from here. The workflow is a preconfigured document flow used for sending documents in bulk, for API integrations, and defining the process of sending & signing all documents for that use case.
My Documents
Draft: This tab contains all the documents that are created but not sent out for execution
Sent: This tab contains all the documents for which invitations to ‘eSign’ have been sent, but not executed completely.
Received: This tab contains all the documents for which invitations to ‘eSign’ have been received by you but not signed by you yet.
Completed: This tab contains all the documents that are signed by all the invitees.
Expired: This tab contains all the documents for which invitations to ‘eSign’ have expired. Expired documents can be reactivated.
My Folders
Folders: This tab helps in organizing the documents by creating different folders.
Buying eSign credits
In order to send out documents our for execution you need to first purchase eSign credits from the dashboard
Go to “Wallet” to create the billing profile that is required for purchasing Esigns/Estamps.
Billing profile details will be reflected in the invoices.

Under the “Add Profile” side menu, enter the billing details as required on the invoice and click “Save”.
Name
Company Name
Billing address
City
State
Pincode
Country
GST (optional)
PAN (optional)

Purchase
Once the billing profile is created, purchase Esign credits by entering the quantity of Esign credits required.

Note:
1. Minimum 500 INR invoice amount is required for Esigns only.
2. Minimum of 30 stamps need to be added for each stamp series.
Note: ESigns will expire in 365 days from the purchase date. Stamps will expire as per the timeline prescribed by law.
Once payment is completed, Esign credits will be added to the account.
The invoice can be viewed in the “Invoice” tab and the quantity of Esign credits and stamps purchased can be viewed in “purchase history” in the “Wallet” tab.
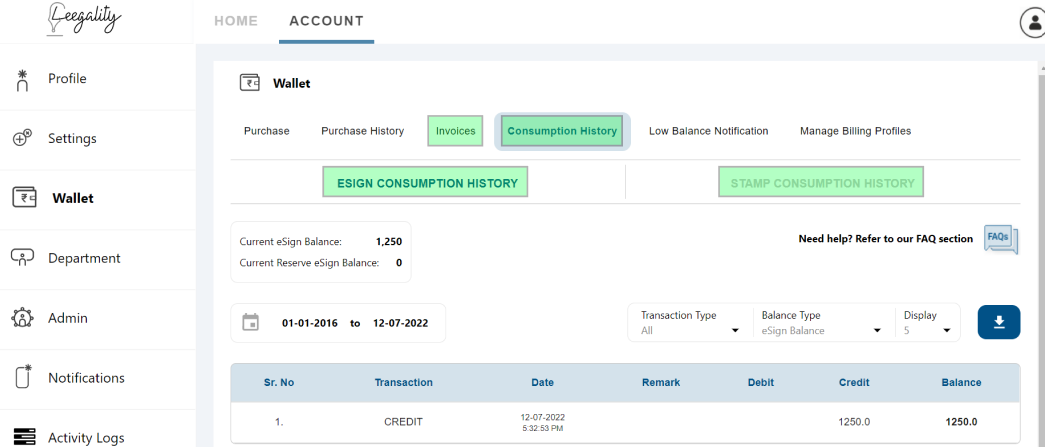
Check for “Invoices” & “Consumption history of Esign & Stamps” here
Sending a document for execution
- New Document Flow
- Workflow
New Document Flow

The “new document” button leads to configuring the document.
Leegality Create Page: Upload document/Choose template
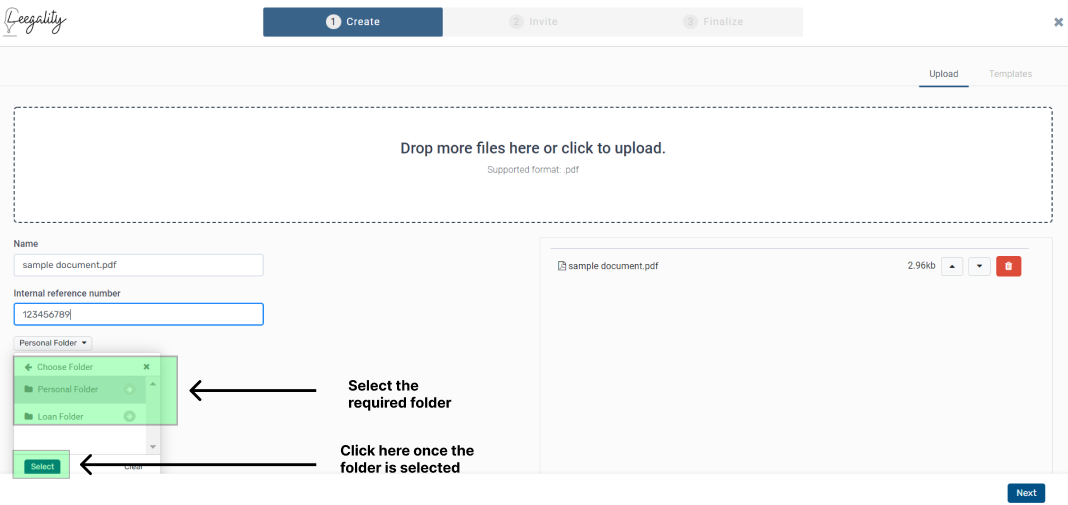
Upload the PDF file that has to be signed or choose a template from the list of templates that is available on the dashboard.
Document name can be changed and additionally, Internal Reference Number can be entered for easy accessibility.

Upload the document from the PC

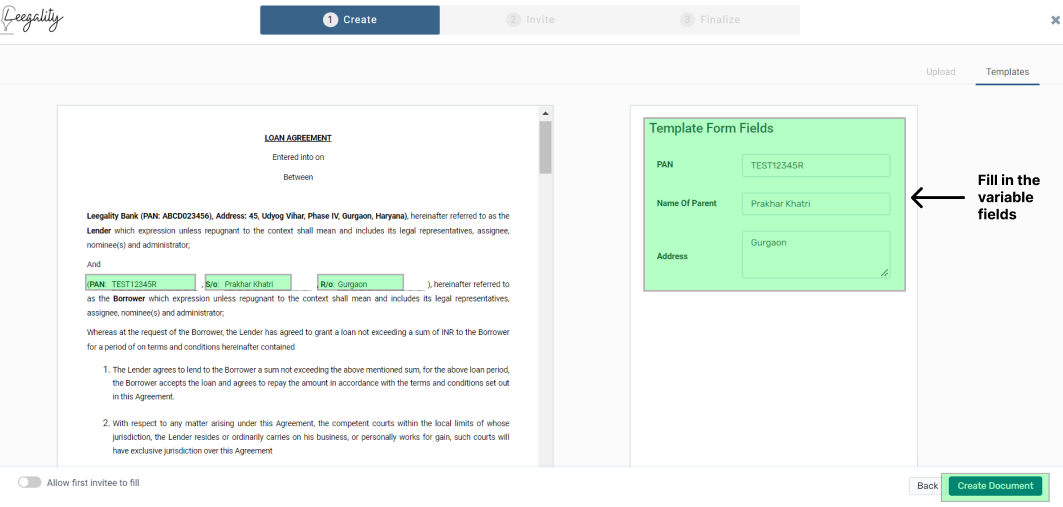
Choose the template from the list

Choose folder
The option “Choose Folder” will help in choosing the pre-existing folder in which the document that is being initiated will be saved.
Stamps
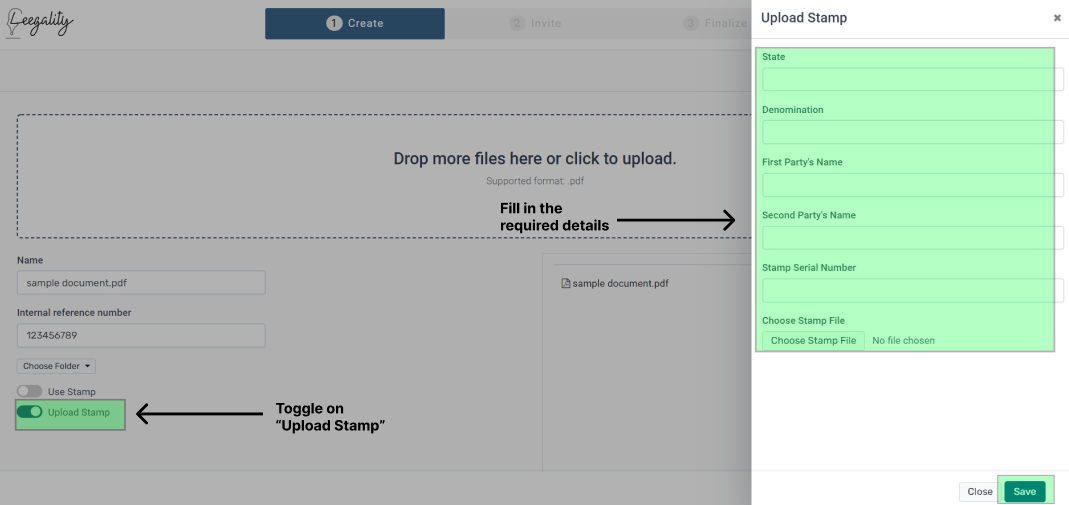
Either you can upload your own stamp paper by filling in the details as required or affix the stamp paper to the document by selecting the relevant stamp series from the stamp inventory.
Upload Stamp
Toggle on “Upload stamp” to upload your own stamp by filling in the required details.
Use Stamp
Toggle on “Use Stamp” which will automatically toggle on “Use Stamp Series” using which select the relevant stamp series from the drop-down.

Note: If the template option is selected, fill in variable fields in the template selected.
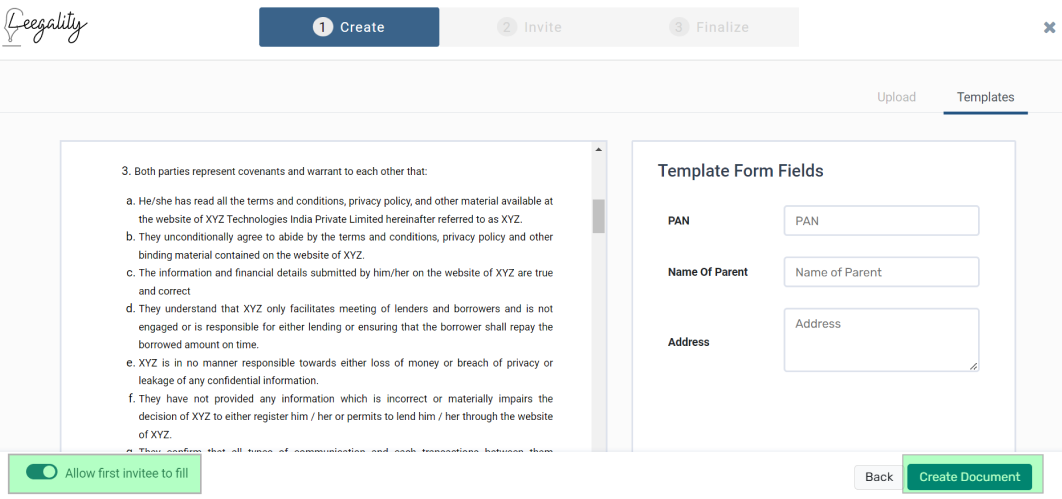
Leegality Invite Page
For each invitee, different types of Esign can be enabled as required. For each Esign type, different configurations can be set.

The invitation can be cc'ed by using the CC feature which will add contacts to the document journey who may or may not be signers/reviewers in the document but who need to receive updates (as configured by the sender) in order to remain privy to the progress of the document through its various stages.
To review the document before signing, the reviewer has to review the document. Once the document has been approved by the reviewer, the document will be sent to the signer, if rejected, the document will not be sent to the invitee for signing.
Group Invitee allows the sender to send signing invites to a group of authorized signatories.
Using this feature, any one or all signers in one group can sign the document, thus, reducing the dependency on a single signer.
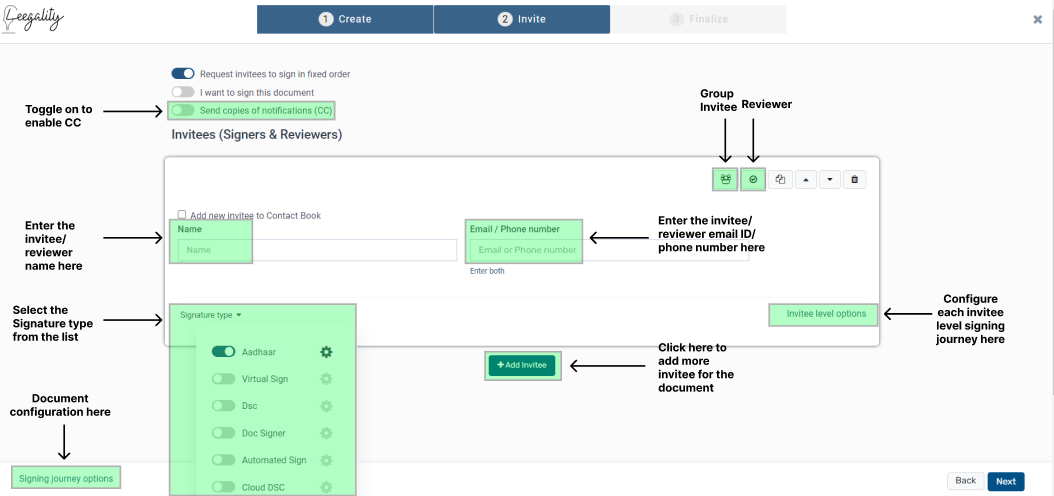
“Signing journey options” provide various options to further modify the signing journey for all the invitees.
By using “Signing journey options”, the sender of the document can set the expiry of the document, send a custom message with an invitation, enclose an attachment with the document being sent and enable auto-purge of the documents.
“Invitee level options” provide various options to further modify the signing journey for the particular invitee.
By using “Invitee level options”, the sender of the document can set the retry attempts for Aadhaar signing, restricting the signer from editing the name while signing, not showing the invitee's name in the signature, getting organizational or custom seal in the signature, and mandate the signer to upload the document while signing the document.
Leegality Finalize Page
Once the document is created and invitees are configured, the signature coordinates have to be set where the signature will reflect once the document is signed.
Once the required coordinates have been set, click on “Next” to send the document for signing.
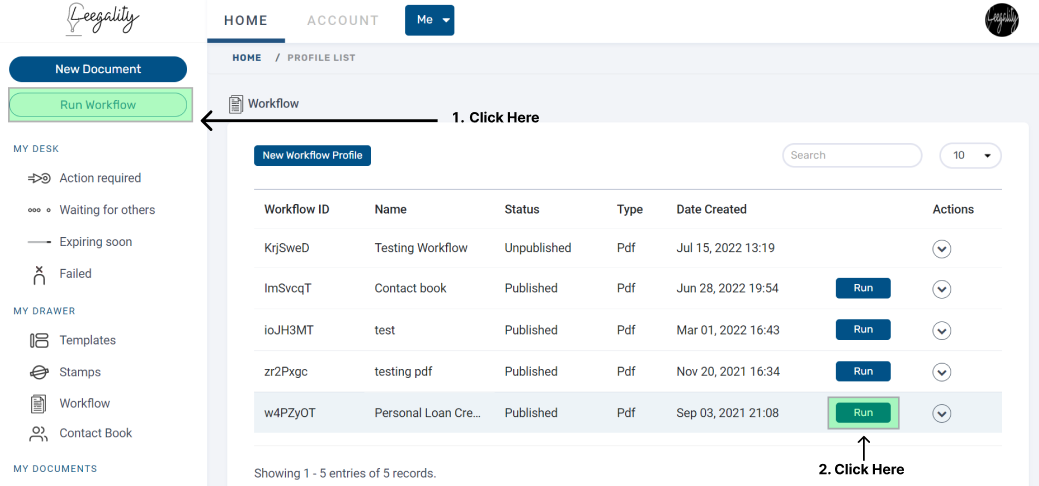
Workflow
This option allows you to configure an existing workflow or create a new workflow from here. The workflow is a preconfigured document flow used for sending documents in bulk, for API integrations, and defining the process of sending & signing all documents for that use case.
Create a workflow with the required configuration and to run the published workflow, you can choose any of the two methods available:
Signing Journey
The signing process is helpful in understanding the end result of the configurations done by the sender.
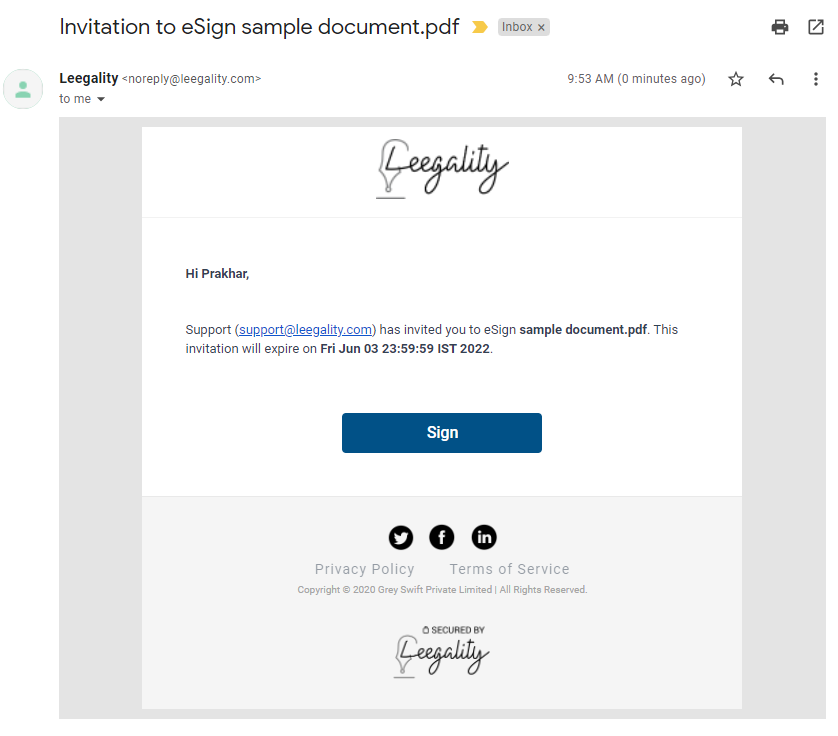
Once the sender sends the document, an email/SMS is delivered to the invitee with the subject line Invitation to esign “Document Name”
The invitee clicks on the “Sign” button to sign the document.
The signer can view other invitees and can also download the document to save it offline.
The signer reads the document and clicks on “Proceed” to sign the document.
Note: Invitee can reject the document if Invitee rejection is configured while sending the document.
The signer proceeds with the eSign type offered by the sender. In case of an option is provided, the signer may choose a convenient method of signing.
Once the document is signed by all invitees, an email/SMS will be triggered to each signatory with the signed document and the audit trail.

Reviewer Journey
In case the invitee is the reviewer of the document, an email/SMS is delivered to the reviewer with the subject line Invitation to review “Document Name”
The reviewer clicks on the “Review” button to review the document.

The reviewer's journey for both approving or rejecting the document can be viewed here.
Bulk Signing Journey
Leegality allows signing multiple documents at once that are in the received folder. Cloud DSC and DSC token Esign types support bulk signing.
Personalize your Account
Profile: This option helps in changing the account name and password.
Setting: This option helps in getting the API details, document setting, and configuring esignature and seals.
Wallet: This option helps in purchasing, viewing invoices, purchase history, setting up a low balance notification, and managing the billing profile.
Department: This option helps in branding, security setting, Invitee and document configuration, and Esign and stamp settings.
Admin: This option helps in managing users.
Notification: This option helps in managing user and organization-level notifications.
Activity Logs: This option helps in viewing all the activity logs of the account.
Related Articles
Leegality Payment Collect
Introduction Leegality Payment Collect is a feature that will allow Leegality clients to collect payments within the signing journey from their signers. This happens through a payment gateway (currently only Razorpay is supported) which needs to be ...Leegality Home
Before you proceed with this Knowledge Base, an important point to note – several of the processes and steps here can be fully automated and integrated within your own application through our APIs (docs.leegality.com). Therefore, if you are ...Extending the Use-by date of stamp papers in the Leegality dashboard
Stamp papers procured via Leegality have a default use-by date of 6 months from the date of purchase, after which the stamp papers are removed from the circulation of usable papers and move into the expired section. Note: This is not a regulatory ...NeSL eSign
How to activate Account settings >> Department >> eSignature To activate NeSL eSign, “NeSL eSign” needs to be enabled. NeSL eSign can be made the Default signature type using the Default toggle. NeSL eSign settings can be configured by clicking on ...DSC Esign Frequent Issues
Error during installation This error message appears while installing the Leegality DSC Utility - to prevent this error, install the application by running the setup as an administrator. Signing Journey Errors 1.) Leegality DSC Utility is not ...